Tech rescue transition techniques that will help your firefighters operate more safely and effectively
In recent years, elevated victim rescue with rope systems has had many advances for the urban environment. New equipment makes patient packaging, rappelling, changing from a lower to haul system, and creating a high anchor on a top of a structure easier. Although the advancements have made rescue easier and safer, the cost of this modern equipment may prevent certain rescue companies on a reduced budget from obtaining them.
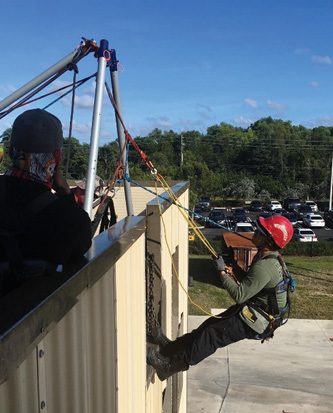
Artificial high anchors, like a tripod or some of the newer devices, allow rescuers to load their ropes before they transition over the edge of the building or a flat structure. After the rescue, the elevated high anchor allows you to bring your rescuer or victim up the building face and onto the roof before the rope system becomes slack. Any slack in a rope system creates an opportunity for the rescuer to fall if he loses his grip during the transition.
Piggyback Progress Capture Setup
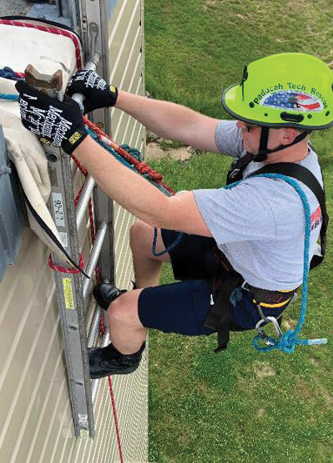
The transition from the building’s face to the roof is usually a two- to five-foot distance in which the weight of the rescuer transfers from the weighted rope onto the roof or horizontal surface. One system to keep tension on the rescuer during the transition is a simple 2:1 piggyback progress capture setup. “Piggyback” means that you place one independent system on top of an existing rope system (photo 1).
MORE JEREMY RIFFLARD
- Finding Last-Chance Anchors Inside Structures
- Prebuild Wood Shores for Efficiency
- Using Pickets as Stable Anchors
The progress capture components can include a hard cam rope grab or a soft Prusik rope grab, a carabiner, and a 15-foot length of webbing that is run through the D ring of the rescuer’s harness. You will need all these components to piggyback onto your tensioned rope system (photo 2).
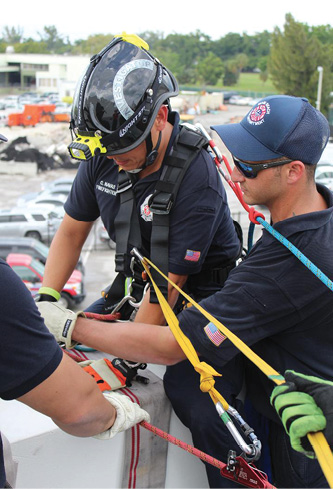
(1) Rescuers use a simple progress capture for the roof transition. (Photos by author.)
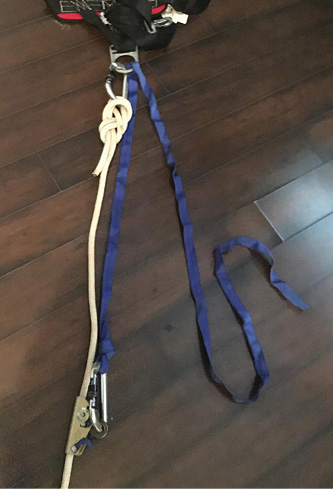
(2) The progress capture components can include a hard cam rope grab or a soft Prusik rope grab, a carabiner, and a 15-foot length of webbing that is run through the D ring of the rescuer’s harness.
Before you begin, remember that when your rescuer is transitioning, he should have an attached main and belay rope system that should not be removed until he has fully transitioned onto the roof.
A Simple System
For the simple system, attach the hard cam or Prusik’s rope grab onto the main roof rope system about two to three feet away from the rescuer. It is vital that you test the rope grab to ensure that it will hold in the direction in which you intend. It should grab when pulled in the direction away from the anchor or toward the rescuer. Tie a loop in one end of the webbing and use a carabiner to attach that loop to the rope grab.
Pass the other end of the webbing through a D ring on the front of the rescuer’s harness, then bring the webbing end away from the rescuer. This end of the webbing will be the progress capture as the rescuer climbs over the wall. Tension the web as the rescuer climbs. This will act as a 2:1 mechanical advantage and prevent a backward fall if the rescuer’s grip fails. This technique can be used to lower the rescuer from the roof edge and onto the face of the building. To lower the rescuer, slowly release tension on the web to lower the rescuer. When the rescuer is loaded on the lowering ropes, drop your end of the web and pull it through the D ring (photos 3-4).
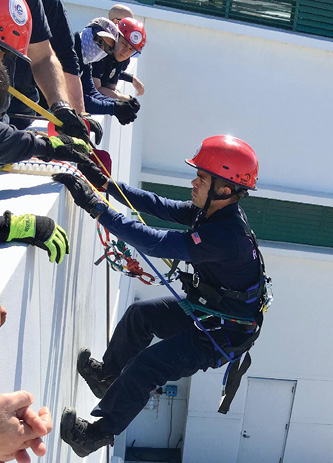
(3) The yellow webbing runs through the front D ring of the rescuer’s harness.
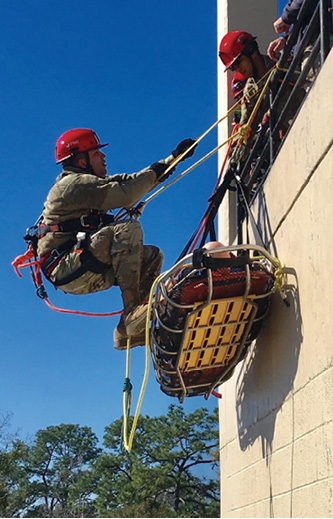
(4) The military rescuer is lowered onto the Stokes basket highway with the webbing.
If you have concerns that the webbing will be minded by a rescuer on the roof and it does not have a mechanical progress capture during your transition, then you can replace the webbing with a 15- to 20-foot length of rescue rope. One end of rope receives an end knot, such as a figure 8 on a bight, and the knot is carabinered to the rope grab. Pass the other end of the rope through the rescuer’s harness D ring and back toward the rope grab. Attach a Prusik cord onto the moving end of the rope and attach the Prusik into the carabiner that you placed on the rope grab. As the rescuer transitions and the rope becomes slack, one person on the roof will tension the rope through the Prusik cord.
Roof Ladder
Another technique to transition the edge is to use a roof ladder. Some teams use a modified seven-foot-long ladder that fits into an elevator. The ladder can be placed over the side of the building with a rope around the third rung down. Think of a fire school ladder raise with a rope. Place the rope loop under the third rung then over the top beams until the rope and loop are snug. The suspended ladder still has some sway. This may be more than you need to transition one person but it is a great tool to bring a rescuer and victim over the roof edge during a pickoff rescue (photos 5-8).

(5)
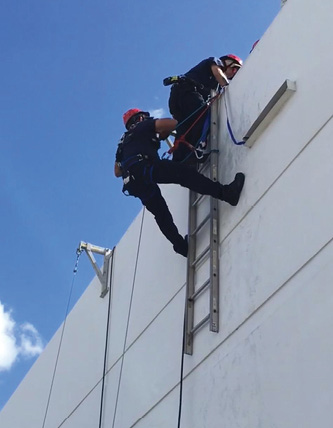
(5-7) The rescuer and victim can climb the ladder to transition from the roof to the wall or the wall to the roof.
(6)
(7)
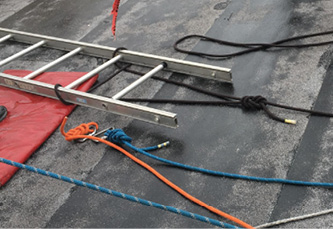
(8) The rope will support the ladder for a transition on or off the roof.
The loop in the rope is under the second or third rung of the ladder, then tied off to a secure roof anchor. The rescuer and worker will independently climb the ladder to transition over the wall and onto the roof. To keep the top of the ladder tight to the wall, use a webbing or Prusik to tension the top onto the ladder’s designated rope.
One pitfall in either of these operations is the overzealous team member who wants to aggressively haul the rescuer onto the roof. Injury can occur if the rescuer is pulled into the building or dragged on the roof. The rescuer should be allowed to climb at his own pace with this system to capture the progress.
High Anchor Advantages
Several high anchor products are available on the market. For a lowering operation, the high anchor allows the rescuer to be above the roof on a loaded rope system during the transition over the wall; this eliminates fall factor. During a raising operation, attach a device similar to a micro pulley 4:1 onto the rope as the rescuer approaches the roof. Pass one end to the rescuer that he will carabiner to his harness. The rescuer can haul himself to transition from the wall to the roof (photo 9).
A small-diameter micro 4:1 system is a great tool to use instead of the webbing technique. To set up this progress capture, attach the 8mm 4:1 on a tripod or similar device. Carabiner the other end of the 4:1 to the front of the rescuer’s harness. The rescuer or roof team can operate the 4:1 haul system to capture progress as the rescuer transitions onto the roof (photo 10).

(9-10) The micro 4:1 system attached to the main line through a high anchor allows the rescuer to haul himself onto the roof.
(10)
Practice Is Still Essential
Regardless of technological advances in rope rescue equipment, it does not replace training and repetition. Rope rescue skills are easily perishable. Practice tying knots and hitches. Build haul systems until you do not build them wrong. Practice operating systems that transfer between lowering and hauling under load. Get with an experienced instructor and practice scenarios. Get your skills up to the level that your team and your community hope that you have. Become the responder others look to when the rescues are complex. Knowing these transition techniques will allow your team to operate safer and more effectively.
JEREMY RIFFLARD is a rope rescue instructor and presented on swing-stage suspended scaffold rescue at FDIC International 2019. He is the lead instructor for the scaffold rescue program and the structural collapse program at the Coral Springs (FL) Regional Institute of Public Safety. Rifflard is also a subject matter expert with L2 Defense for first responders and military urban search and rescue exercises. He is a retired captain with the Fort Lauderdale (FL) Fire Department and rescue team manager for the FEMA Urban Search and Rescue Team FL TF-2.

