Vehicle Extrication
RESCUE
A common-sense approach to a complex problem. Part two of a series.
In the first article of this series [Fire Engineering, November 1988), four of the eleven steps to a successful vehicle extrication operation-preparation, response, assessment, and hazard control—were discussed and explained. Once these tour steps are completed, you are ready to begin actual work on the vehicle that is entrapping the victims.
STABILIZATION
To withstand the rigors of extricating crash victims, the vehicle being worked on must be stable. For the sake of the victims especially, movement of the vehicle must be kept to a minimum. Just the slightest movement of a victim with a cervical fracture could cause paralysis or death. If a vehicle moves suddenly or rocks violently, simple injuries could become traumatic.
Stabilizing a wrecked vehicle can be as simple as placing a few cribbing blocks—the most common stabilization tool —or as complex as using tow truck cables or a rigging crane. It all depends on terrain and the shape, size, and position of the vehicle.
A vehicle on all four wheels is not stable. It is capable of rolling backward or forward, and will bounce up and down on tires, shock absorbers, and springs. At least two tires should be blocked to prevent rolling, and cribbing stacks should be built up to the frame in at least tw o places to prevent bouncing. Ideally, all tour comers of the vehicle should be cribbed.
Two-by-four-, four-by-four-, and twoby-six-inch wooden cribbing blocks work well, along with wedges made from each size. Each piece of cribbing should be marked with the department’s identification of color, and each should have rope handles for carrying and handling purposes.
To build cribbing stacks, a crisscross or “log cabin” format should be used. Lay two pieces down, then lay two more pieces on top of the first two, running the opposite direction and near the ends of the first two. A third row will run in the same direciton as the first row; the fourth will run the same direction as the second row, and so on. The stack is put in firm contact with frame of the vehicle by the use of the wedges. Wedges should be driven in snuggly, but not driven to the point where they begin to lift the vehicle.
A vehicle on its roof must be stabilized to prevent it from rocking back and forth, to prevent further roof-post collapse, and to prevent it from sliding or rotating on its roof. Cribbing stacks must be built up to strong points on the hood and trunk area, and w edges should be placed under the roof from both sides of the vehicle.
It is a challenge to stabilize a vehicle that’s lying on its side. Cribbing must first be placed on the undercarriage side, either to the frame or w heel rims; under the wheels is preferable because some cars have no frame, and wheels offer a wider area for cribbing contact. It may be necessary to gently rock the vehicle toward the roof side to permit cribbing placement under the wheels. Be sure that the cribbing is under the metal rim and not just the tire. If blocks are under the rubber, the car will still be able to shift and move.

Photo by Byron Rhodes.
Next, the roof side is cribbed to the strong points—the posts—on the roof. For the sake of standardization, posts are referred to by letters. The front post on any vehicle is the “A” post. The next post toward the rear of the vehicle is the “B” post, and so on. Some vehicles will have only an “A” and a “B” post, but some, like buses, may have twelve or even thirteen posts.
Cribbing stacks must be built up to the “A” post and at least one other, preferably the one nearest the rear.
Once cribbing is in place on both sides of the vehicle, it should be stable. If you are not completely comfortable with it, additional cribbing may be added to any other strong points on the vehicle.
If no cribbing is available, you must improvise. Tying the vehicle off with rope or cable is one way. Tie to the undercarriage of the vehicle, bring rope over the car, and anchor to a strong and stable object. Tie a second line on the roof post of the car, again bringing that rope over the side of the car, and anchor it to a stationary object on the undercarriage side.
Bumper or hydraulic jacks are good tools for stabilization. For a car on its wheels or roof, jacks can be placed snuggly against any strong point to minimize rocking. For a car on its side, two jacks on the undercarriage side and one on the roof side will make the car fairly stable.
A few years ago, every car had the tools on board necessary to stabilize it: a bumper jack and a spare tire. The tire was placed under the roof of a car on its side and the jack placed into the frame on the undercarriage side. By jacking the car until it tightened down against the spare wheel, the car was held fairly stable. Nowadays, with so many different types of jacks and the “mini” spare tires, this is not usually an option open to you.
Air bags should not be used for stabilization. The vehicle is still capable of bouncing or rolling if “cribbed” with air bags.
Tow trucks can be helpful in stabilization, but only if the operator is familiar with what you need to accomplish. One method is to back the wrecker against one side of the car, then attach the cable to the other side of the car and wench it tight. Two problems are created by this practice: The truck and cable are now in your way, and if the vehicle being worked on ignites, the wrecker will become an exposure.
For work on trucks and buses, large tow trucks or cranes may be needed to ensure that the vehicle stays in place and does not roll over. The cables needed and the connection options will depend on terrain and vehicle position.
PRIMARY ACCESS
The primary access provides a pathway to get medical atention to the crash victims. By creating openings through doors or windows, medical personnel are able to perform patient assessment, provide basic life support, and control serious bleeding.


These photos and those that follow by Waiter Alrutz, Jr.

RESCUE
VEHICLE EXTRICATION
Most of the time, primary access is as simple as opening a door or reaching through an open or broken window. Often, even after a severe crash, at least one door will open. Try all doors first. It could be a little embarrassing if, while you’re attempting to pry open a door, another emergency responder opens a door on the other side of the car!
If no doors open readily, do not waste time trying to force them open. This is a secondary access maneuver, and takes too long for primary access (the object of which is life safety of the victims). Go through the windows!
If you have to, break some glass to gain access. Try to choose side glass away from all victims. Cover the window with masking tape, duct tape, or contact paper. Break the window with a sharp blow in a lower corner (a springloaded center punch is ideal for breaking safety glass). Then cut around the edge of the window, cutting the tape and separating the glass from the window frame. Gently pull the tape and glass away from the vehicle as you are making your cut. Most of the glass will adhere to the tape, minimizing the amount that may fall into the vehicle.
Rear glass also can serve as an access route but should be a second choice to side glass because it is more difficult to control the amount of glass fragments. Most rear glass is mounted on a slant, and some is curved, making the tape method less effective. Also, the area to cover with tape is large, making it less time-efficient.
The rear hatch on hatchback-style cars can be a quick primary access route. If it is locked, you can open it quickly. First, remove the locking tumblers. A dent puller (also called a slamhammer) can be inserted into the keyway to pull the tumblers from the car; or you can hit the tumbler with a hammer, driving it into the car; or you can cut around the tumbler and remove it altogether. Once the tumbler is out of the way, look into the hole and you should see a rectangular slot in the locking mechanism. Insert a screwdriver or an oil dipstick into this slot and turn it, usually clockwise. The hatch should now open as if a key had been used. An oil dipstick may be more effective than a screwdriver for this procedure, depending on the distance that the slot may be from the outer deck of the hatch or trunk.
RESCUE
VEHICLE EXTRICATION
If a window is the only primary access route and there are multiple victims, it will be difficult for medical personnel to reach, evaluate, and care for all passengers. An effective means of overcoming this difficulty is to have a medical technician lie face down on a long spine board and lift the board up to the access window. By sliding and maneuvering on the board, the medic can reach more victims, and even perform life-saving first aid as needed.
Once primary access is achieved and victims are being cared for, the emergency is essentially over. Unless a vietim’s life is threatened, there is no real rush to get them out of the vehicle. This is not to suggest that everyone take a coffee break, but rather that personnel slow down, look the situation over, and decide the best way to perform the extrication and send the victims, properly stabilized, on their way to the hospital.
SECONDARY ACCESS
Secondary access is the process in which openings are created to remove the casualties or provide more working room for the next phase of disentanglement.
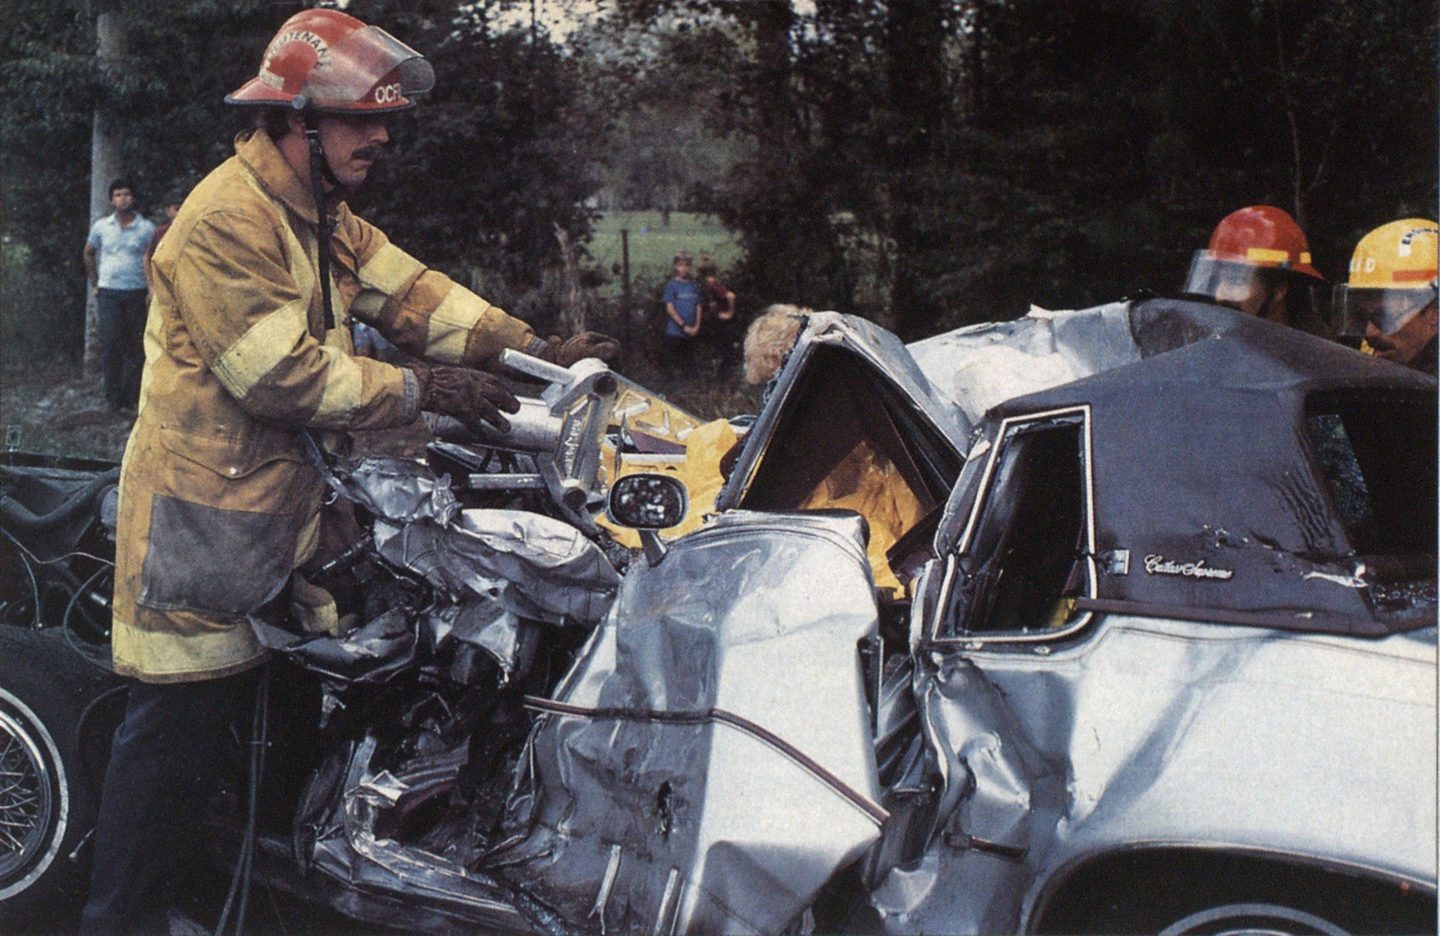
The most often-needed secondary access procedure is to open or remove the door(s). Opening a jammed door is best accomplished by hydraulic power tools. Doors can be opened with hand-operated hydraulic tools or even pry bars, but it takes much more time and physical effort.
Whichever method is used, you must attack either the hinges or the dead bolt (often refered to as the “Nader pin”). It is impractical and often impossible to get to and cut the dead bolt. Many larger vehicles employ a striker-type asembly instead of a dead bolt. These doors are much easier to pry open.
It is often necessary to open a door further than it was designed to open, or remove it completely, so as to facilitate disentanglement or removal of the victim. This can be accomplished in several ways.
Probably the fastest way to remove a door is to insert a power spreader into the hinges and break the door from the vehicle. The hinges can also be dismantled with hand tools, or the center pin knocked out by using a punch and a hammer, or unbolt the entire hinge assembly.
The door opening can be widened without removing the door completely. Physically forcing a door by pushing on it with your body causes too much rocking motion on the vehicle. This action should be avoided. Instead, set a hydraulic spreader, come-a-long. or air bag(s) into place for an across-the-hood pull.
For such a pull, locate a strong point on the underside of the vehicle. (On front-wheel-drive cars, this can be difficult.) “A” frames and axles provide good strong points. Sometimes engine or transmission mounts can be used, but their strength is questionable. Never use the bumper as a strong point, and never hook up to another vehicle or stationary object. All you will accomplish is to pull the vehicle that you are working on toward the stationary object. Connections must be made to the vehicle being worked on.

RESCUE
VEHICLE EXTRICATION
Once a strong point has been located, place the tool being used on the hood of the vehicle and connect it to the strong point with a chain. Connect a second chain vertically around the door, then operate the tool to force the door open wider. If air bags are used, a continuous strap must be positioned around the door and across the bags, and attached to the strong point. (Do not use a chain, since it could slip off the bag.) Inflating the bags will then accomplish the pull.
Whichever tool you use, a certain amount of hood collapse is to be expected. However, collapse can be minimized by placing cribbing blocks under the tool or bags and at the point where the chain or strap bends around the bumper and grill of the car.
Remember to stay clear of impactabsorbing bumpers when operating the tools. The pull may cause the cylinders to compress, and they may release at any time with sudden, bone-crushing force.
The across-the-hood pull is also used for steering columns, foot pedals, seats, and dashboards. These will be discussed at length in the next step, disentanglement.
The next avenue of secondary access is front and rear glass. Rear glass is usually safety glass and will shatter easily. Front windshields are laminated glass—constructed of two layers of glass that adhere to a thin layer of plastic-like lamination sandwiched between them—which, if broken, will “spider web” but will not shatter. Some newer models of cars may have plastic windshields.
Don’t use an air chisel to cut glass—the risk to the victim is not worth the time you save.
Windshields are mounted either in mastic —a thick, glue-like substance — or rubber. To identify the mounting, look around the chrome trim that surrounds the glass. If rubber can be seen protruding from the bottom edge of the trim strip, the glass is mounted in rubber. If nothing can be seen under the trim, it is set in mastic. All truck and bus windshields are mounted in rubber.
To remove a mastic-mounted windshield, first remove the chrome trim, trim clips, wiper blades, and anything else that may get in the way. Next the glass must be separated from the mastic at the top and sides of the window. This is most easily done with a tool known as a “swivel cut,” which is available through automotive glass suppliers or autobody dealers. The swivel cut consists of a cutting blade bent at a right angle and mounted on a handle, and a “T” handle attached to the main handle by cable or a metal strap. Work the blade between the glass and the metal frame, pushing through the mastic. Then, while holding the blade handle perpendicular to the glass, grasp the “T” handle and pull it along the glass, thereby cutting the mastic.
Piano wire can also be used. A piece of wire approximately eighteen inches long and two wooden handles (such as dowel rods) are needed. Attach one end of the wire to a handle and pass the other end of the wire betw een the glass and frame, going through the mastic. Roll the other end of the wire around the other handle. Working with a rescuer inside the vehicle, pull both ends in the same direction, thereby cutting through the mastic and releasing the glass.
A regular knife or a screwdriver may be used to cut through the mastic, but it is difficult and breaks the edge of the glass, causing fragments to fall inside the passenger compartment.
If the proper tools are not available or if the situation demands expediency, windshields can be cut with an axe. Another fast method is to drive a bale hook through the glass and pull out sections of the glass with the hook. Both of these methods produce a lot of tiny glass fragments, and extra caution must be used to prevent glass from getting into the wounds or eyes of the victims. Do not use an air chisel to cut glass. Fragments of the glass will fly through the inside of the vehicle with force. The risk to the victim is not worth the time gained with the air gun.
Windshields that are set in rubber are much easier to remove than those set in mastic. Remove all trim and other obstructions. Then cut around the edge of window with a knife. The glass can then be pulled away from the vehicle. If the situation permits, a rescuer inside the vehicle can simply kick or push out a rubber-mounted windshield.
Rear glass may be removed in the same manner as windshields; however, since rear glass is not laminated, too much pressure anywhere on the window will cause it to shatter.
If there is enough room for a rescuer to get into the rear seat, he may spread a blanket out on the rear window deck and hold it up, covering the entire inside surface of the glass. A rescuer on the outside then breaks the window, and glass will fall downward into the blanket. The edges of the blanket are then folded inward and the remnants of the rear window* carried out of the car.
Roof removal is also a secondary access procedure. There are two types: a half-roof removal and a full-roof removal. The half-roof method creates a large hole in the roof and is usually performed with a vehicle on its side; the whole-roof method means cutting the “A” posts and folding the roof toward the rear of the car.

To perform a half-roof removal, it is necessary to cut a large amount of sheet metal. This is best accomplished with an air-powered chisel. However, many inexpensive hand tools will work quite well. A flathead axe and a sledge hammer will cut almost as fast as an air chisel. A very cheap cutter can be made from an old lawnmower blade: Simply pad one end with cloth and tape to create a comfortable handle. By grinding a sharp edge on the other end and striking it with a heavy hammer, a lot of metal can be cut in a short amount of time. I^irge meat cleavers and leaf springs with edges ground on them also make inexpensive, effective cutters.
To perform effective half-roof removal with a vehicle on its side, cut the roof along the top and both sides, leaving the bottom intact. This leaves a smooth edge on the bottom over which to work and move patients. Make the opening as large as possible.
If the vehicle has a vinyl roof, peel the vinyl out of the way before cutting metal. It will roll up and bind w hichever tool you may be using.
Once the three sides are cut, bend the sheet metal down, exposing the roof braces and the headliner. Braces are usually track-welded and can be cut or knocked loose with a heavy hammer, breaking the weld. Using a knife, remove the headliner. Metal rods in the headliner will simply pull free.
Finally, cover the sharp edges on the sides and top of the cut with duct tape. Rubber hose split lengthwise may also be used, but does not stay in place very well.
Larger vehicles such as trucks and buses may be constructed with more roof braces than automobiles. Look for rows of rivets on the outside of the sheet metal; they are indicative of the braces. By cutting between the rivets, you will avoid striking the braces and damaging the tool. It will ensure that you are only cutting sheet metal. A second layer of sheet metal, usually with insulation between the two layers, will be encountered on large vehicles. This poses no problem other than some extra cutting.
Prior to any cutting, the position of the victims must be checked, the vietims must he covered, and, if possible, spine boards should be placed between them and the roof.

RESCUE
VEHICLE EXTRICATION
Full-roof removal should be avoided on a car on its side because the cribbing support on the “A” post will be eliminated, and the “B” and “C” posts will be substantially weakened.
Before full-roof removal, the windshield should be taken out. It is possible to fold a roof back with the glass intact, but it is not a safe practice.
After the glass is removed, cut the “A” posts as close to the dashboard as possible. This cut is best made with power shears, but can be made with an air chisel, hacksaw, or any of the sheet metal cutters previously mentioned.
An “A” post is constructed of several layers of metal rather than one big block of steel. When cutting the post with anything other than shears, it is best cut around the post, cutting one layer at a time. If cutting w ith a hacksaw or an air chisel, the gravitational pull on the post may bind the tool, hampering your efforts. This can be corrected with a spreading device or, simply, a bumper jack. Place some cribbing on the dashboard, then place the spreader or jack between the cribbing and the roof. Apply a constant upward pressure as the cut is being made.
Keep some one-foot sections of old 2’/2-inch hose on your rig to cover the sharp stumps created when the “A” posts are cut.
Once the posts are severed, cuts must be made into the roof at a site behind the victims, usually toward the rear behind the last side window. Cut toward the center of the roof four to six inches or until the roof braces along the edge are cut through. The depth of the cut is dependent upon the make of the vehicle. As with the “A” posts, this cut is best performed with power shears, but may be accomplished with any metal-cutting tool.
When all cuts are made, rescuers on each side of the vehicle can physically force the roof rearward. If there is an upward curve in the roof, dent or “dimple” it with a hammer or pry bar. If a vehicle has rolled over, forcing the roof back may be difficult because of structural damage. If this is encountered, form a harness with a chain by attaching each end of the chain to an “A” post. Then, using the pulling method described before—though this time the pull will be across the trunk instead of across the hood — force the roof back.
One last word on the metal cutting: Avoid the use of high-speed saws. They throw* off too many sparks that could ignite the fuel, spelling disaster. If you must use a high-speed saw*, aim a small fog pattern from a hose directly at the blade as it is cutting. This will minimize the amount of sparks flying I around. Low-speed power saws that ! do not create a lot of sparks will work fine.
In the next article, the steps of disentanglement, packaging and removing victims, cleanup, and evaluation will be discussed and explained.

