Photos by author
Firefighters across the country are generally taught out of a handful of different textbooks for their Firefighter I certification. It’s called minimum standards. Firefighters are expected to meet these minimum standards and regardless of what textbook is used; most teach the same minimum standards across the board. As firefighters graduate from the academy and move into the firehouse, they are often told: “Now the real learning begins.” More often than not, that’s the truth—firefighters will learn better ways to do things through trial and error and experience. These experiences are then passed down by senior firefighters and officers. The core basics of minimum standards still exist, but firefighters move past minimum standards by learning real-world, proven tips and tricks. What follows is a collection of tips and tricks I’ve been shown by others.
- Training Minutes Revisited: Truck Tricks of the Trade
- Tricks of the Trade: Another Use for The Halligan Bar
- Truck Company Basics: Ground Ladders
- Training Minutes: Ground Ladder Placement
Ladder Angles
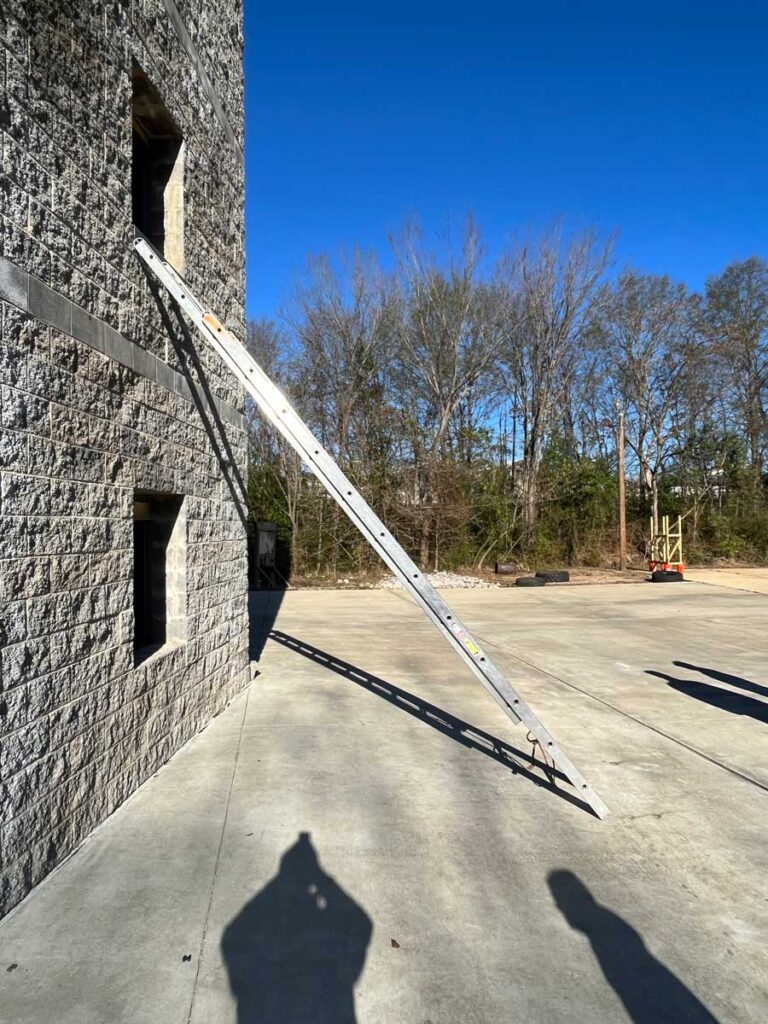
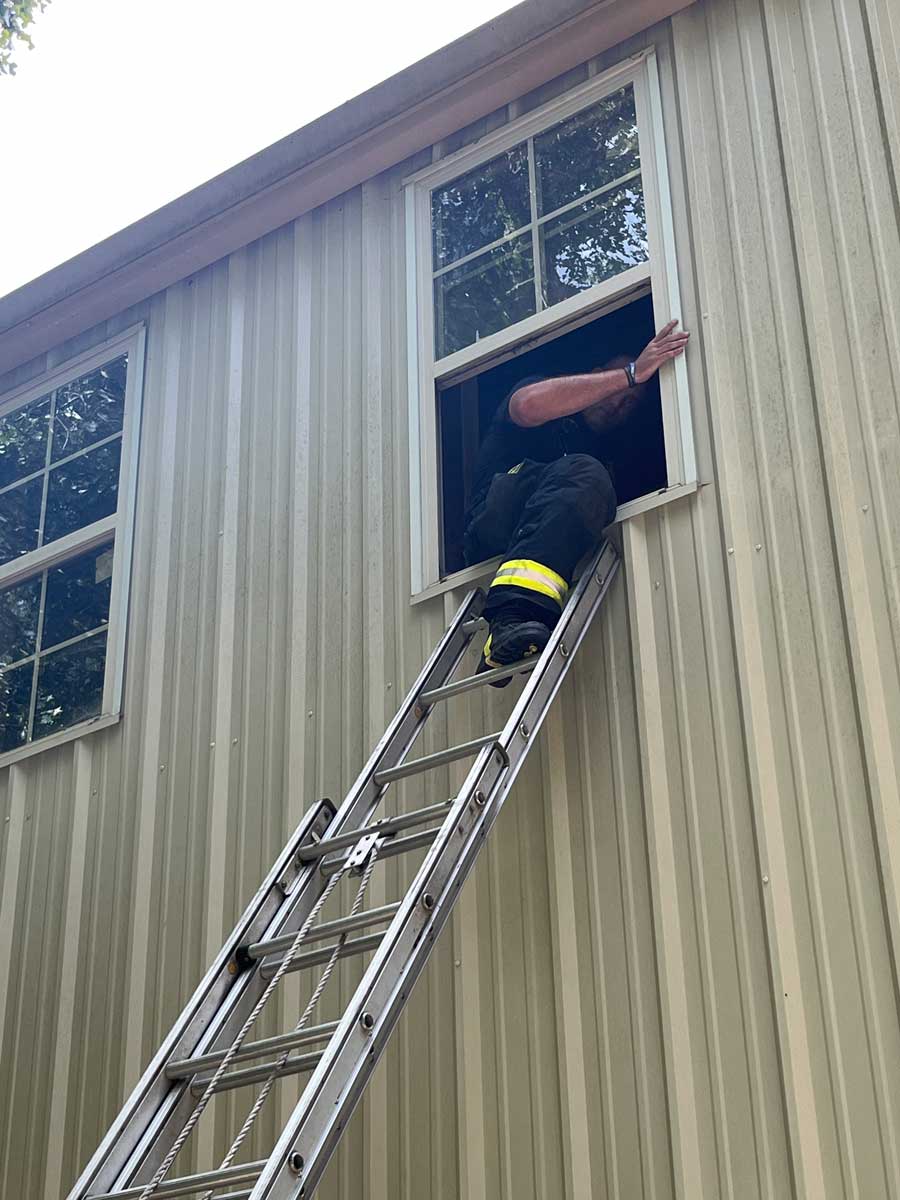
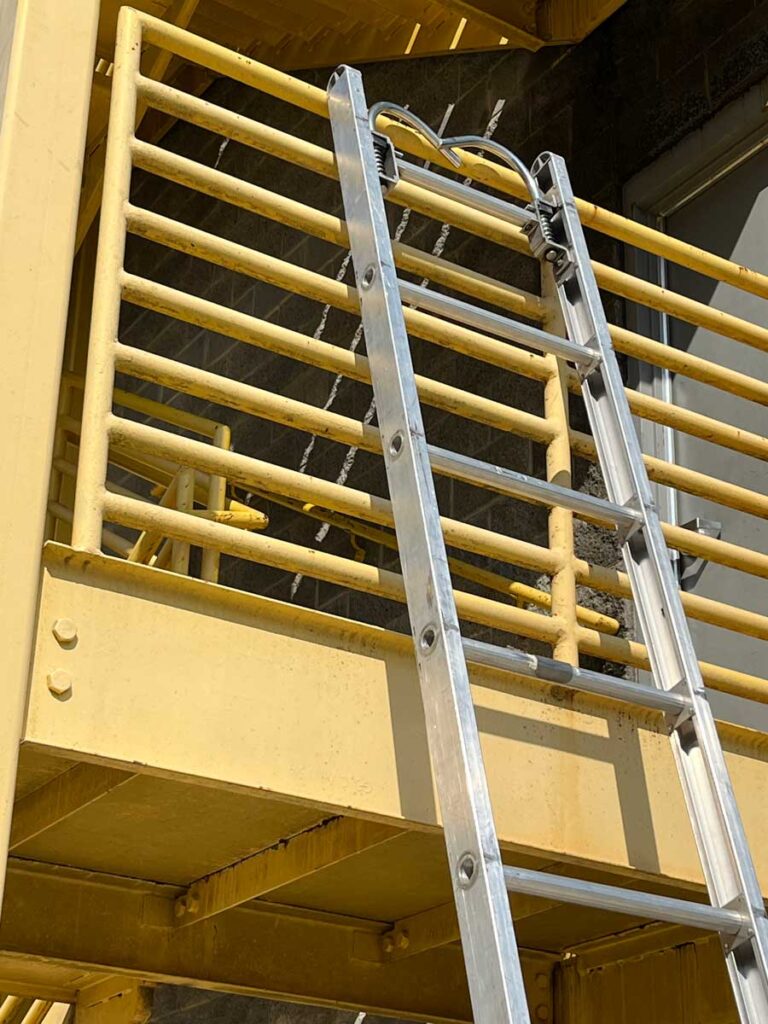
In the academy, we are taught that the proper climbing angle for a ground ladder is 75°. This is the most stable that the ladder will be. This angle is appropriate for working off the ladder whether we are venting or operating a hoseline. Frequently, however, the reason for the ground ladder being thrown is for rapid intervention, bailout, or vent-enter-search (VES). All these are excellent reasons to throw the ladder with a much shallower angle, often referred to as a “rescue angle.” Ground ladders can safely be climbed from lower angles approaching 55 to 65°. This shallower angle creates a much safer angle for a firefighter bailing out and for a firefighter removing an unconscious civilian. The shallower the angle, the less the victim’s gravity tries to pull them straight down. If at any point you feel you are about to lose control, just lean into the victim, while your hands are holding onto the back of the ladder’s beams and you’ll create a brake with your body. To achieve these angles, I have a few knowns that I use for choosing how much ladder I will use. These include common building construction features such as windowsills being three and 10 feet between floors. These knowns are based on flat ground and slab foundations for residential houses.

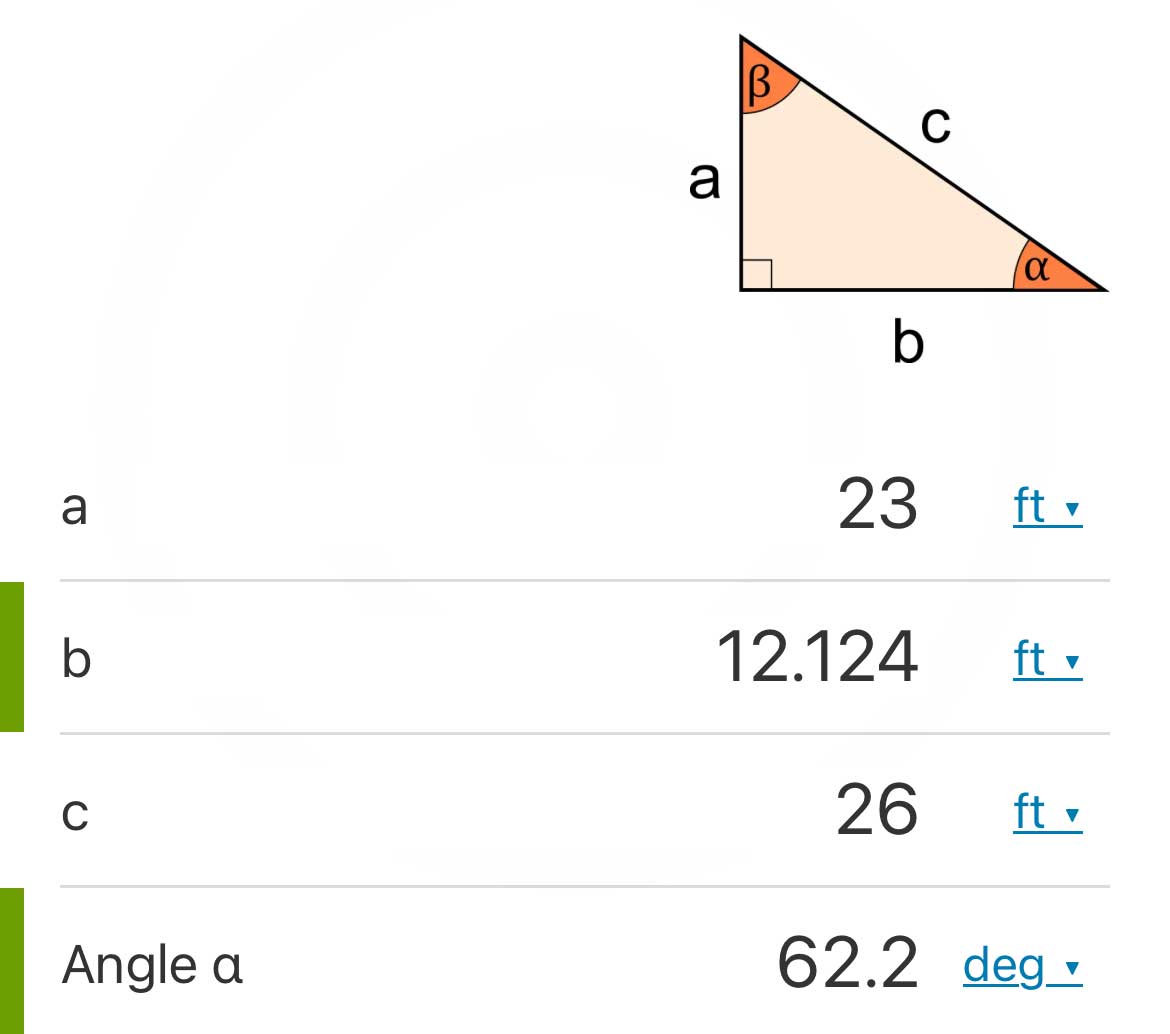
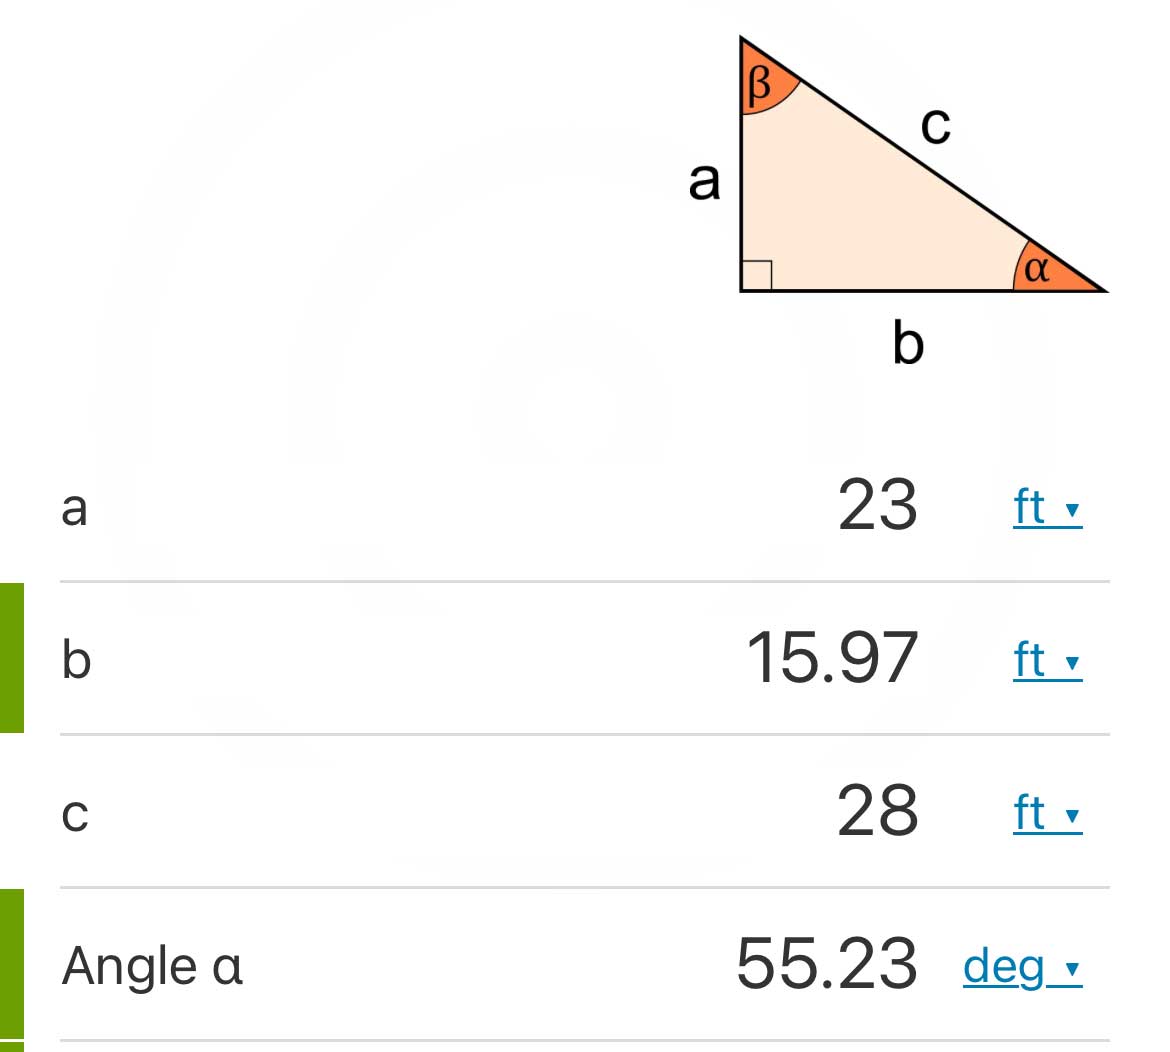
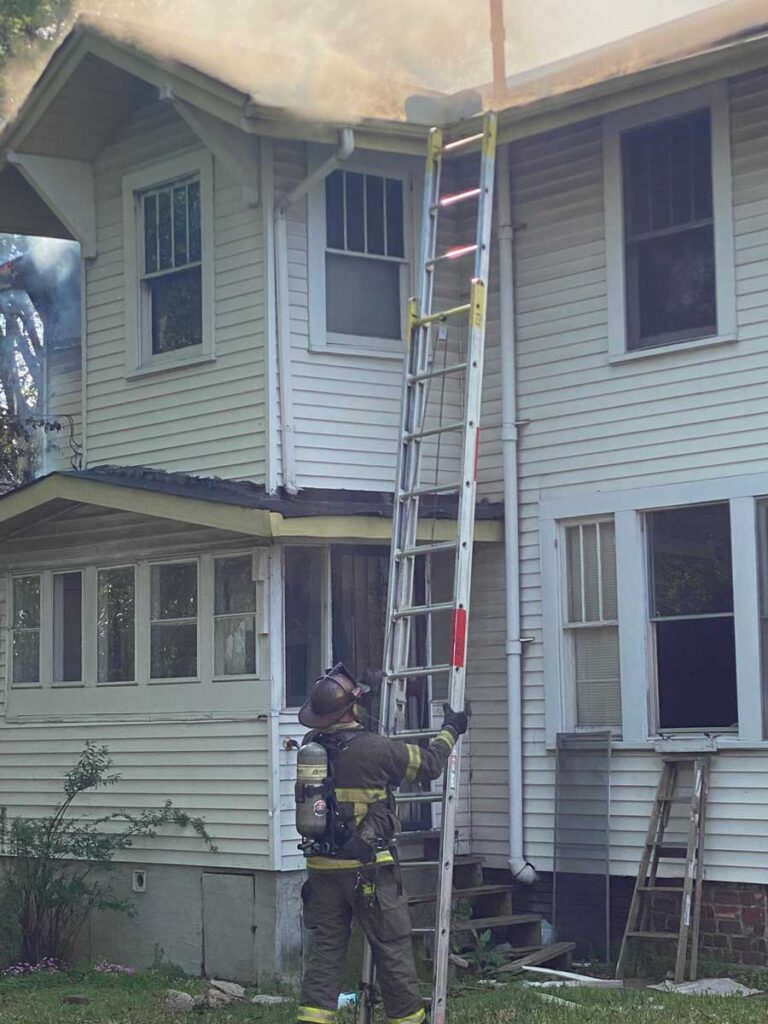
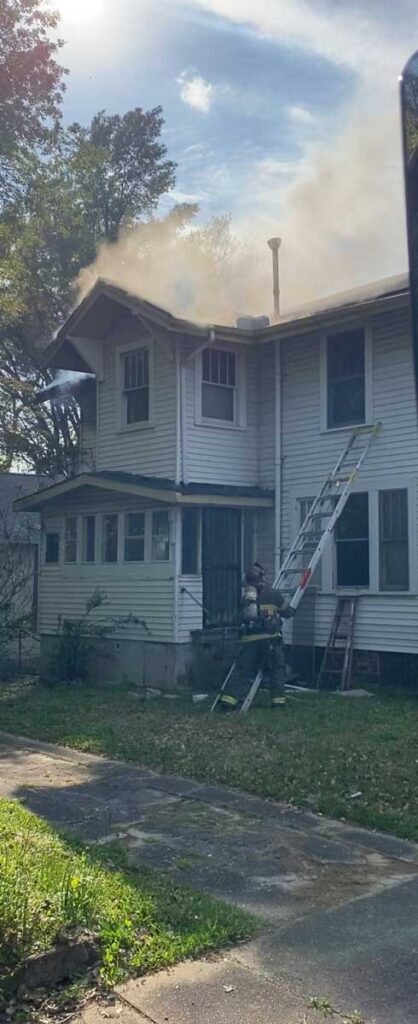
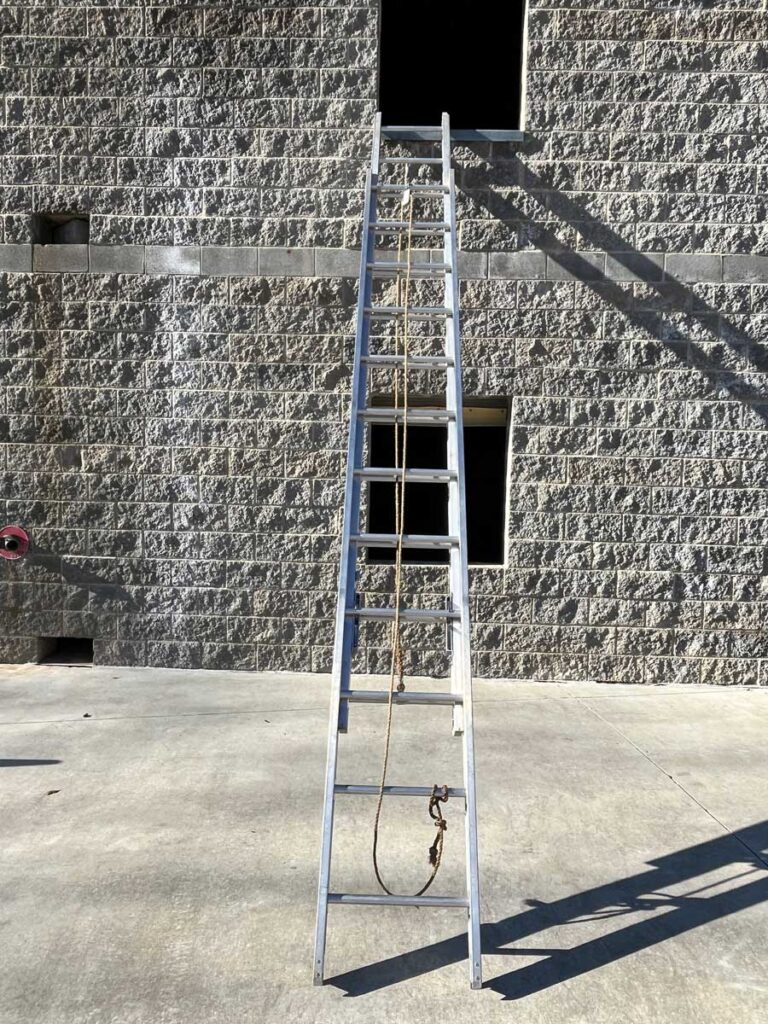
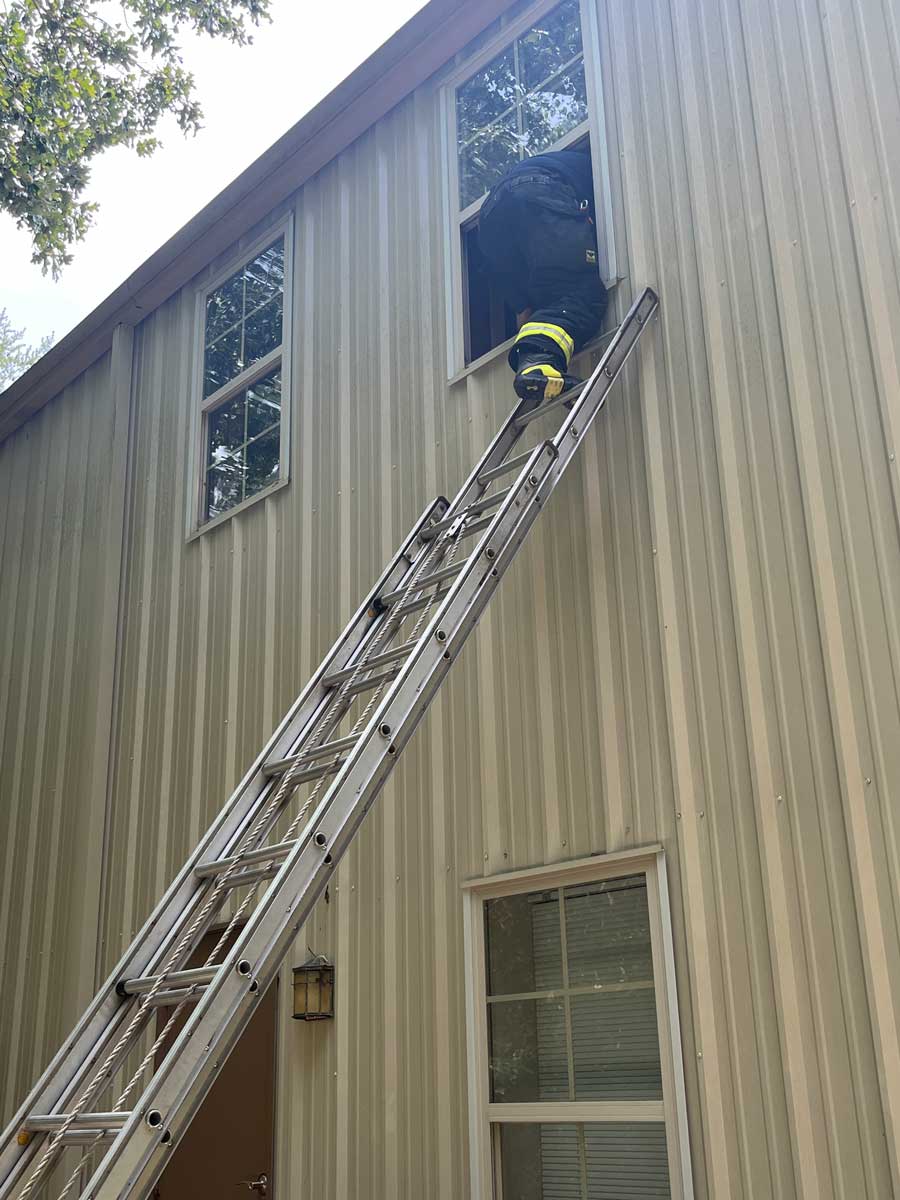
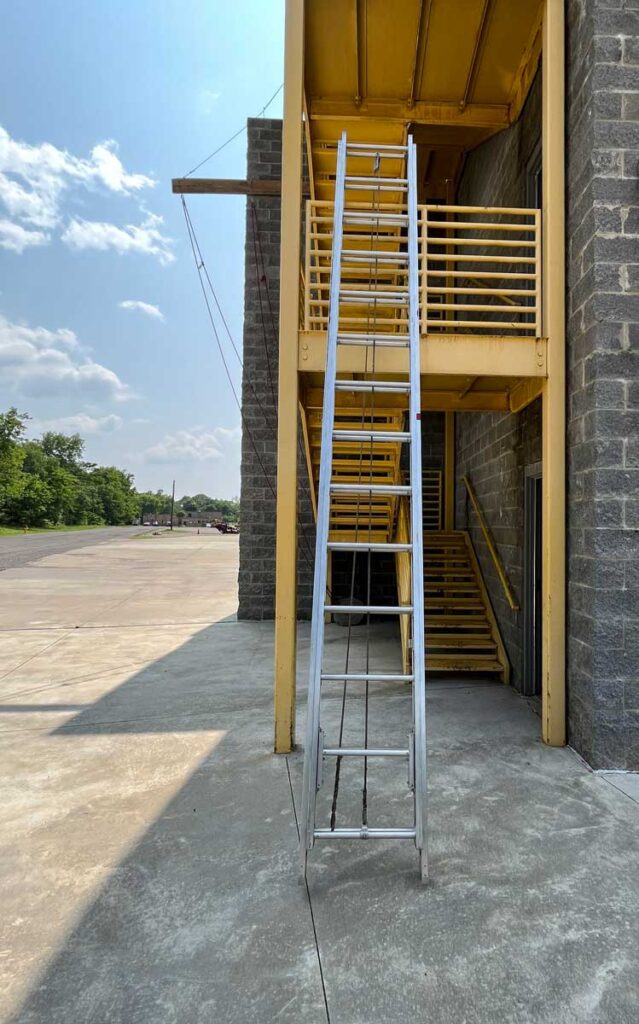
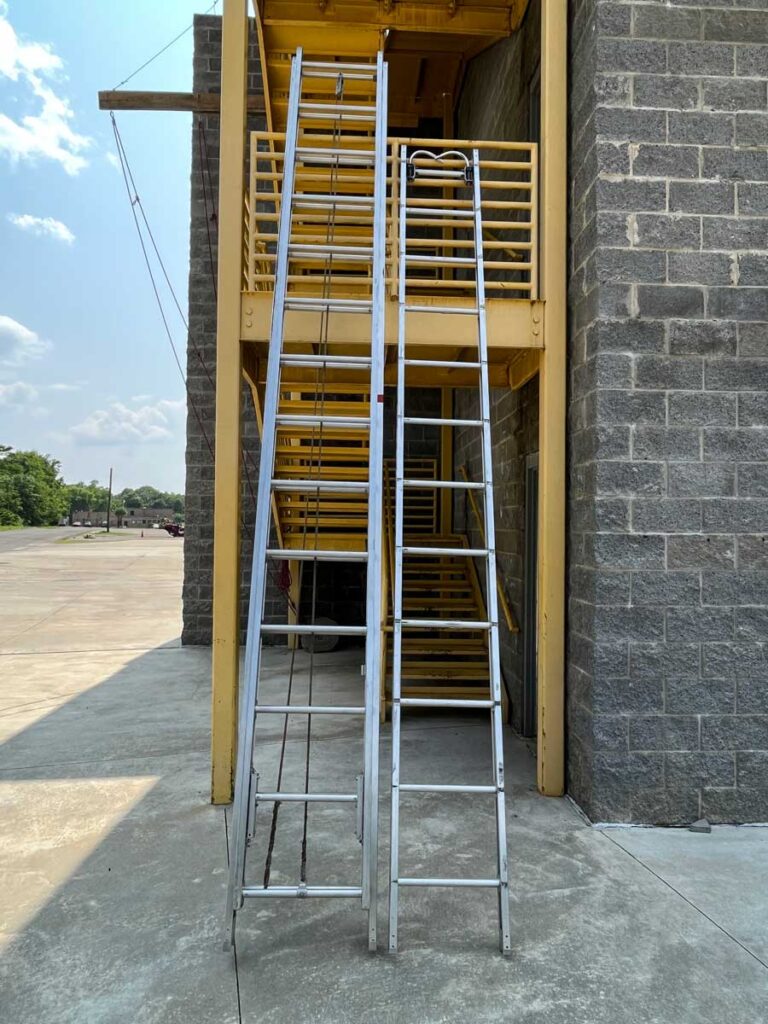
My starting point for a rescue angle is as follows: 16 feet of ladder for a second-floor window, 26 feet of ladder for a third-floor window. In the following photos “a” is the vertical height from the yard to the windowsill, “b” is the distance from the building to base of the ladder, and “c” is the total length of ladder being used. As you can see, I can achieve a 54° angle (Photo 1) for a second-floor window with 16 feet of ladder. An angle of 62° (Photo 2) can be achieved at a third-floor window with 26 feet of ladder and an angle of 55° (Photo 3) can be achieved at a third-floor window with 28 feet of ladder. While these are the preferred angles for rescue, know that a 24-foot extension ladder is capable of reaching some third-floor windows and a 35-foot extension ladder is capable of reaching fourth-floor windows, although not at the preferred rescue angle. Also, as mentioned previously, these are based off flat ground and slab foundations. Extra footage will need to be added to account for things such as terrain features and conventional foundations. In photos 4 and 5, you can see that a 24-foot extension ladder being thrown to the second floor was given three “clicks” to give a total length of 17 feet to account for the crawl space. See also “Ground Ladders: Size Really Does Matter” by Anthony Rowett and myself, which gives a much more detailed explanation of deciding how much ladder is needed to reach a certain target.
Tip In vs. Tip Out
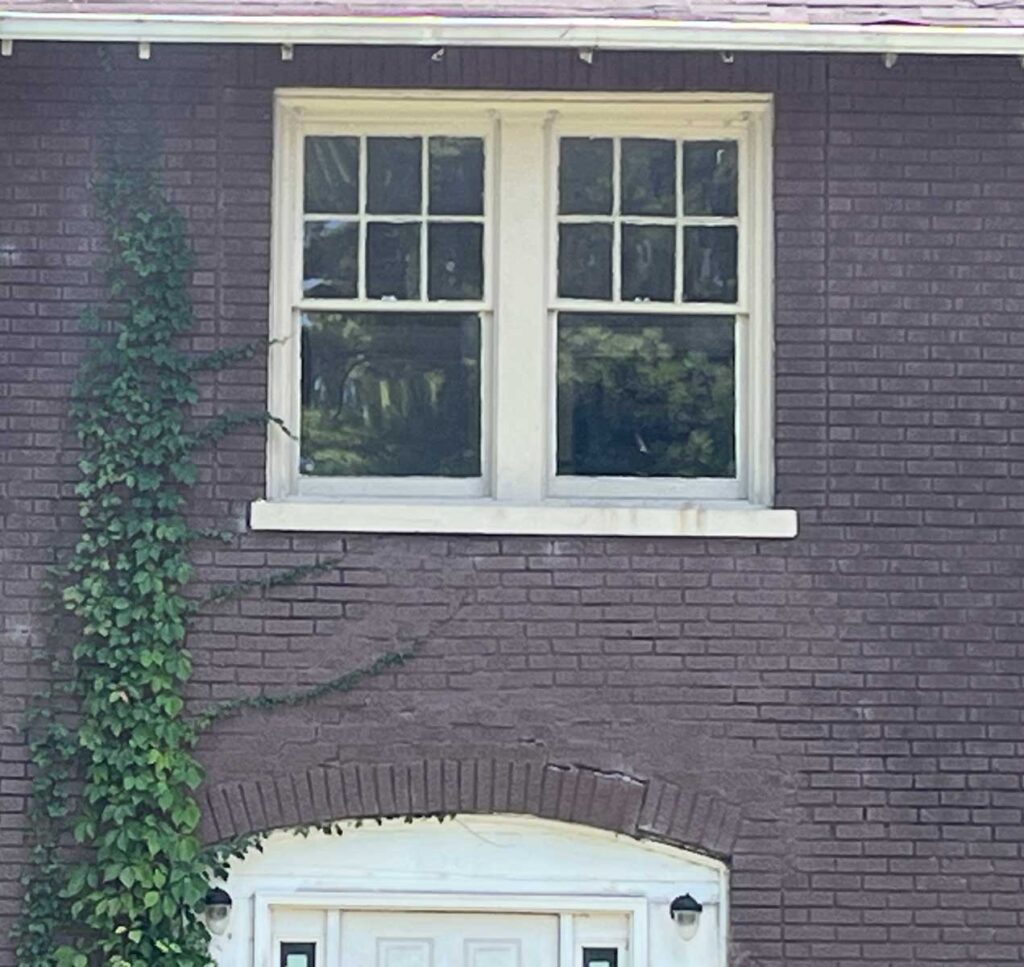
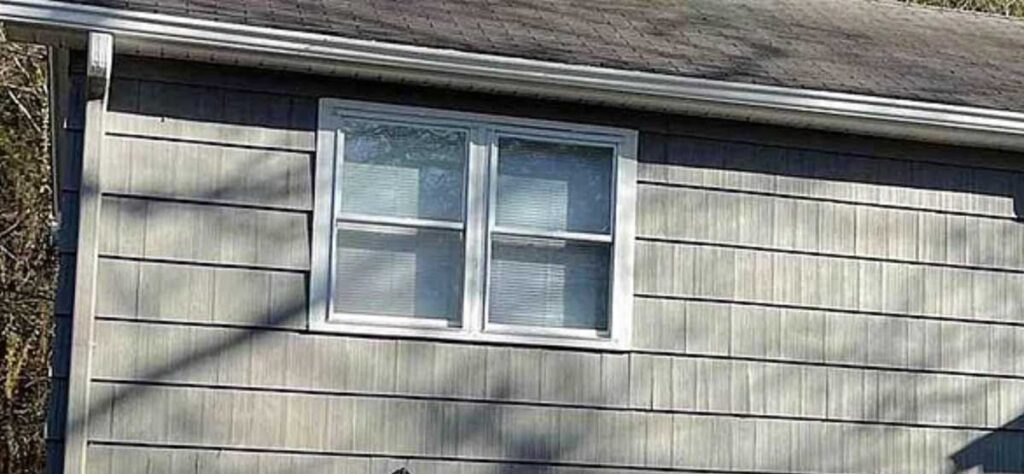
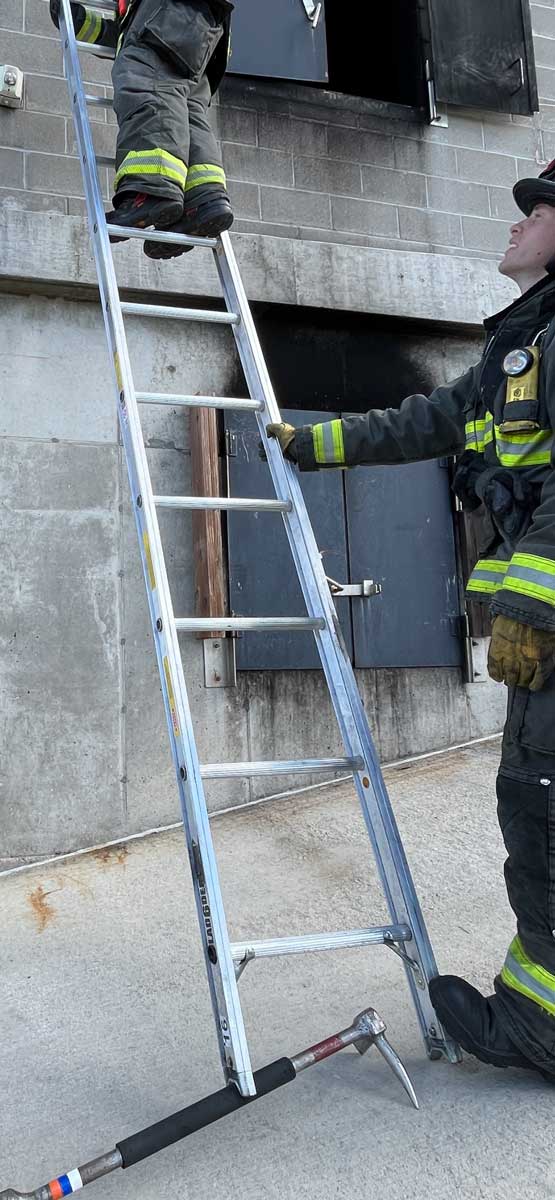
In my travels teaching hands-on training , most firefighters have been taught to place the tips of the ladder even with the windowsill (Photo 6). This is my preferred placement. However, others, including other well-known ladder instructors, prefer that the tips be placed slightly above the sill or “in” the window (Photo 7). The two biggest schools of thought for tips in are, first, a firefighter searching inside, upon finding a window, can sweep their hand across the sill and know that a ladder is placed for bailout. Second, tips in can help prevent side-to-side washout. If the ladder starts to tip one way or the other, the tips can catch the edge of the window frame. The tip in vs. tip out debate is one of personal preference. Both have their merits. As I stated earlier, I prefer placing the tip at the windowsill for several reasons. First, it’s consistent placement. Some windows have ledges (Photo 8), where the tips can be placed above the sill and not break the window, if it is still intact. Other windows (Photo 9) have no ledge at the sill, making it impossible to put tip in unless the window is broken. Another reason I prefer tip at the windowsill is transitions. Whether doing bailout drills or exiting a window onto a ladder after a VES, the tips above the sill or in the sill create a snag point. Tip-in placement also can hamper performing a “ladder roll” when moving a ladder from window to window. The last reason I prefer tip at the sill is my next topic, side-to-side tip placement.
Tip Placement: Side to Side
As previously mentioned, most firefighters are taught in recruit school to place the tips at the sill and in the center of the window, as seen in photo 6. One tip that was passed on to me was to place the ladder towards one side or the other (Photo 10). I tell people to line the inside beam up with the center of the window. This does two things. First, it helps with transitions off the ladder and into the room, if you prefer to swing in keeping low in the window and using your foot to sweep the floor. It also helps with transitions out of the window onto the ladder. Most firefighters find themselves holding onto one side of the window frame for support while trying to exit. As your leg goes above the sill and you rotate out of the window, the foot wants to transition to the side of the window you are holding. If the ladder is in the center, this creates extra work for the firefighter as you move your leg back and try to find the ladder (Photo 11). If the ladder is placed towards the side, the firefighter’s leg naturally finds the ladder as you rotate out. (Photo 12).

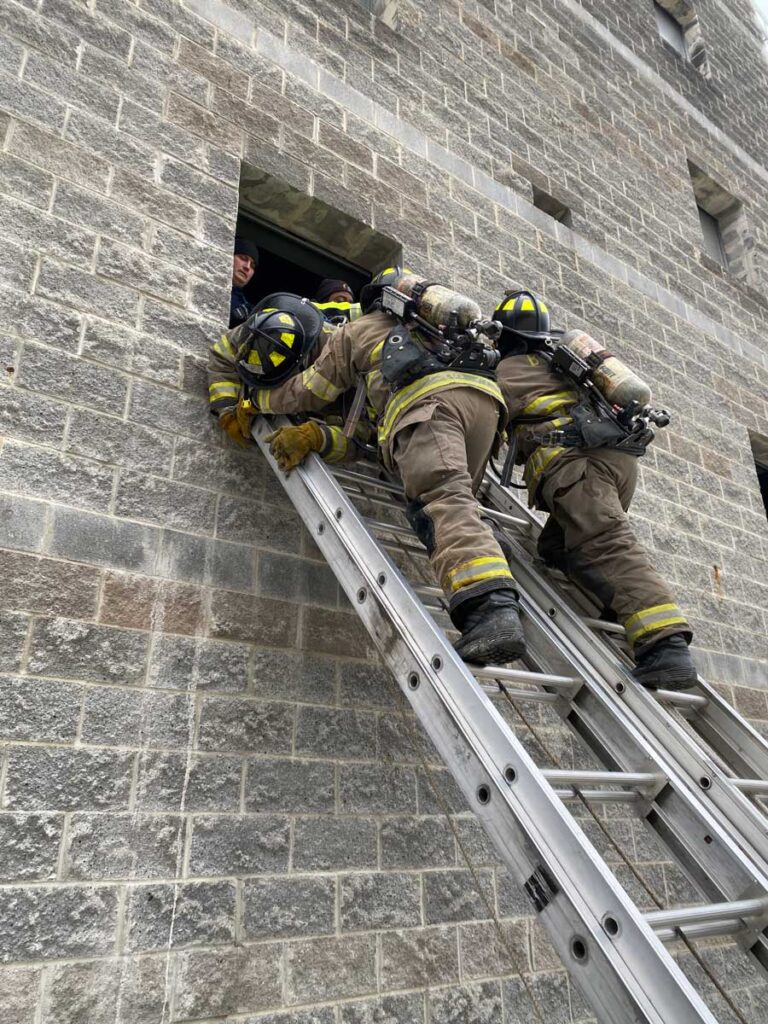
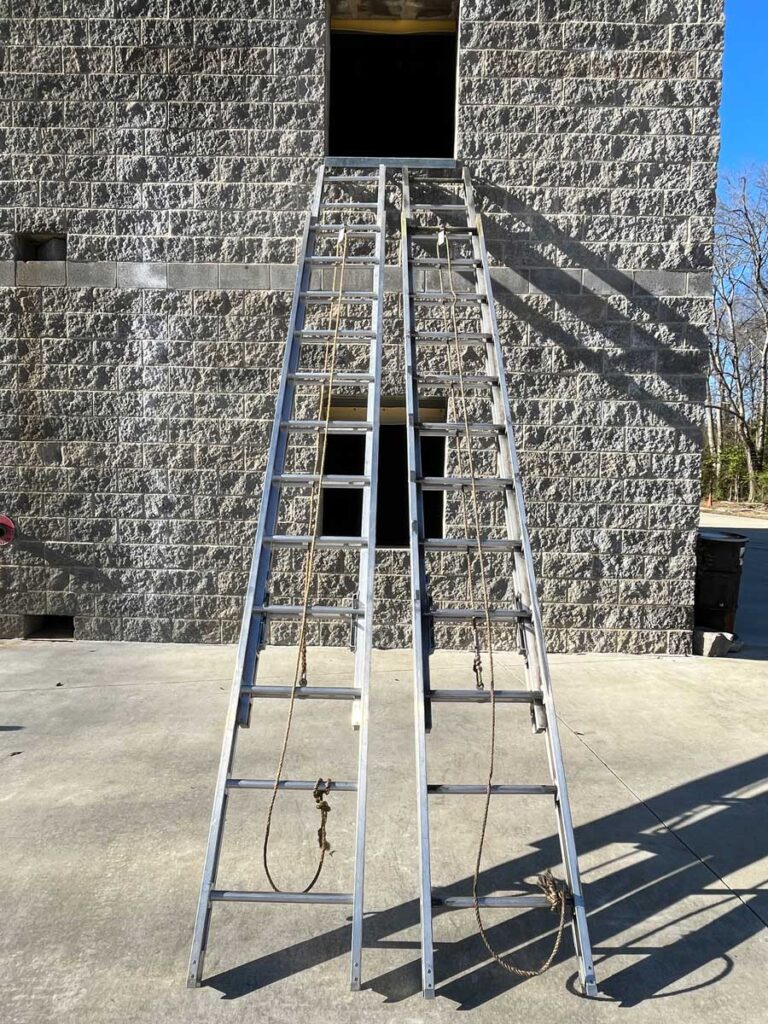
Second, most of us are taught the large victim removal via double ladders. If the first ladder is placed in the center of the window, the second ladder will be placed off to the side. The additional rescuer will be leaning across the ladders, off one’s center of balance, and will not be much help. However, if the first ladder was thrown to the side to begin with, this leaves room for a second ladder to be thrown next to it and now both rescuers have equal access to the victim to assist with the decent (Photo 13). Another tip in this instance is to make sure you leave a space between the ladders so that you have room for your hands on the inside beam. (Photo 14)
Balcony Rescues
How you ladder a balcony is a matter of personal preference, like a lot of things we do, but it also needs to be based on a quick size-up. Take the time to observe the balcony. Is it wood? Is it newer construction that is probably still sturdy, or is it old and possibly going to fail when weight is applied? Is it lightweight aluminum that may bend when weight is applied? If you are worried about the railing, it may be beneficial to ladder the building to the side of the balcony and then transition over.
Some firefighters prefer to place the tips barely above the top railing of the balcony. To them, this allows for an easier transition. (Photo 15) I prefer to place several rungs above the top of the balcony railing, much like you would when laddering a roof. (Photo 16) For me, this allows you to climb the ladder a little higher and more easily transition over the top of the railing. This also gives you more to hold onto when transitioning back over the railing.
This tip is for those like me who prefer to have ladder above the railing. As mentioned earlier, a double ladder rescue makes things easier when bringing an unconscious victim out, especially if the individual is large. If both ladders were placed well above the top railing, this presents a problem that must be overcome. The victim would have to be raised up and over the top rungs of the ladder. Keeping this in mind as you go to set your first ladder to the balcony, if you place several rungs above the railing, place the ladder further away from your point of entry off the balcony. When the second ladder is placed, place it in-between the entry/exit point and the original ladder. Place the tips even with or just above the top railing. (Photo 17) This lowers the height that the victim must be lifted to pass over the railing and onto the ladder. Another option to consider, with wooden balconies, would be to blow out the balusters with a tool. This would negate having to lift the victim up and over the railing and could be useful with any victim of size.
Laddering Uneven Ground
Much of the country is anything other than flat. Firefighters need to be prepared to handle issues that arise when it comes to grade changes. The following tips can be used for laddering hard surfaces such as concrete and laddering in soft surfaces such as grass. When you are faced with laddering a building on an incline you have a couple of options, if you prepare ahead of time.
Some truck crews carry ladder wedges or ladder chocks that consist of a wedge made of a 4×4 and a short section of 2×4 married together with a rope. These can be draped over the bottom rung of the ladder while it is being carried as a way to change the balance point when faced with a single firefighter shoulder carry. The wedge can be used to stabilize the downhill side of the ladder. (Photo 18) On steeper inclines, 2×6 wood extrication chocks can be used since they are wide and sturdy. Stay away from using commercially made ones as they tend to be narrow and flimsy. Also, a halligan can also be used to take up the downhill space under the spurs. (Photo 19) The downside to using your halligan is that you are now short a tool.

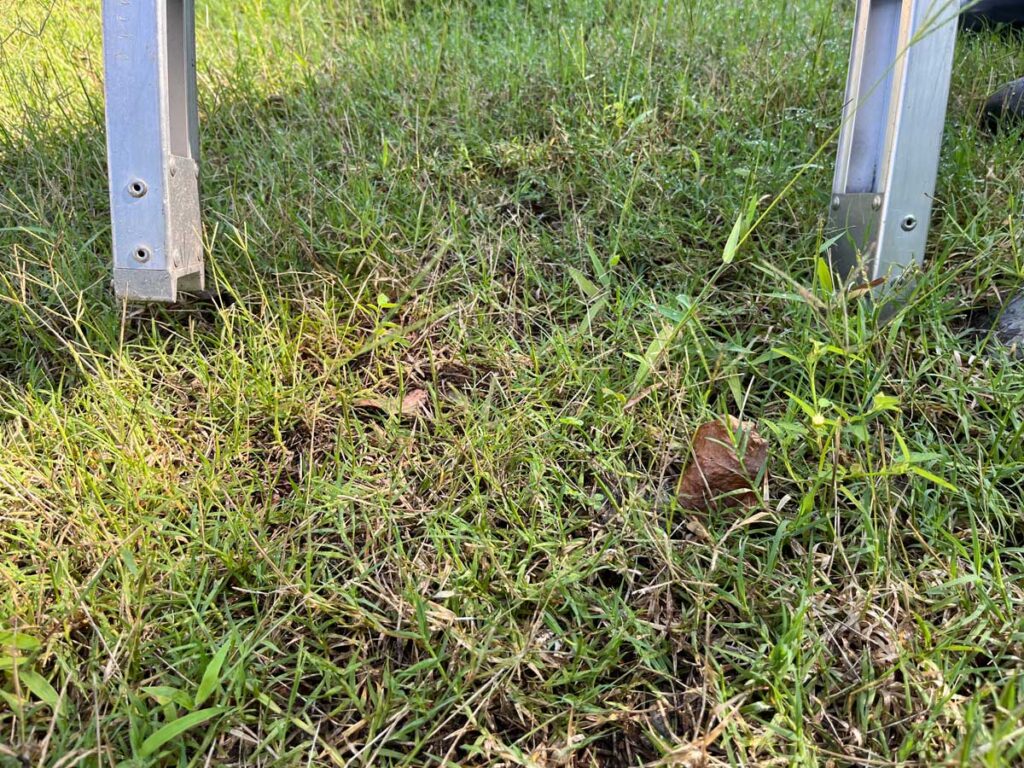
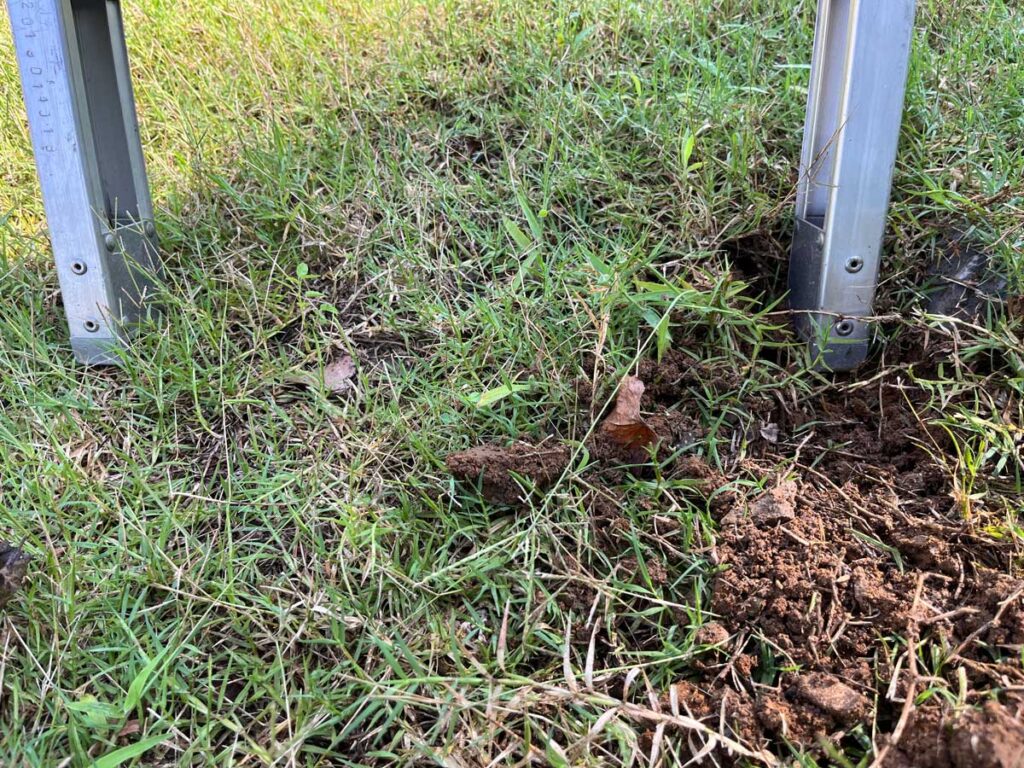
When laddering uneven ground in soft surfaces such as a yard, you can perform a dig out of the high side of the ground. If the ground is soft enough, use the heel of your boot to dig out a small trench in the yard to drop the spurs of the ladder in. In tougher ground, if you have a halligan with you, you can also use the adz like a hoe to dig out the high side of the incline. (Photos 20-21) The benefit to either one of these methods in soft ground is that you can dig as much as needed. On a larger incline, you can dig down deep enough that the rung is touching the ground or in a trench. Dig enough to even the spur level out.
*
As you go throughout your career, remain a student of the game and learn the tips and trick and real-world knowledge that will benefit the firefighters on your job, regardless of the time on they have. Some of these tricks you may figure out yourself; some may be tips passed onto you from others. Take the time to pass them on to others around you so that they can move past minimum standards.
Clay Magee is an instructor with Magic City Truck Academy and a lieutenant with Birmingham (AL) Fire and Rescue. Clay began his career with the East Oktibbeha Volunteer Fire Department in 2004. He holds a bachelor’s degree from Mississippi State University and a master’s degree in Emergency Services Management from Columbia Southern University. He has been published in Fire Engineering and other fire industry media, and is an organizer of Deep South Fire Conference. He has taught hands-on training at the Alabama Fire College, various fire conferences, and multiple departments across the state of Alabama.

