BY JEREMY RIFFLARD
In presidential election years, candidates, Secret Service personnel, protesters, and dignitaries are on the campaign trail across America, passing through all 50 states, stopping in small communities and large cities. Your engine company arrives at an intersection to find an unconscious driver of an armored sport utility vehicle (SUV). The locked doors, the roof, and the undercarriage are reinforced with one-inch-thick steel; the hinges are thick reinforced steel. The glass is bullet resistive. How can you access this patient?
 |
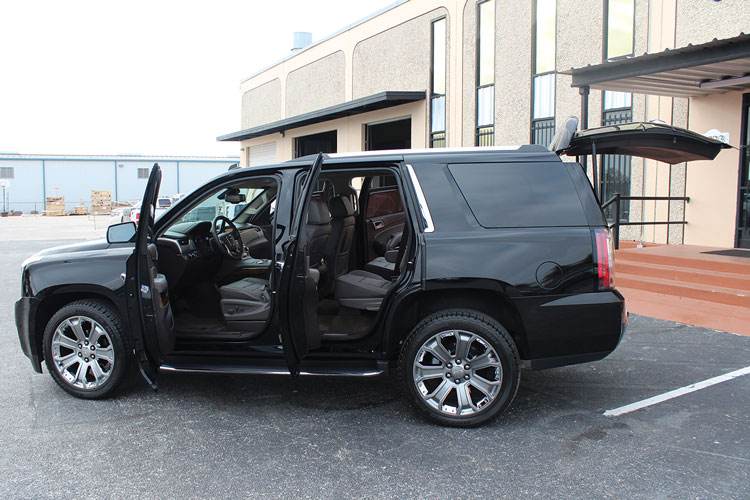
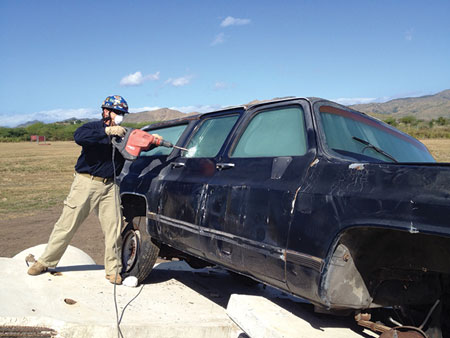
| Photo 1 courtesy of Texas Armoring Corporation |
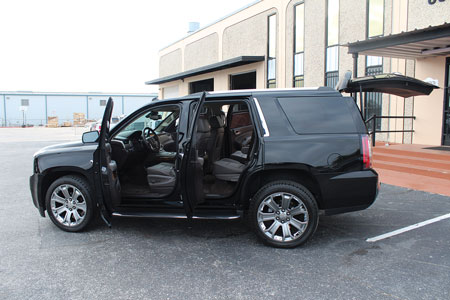
Armored vehicles are designed to keep people and projectiles out. They can appear to be an everyday passenger car, a limousine, an SUV, or a van (photo 1). The steel reinforcement strength is beyond what your rescue tools can cut. The weakest point of this vehicle is the bullet-resistive glass, which is often comprised of multiple layers of tempered glass and polycarbonate; it may be ¾ inch to three inches thick, depending on the type of force it is designed to resist (photo 2).
The Tools
There are several tools and techniques that, when combined, can effectively defeat bullet-resistive glass. Generally, cutting tools are more effective than striking tools, but certain striking tools can assist in making the cut.
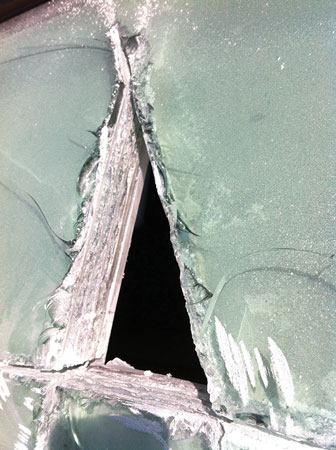
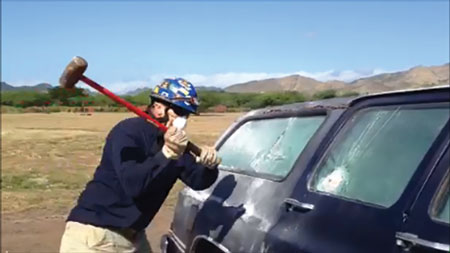
Sledgehammer. The most basic striking tool, the sledgehammer, can breach some bullet-resistive glass. It is not recommended because it may take 20 to 40 hard sledgehammer strikes in the same location to fracture one- to 1½-inch-thick bullet-resistive automotive glass. Eventually, the glass will fracture in an area that has received multiple blows. After a few hard swings, the outermost layer will fracture but not the inner layers that are protected by the pliable polycarbonate layer. You need persistence to break the inner layers. The only remaining barrier may be the polycarbonate, which can be punctured with a knife (photo 3).
Using the sledgehammer on bullet-resistive glass presents several problems. First, the vehicle and the patient will be jolted with every hammer blow. When you eventually breach the glass, the hole will only be the size of the sledgehammer’s head. You must repeat the process in one or more adjacent areas to create an opening large enough for your arm to reach inside. For rescuers, this is very time consuming and exhausting, and two- and three-inch-thick glass may resist a sledgehammer breach.
 |
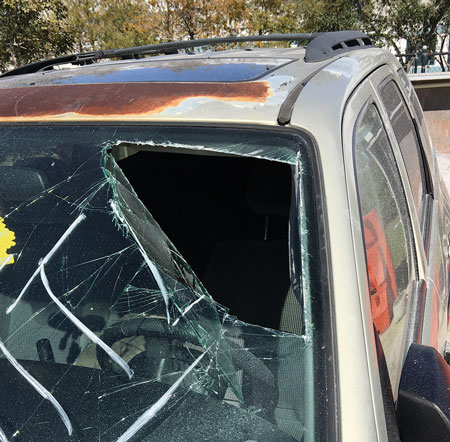
| Photo 2-4 by author |
Hammer Drill. Using a hammer drill to make a stitch cut pattern (drill a series of holes and connect the “dots”) on bullet-resistive glass is a slow, ineffective process. It is effective on concrete because the small amount of concrete between the holes will fracture when you apply force. This technique is not as effective on layered glass. Because of the polycarbonate layers’ elasticity in bullet-resistive glass, the glass does not break in the way that concrete fails. Drilling through the glass will not take as long as drilling through concrete, but you must make the holes almost side by side. If there is significant space between the holes, the polycarbonate will keep the barrier intact. If you are making a 30-inch square hole and the holes are one inch apart, you will need to drill about 20 to 24 holes on each side. If you need to drill four sides, you will need to make about 80 to 100 holes. This is another technique to avoid (photo 4).
Reciprocating Saw. If you use a reciprocating saw on bullet-resistive glass, it will tend to skip on the smooth surface and not penetrate the outer layer. The reciprocating saw alone has no bite to make a purchase point. An effective technique to breach bullet-resistive glass would be to first soften the glass by fracturing it with a half-dozen sledgehammer strikes. After you see some damage, switch to a reciprocating saw with a metal blade. The sledgehammer blows alter the slick surface and allow the blade to bite. Once the blade penetrates the thickness of the glass, you can create an access point. Continue to cut the glass in a circular pattern that is large enough to allow you to reach your arm through to operate the door lock. During the cut, keep the reciprocating saw’s guard against the glass so you don’t bend the blade. A gentle rocking motion may assist in the cutting process so you don’t wear out the blade in one area. Water or lubrication will protect the blade and keep down some of the glass dust.
Rotary Saw. One of the most effective breaching tools is a gasoline-powered rotary saw or chain saw with a diamond-tip blade. This saw creates its own purchase point. This saw has a high number of revolutions per minute, allows for straight insertion, and will cut through all thicknesses of bullet-resistive glass. In creating an access point, using a large triangular or square pattern may be best. Some drawbacks of using a gasoline-powered rotary saw include that it can push carbon monoxide (CO) and glass residue (dust, shrapnel, and mist) into the patient compartment. To determine during training how much CO a patient may be exposed to, place a gas monitor inside a standard vehicle and make training cuts on the laminated front windshield. Understand that cutting bullet-resistive glass takes about four times longer than cutting a regular laminated windshield (photo 5).
Hydraulic Saw. A hydraulic saw is the best tool for breaching bullet-resistive glass because it does not produce the CO that can be pushed into the patient compartment. Most apparatus do not carry hydraulic chain saws or hydraulic rotary saws, which are usually found on heavy rescue or urban search and rescue (US&R) response trucks. The hydraulic chain saw or rotary saw with a diamond-tip blade is a great choice if it is available.
Where to Cut
The goal in making entry should be to create an access point through the glass that allows you to open the door from the inside. It would be more beneficial to make the access hole near the door latch vs. in the middle of the windshield. After you have created the hole, you should be able to reach in and open the door. If you make an inspection hole, attempt to place a dust mask on the victim to protect his airway if additional cutting is needed.
If you need to extricate the patient through a window, you should choose the largest window – the windshield – and cut close to the window frame. Keep in mind that the larger the piece of bullet-resistive glass you cut, the heavier it will be. To prevent the windshield from falling uncontrolled into the patient compartment, use suction cups to hold onto the glass. Large fire rescue departments or US&R teams may keep suction cups on their heavy rescues.
Alternatively, cut handholds into the windshield. First, make a vertical cut along the left or right edge of the windshield. Follow this with a diagonal plunge cut at the top corners. Continue cutting along the top horizontal; this is your handhold (photo 6). After the horizontal cuts are more than halfway across the windshield, use the handholds to stabilize the glass. Make the final bottom horizontal cut to remove the glass.
One challenge when cutting the front windshield is that you may need to get on top of the hood to make the horizontal cuts. Leaking fluids at a vehicle accident scene can make standing on a hood slippery and dangerous. Always use caution when operating on a vehicle hood.
Glass Dust Hazards
Cutting laminated, bullet-resistive glass creates a large amount of glass dust that will get into every nook and cranny. Respiratory protection is mandatory to prevent the fine glass dust from entering the lungs and causing permanent injury. Ordinary eyeglasses are not sufficient. The recommended level of protection is safety goggles or a full-face self-contained breathing apparatus (SCBA) mask.
Bunker gear or extrication jump suits provide acceptable protection from the hazards of glass dust, sharp glass, and twisted metal. Use a hood to protect exposed areas of the neck, the scalp, and the face from dust mist. The dust mist will adhere to the gear, so you must decontaminate your gear immediately after the incident. You will feel like a wet person who was rolled in pink fiberglass insulation if you wear your contaminated gear after cutting bullet-resistive glass.
 |
| Photo 5-6 by Kevin Yannayon. |
Using a hazmat suit over your extrication gear will keep the glass dust off your personal protective equipment. Since you will wear the SCBA ensemble on top of the hazmat suit, it also will be exposed to the glass dust. After the cut is complete, doff the SCBA ensemble along with your helmet, hood, and gloves, and place them all into a bag to isolate the contaminants for decontamination. Remove the hazmat suit as a hazardous materials responder does by inverting the inside over the outside. Place the suit in a bag to be discarded. If wearing a protective suit over the extrication gear will delay life-saving care, proceed without the hazmat suit.
When extricating patients, brush the glass contaminants off their clothing before loading them into a transport truck. If conditions allow, wash the victims down prior to transport so you don’t cross-contaminate the transport vehicle with glass dust.
Corporate executives, visiting dignitaries, celebrities, and carriers of sensitive materials use ballistic armored vehicles daily. Most fire and rescue companies have tools that can breach the weakest entry point, the glass. Protect yourself from glass dust. Respiratory, eye, and skin protection are mandatory. Decontaminate yourself and your gear immediately after the call. Rescuer safety is always the priority. Know the capability of your forcible entry tools. You may have to make entry into a van, car, or truck that is an armored vehicle.
JEREMY RIFFLARD is a certified 25-year firefighter for the state of Florida and a captain with the Fort Lauderdale (FL) Fire Department (FLFD), an officer for the FLFD’s technical rescue team, and a rescue squad officer of the Federal Emergency Management Agency’s Urban Search and Rescue team FL-TF2. His most recent task force deployments include the 2010 Haiti earthquake and 2008’s Hurricane Ike. Rifflard teaches technical rescue programs for the Coral Springs (FL) Regional Institute of Public Safety. For the past 15 years, he has been an instructor and a safety officer for Military Urban Search and Rescue exercises.
Ensure Scene Safety at Your Next EMS Call
Basic, Advanced, or Heavy Vehicle Extrication?
Patient Extrication: the “Linear” Approach
Fire Engineering Archives

