One thing all extension ladders have in common is a halyard. Different fire departments set their halyards up different ways, some through lack of knowledge and others through carefully thought-out reasoning. Most firefighters give little thought to the halyard, but like many things in the fire service, the devil is in the details. In this article we will discuss common ways the halyard is stored, which one is most beneficial and why, when we should be tying the halyard, and lastly the halyard “quick tie.”
- Ladder Placement Tips and Tricks: Moving Past Minimum Standards
- Tactical Operational Tips in Laddering
- Firefighting Basics: Ladder Tips
- Pressler: Portable Ladders
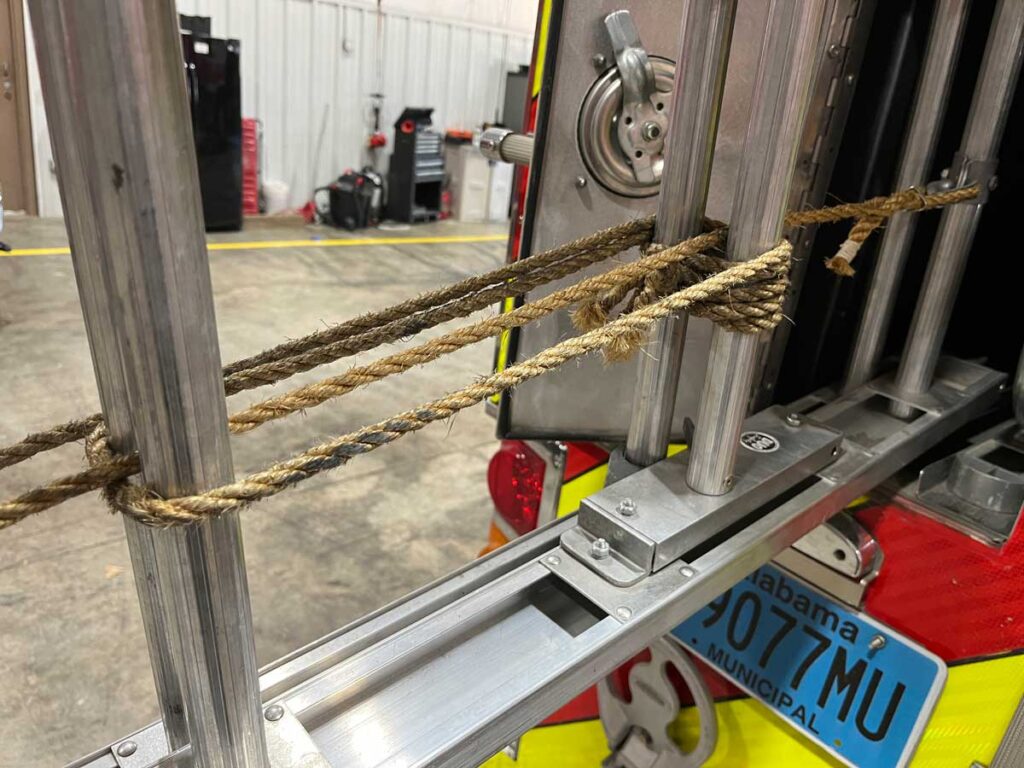
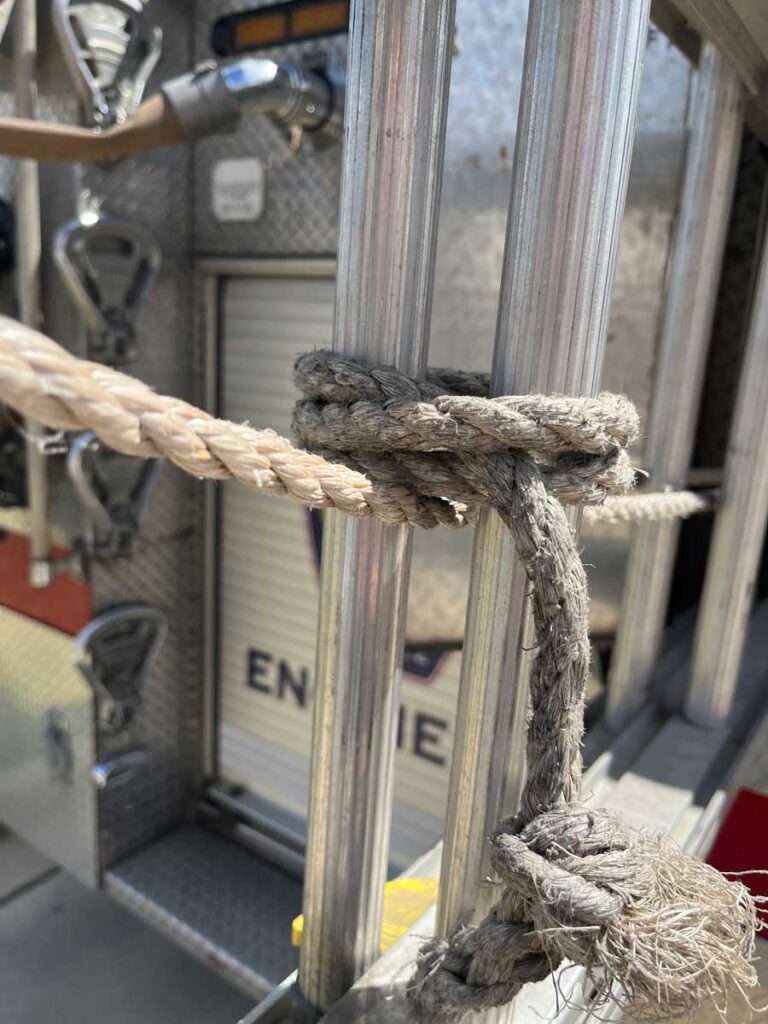
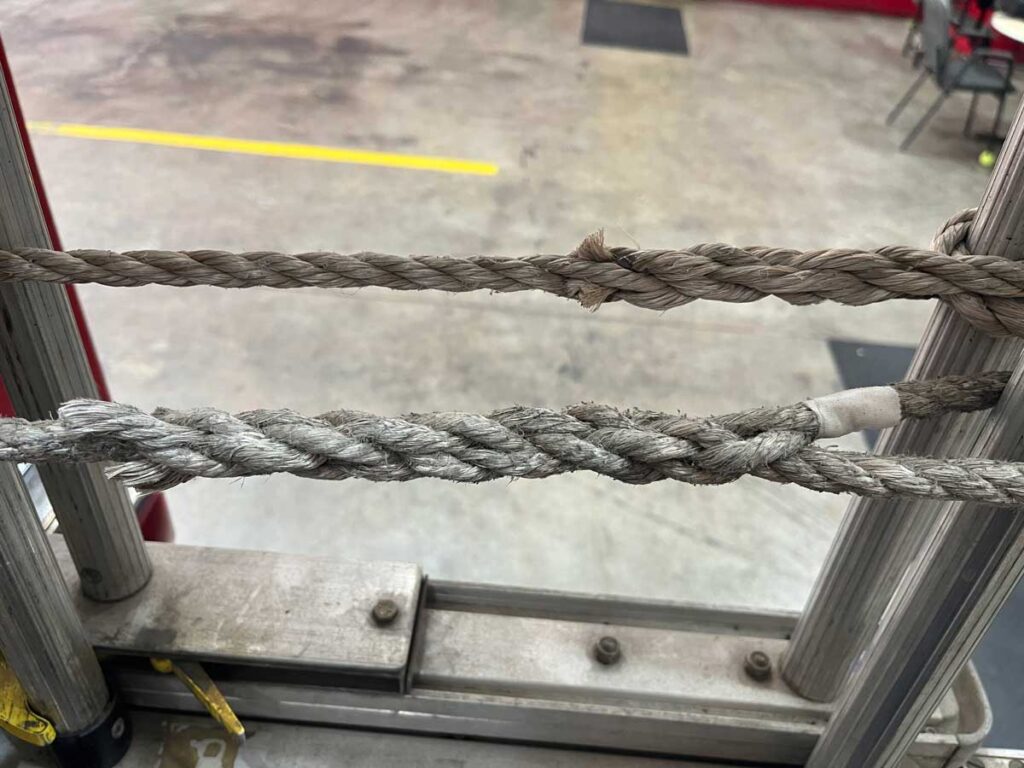
Ladders generally come from the manufacturer with a manila rope halyard. Some departments chose to replace this rope with ladder line, an aftermarket, synthetic rope used for halyards, although most continue to use the manila rope that comes on the ladder. Ladders are shipped with the halyard wrapped around multiple rungs before being tied off across both the fly and bed section (Photo 1). Often, departments will keep their ladders stored this way. When ladders are stored this way, it requires extra time to extend the fly section due to the halyard needing to be untied before it can be used. Other times you may find that most of the excess halyard has been cut away but is still tied off via clove hitch around both the fly section and bed section of the ladder (Photo 2). This setup has the same downside as mentioned previously, requiring the user to untie the halyard before it can be used.
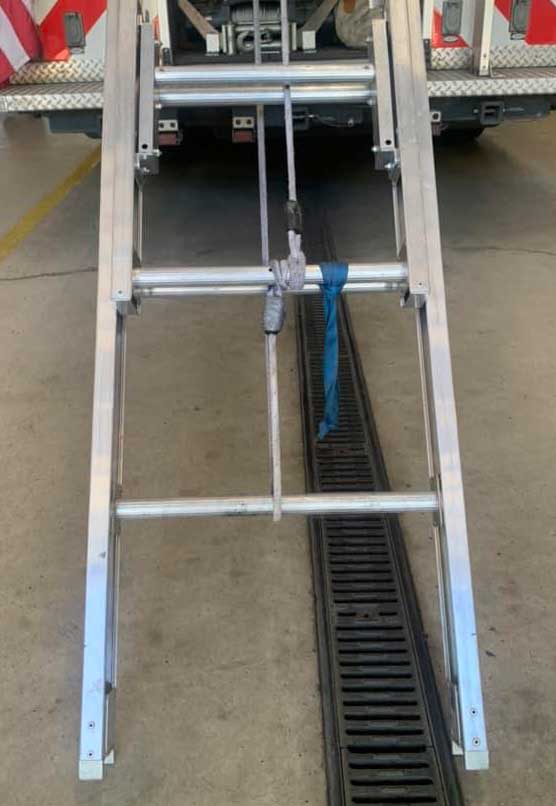
Some departments opt for what is called a “continuous loop halyard.” (Photo 3.) In this setup, the halyard does not terminate on the bed section but instead is run underneath the bottom rung of the bed section and terminates on the bottom rung of the fly section. With this setup, as the halyard is pulled and the fly extends, the halyard travels with the ladder and leaves no tail lying on the ground that needs to be secured. The downside to this setup is that it cannot be tied off to secure the fly section from falling.
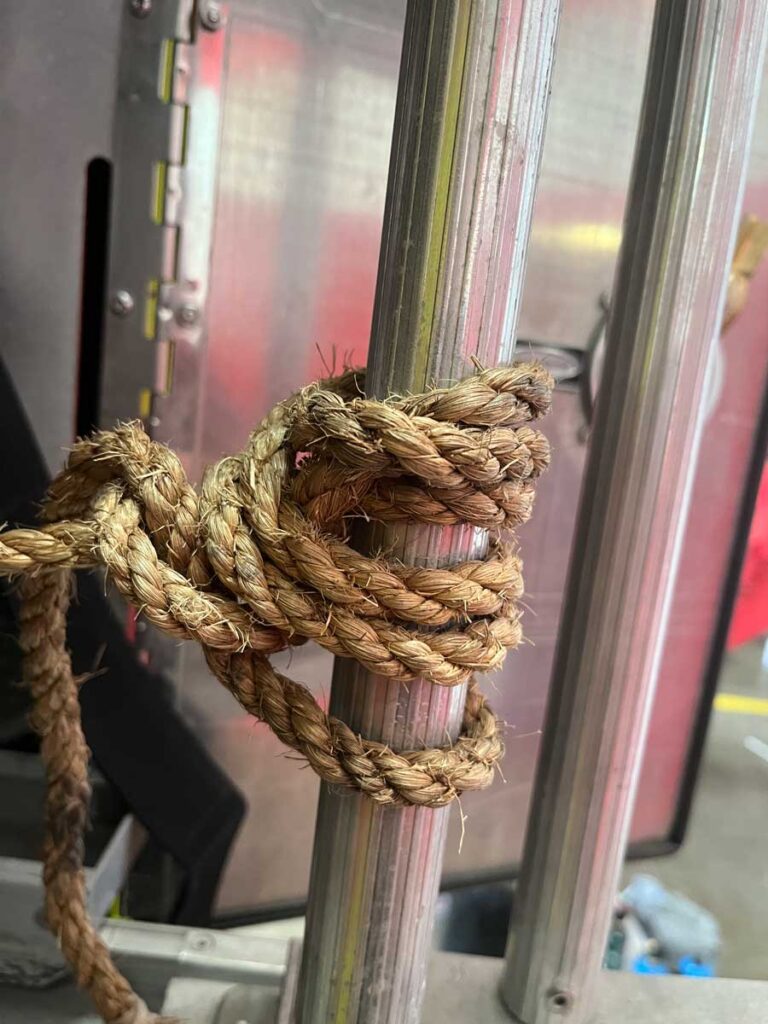
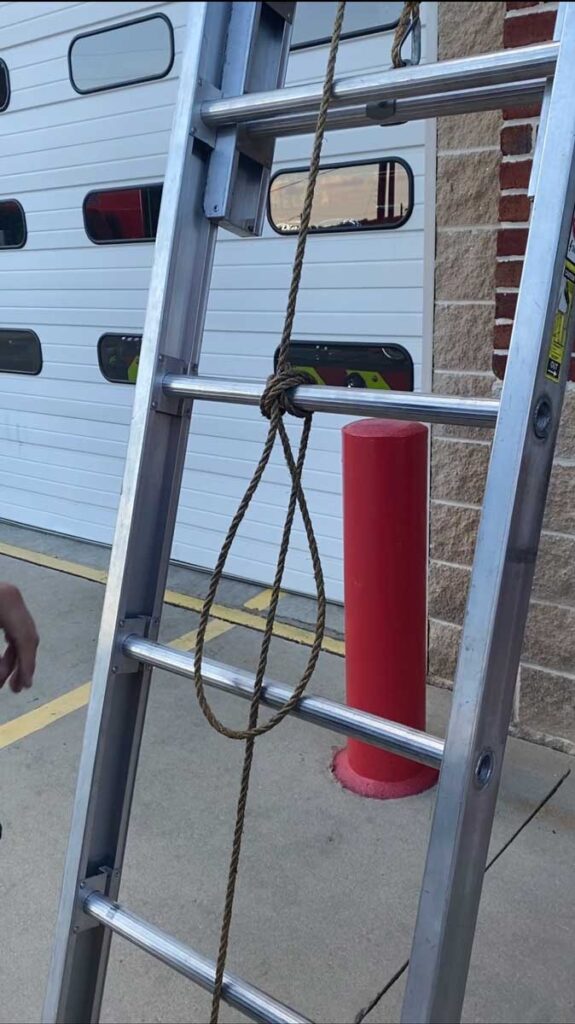
Another option, and the one that I find the best, is to have the halyard terminate on the bottom rung of the bed section. This is often referred to as a “closed loop halyard” and can be accomplished in two common ways. One is to tie the halyard to the bottom rung with a clove hitch (Photo 4). This is common but one downside is that a firefighter unfamiliar with the reasoning can untie the halyard and store it untied, causing the halyard to drag the ground when the ladder is carried. Another downside is that a firefighter may untie it and retie it back around the fly section and bed section together, as discussed above in Photo 2. A common “old school” skill is using an eye splice (Photo 5). An eye splice weaves the halyard back on itself. A firefighter can easily learn this skill with a piece of rope, a little time, and a video from YouTube. With the eye splice, the halyard is secured to the bottom rung of the bed section and cannot be untied on a whim by a firefighter that does not know any better.
So, when would we want to tie the halyard? Recruit schools across the country teach that if you throw a ladder, tie the halyard. This isn’t always necessary and sometimes close to impossible. An example of impossible would be an extension ladder with only a couple of rungs extended on the fly. This leaves little halyard to tie. Other times it’s not necessary or useful. I’ve yet to hear of a set of dawgs failing during normal use. If we are throwing a ladder for rapid intervention team (RIT) purposes, I would recommend not tying the halyard. For most of the country, realistically, we are lucky if we get one ladder per side of the structure. It is very possible that we may throw a ladder for RIT only to have a firefighter present at a different window. If there are any grade changes, the ladder may require adjustment, such as extending length to it. If the ladder is tied off, that will add extra time to repositioning and extending it. Another time that tying the ladder can be a hinderance is when performing vent-enter-search (VES). Often, firefighters will VES a room, exit the room, move the ladder, and continue the VES operation. Tying and untying the halyard adds extra time and steps to the operation.
There are two times that I recommend tying the halyard. First, when throwing the ladder to a presenting victim. A panicky victim wants to help you hurry up. Extra steps should be taken to make the operation as safe as possible. With an aerial rescue we extend and then lower the tip in. With a ground ladder rescue, we should lower the ladder in and finish with tying it off before you start to climb. A panicked victim may grab the top rung of the ladder and pull the ladder in towards them. This could potentially unlock the dawgs. When the ladder comes to rest against the building the pressure on the fly can keep it from collapsing, but once weight is applied to the rungs of the fly, it could come crashing down. It is true that tying the halyard will not keep a victim from pulling the fly section up and unlocking the dawgs, but it will keep the fly from crashing back down. An option that can be considered is to throw the ladder to the side of the victim, tie the halyard, and then roll the ladder into place.
The second time I would recommend tying the halyard is on a three-section, 35-foot ladder, which has two sets of dawgs, one for each fly section. It is possible for one fly section to lock in and the other section not to. It can be hard to spot both sets of dawgs, especially at night or when the tip is obscured by smoke. The dawgs may not lock for several reasons. One is lack of routine maintenance. Sometimes the dawg finger or hook can become stuck and not activate as it is supposed to. Another reason could be if the timing on the pulleys is not in sync. The sheave of the top fly pully may bind, causing the middle fly to move and the top fly to seize in place where the dawgs are between rungs. For this reason, I always recommend tying the halyard any time that a three-section, 35-foot ladder is thrown.
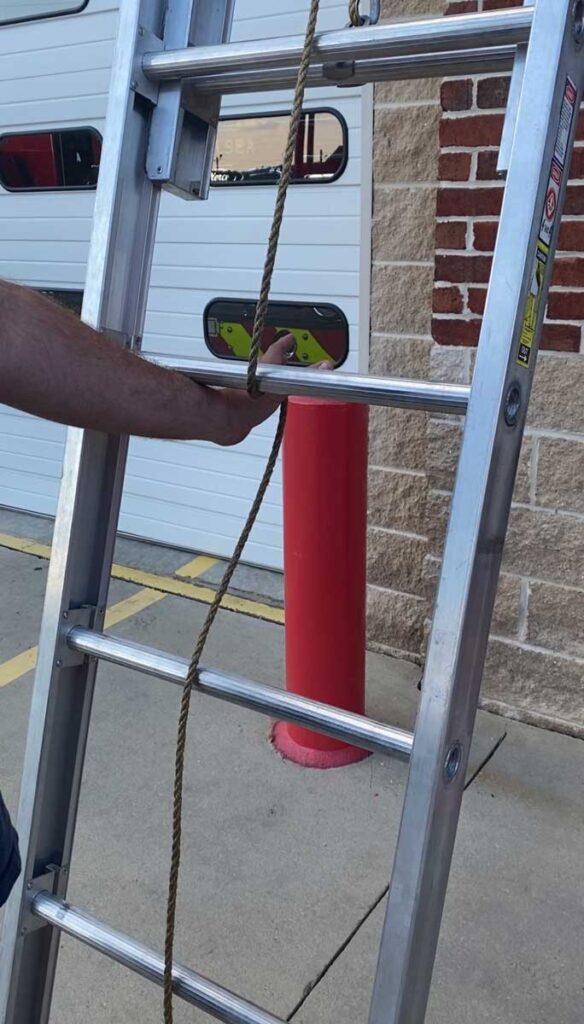
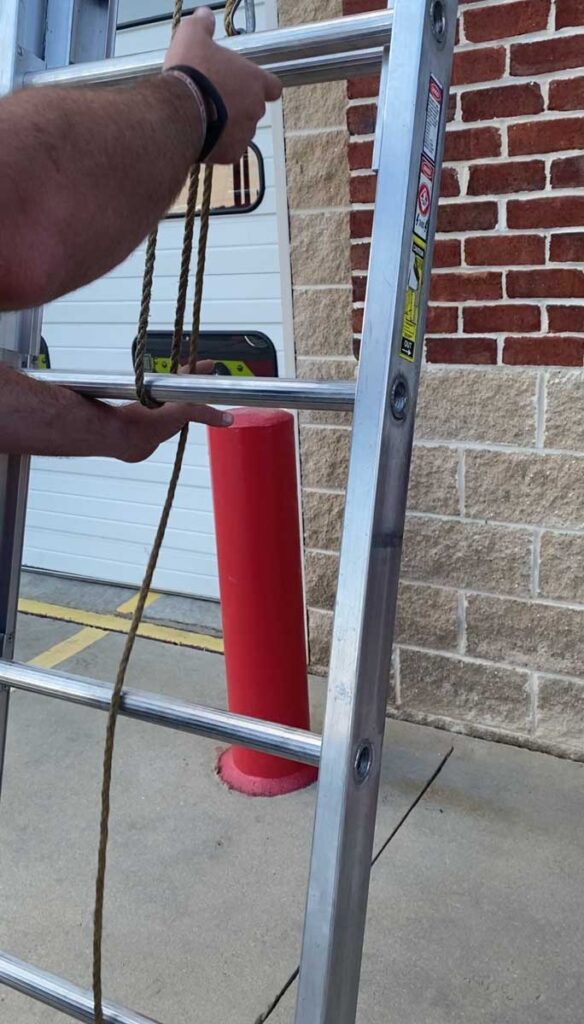

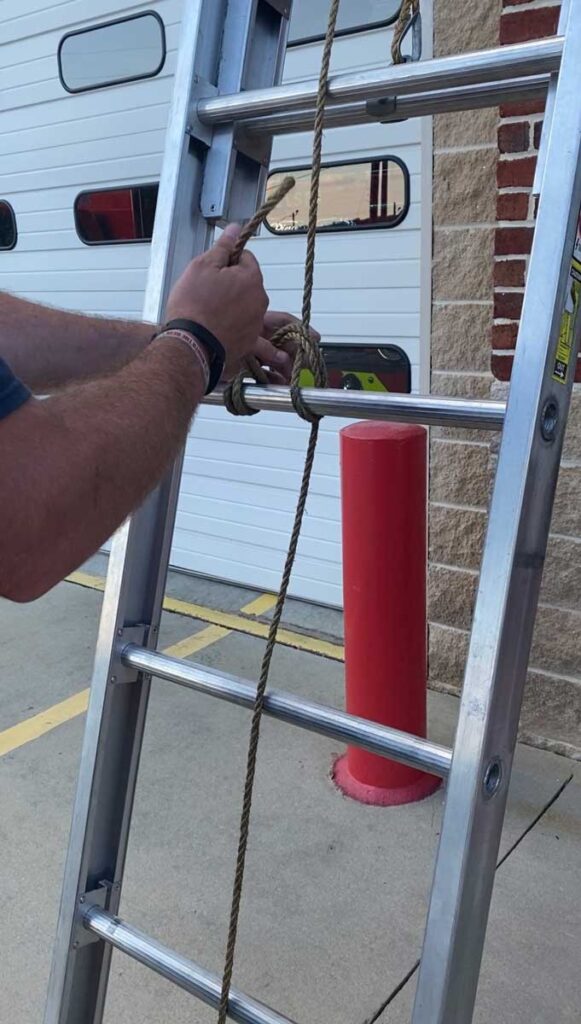
I’ll admit, when I graduated recruit school, I swore I’d never tie a ladder off, and that was strictly because I struggled making a clove hitch with a bight of rope. When you run a “closed loop halyard” you are left with a bight of rope for tying the halyard. Several years after I graduated, a simple, quick method of tying the halyard was shown to me. With practice, this method can be used to tie the halyard in two or three seconds. The key when using this method is to make big movements. If you attempt to do everything with as little rope as possible and keep your hands by the rung, the rope can get snagged on the cuff of your gloves or sleeve of your jacket. In the following photos, the ladder is still facing fly in after a single-firefighter throw and raise. The same thing can be accomplished from the back side if it is already fly out. Also, the pictures show a right-handed person tying. It can be accomplished left-handed by changing the steps. Start by punching the halyard underneath a rung with your left hand (Photo 6). Reach over that rung with your right hand and grab the bight of rope, pulling it to the right side of the halyard that’s coming down from the tip (Photo 7) . Pass that bight of rope into your left hand. Next, run your right hand under the bight of rope, over the rung, and pass the bight of rope under the rung into your right hand (Photo 8). Finish by pulling it through (Photo 9). Once finished, you have a clove hitch (Photo 10). The clove hitch can then be finished with an overhand safety if desired. One thing to note, a fully extended 24-, 28-, and 35-foot ladder can have lots of excess rope underneath. It is not necessary to fully pull all this rope through while making this knot. Use what length of rope you need. In this situation, I finish it with an overhand safety since the knot can sometimes be loose.
Whatever setup you go with for your halyard, know why it is set up that way and the benefits and tradeoffs of doing so. Whatever setup you use, make it quick to deploy, quick to move, and preferably able to be tied off when needed. Lastly, take care of your halyard and inspect it for wear after each use, changing it out when needed. Halyards are not tested as part of annual ladder testing, so keep an eye on it during weekly truck checks and ladder maintenance.
Clay Magee is an instructor with Magic City Truck Academy and a lieutenant with Birmingham (AL) Fire and Rescue. Clay began his career with the East Oktibbeha Volunteer Fire Department in 2004. He holds a bachelor’s degree from Mississippi State University and a master’s degree in Emergency Services Management from Columbia Southern University. He has been published in Fire Engineering and other fire industry media, and is an organizer of Deep South Fire Conference. He has taught hands-on training at the Alabama Fire College, various fire conferences, and multiple departments across the state of Alabama.

