Training Notebook ❘ By William Off
In any profession, being a problem solver is the key to being successful. In firefighting and emergency medical services (EMS) professions, our job is to see what is happening and to mitigate that incident.
- Maximizing Problem-Solving Success
- Problem Solving on the Fireground
- Developing a Problem-Solving Process
Becoming a great problem solver includes three important steps:
- Doing research.
- Reviewing standard operating procedures (SOPs).
- Educating yourself on relevant subjects.
Problem Solving: An Overview
Problem solving is important to do both on your own and with your company. And firefighting and EMS are both team sports—not individual. As a leader, you must develop an effective team of problem solvers to have a strong and successful fire company.
I have always tried to treat my fellow firefighters with compassion and with the goal of inspiring them to be the best. As a company officer or a training officer, you must develop a program that will set the expectations of your vision for the company. It will allow the members to gain a clear and concise understanding of the direction you envision for the company.
I have explained to my crews that if we are going to a fire, we could be assigned to any task on the fireground, and other companies will have their tasks. We learn these lessons through drills and training, and this is how we find out whether we can perform as a team. If we cannot perform as a team on a company level, how can we expect to perform as a team with the department?
As a new or veteran company officer, you may not know where to start. This is understandable, as you’ll find a range of experience levels and years of service among the members of your company. Let’s begin with what I call the Training Matrix.
Components of the Training Matrix
- Reviewing or creating SOPs.
- Writing lesson plans.
- Creating slideshows and presentations.
- Developing drills and training.
- Researching resources including UL FSRI; the National Institute of Standards and Technology; the Bureau of Alcohol, Tobacco, Firearms, and Explosives; and other updated resources.
- Using resources including Fire Engineering videos and magazines for training ideas.
- Educating yourself by taking classes, obtaining certifications, and attending seminars.
For all training and drills, refer to your department’s training guidelines. Set your drills up based on current SOPs, training policies, and tactical considerations. Perform them with all the instructor guidelines in your state, including having the following personnel at your drill:
- A safety officer.
- EMS.
- An instructor or drill ground level certified personnel.
When you hold a drill, it’s important that you establish a set of tasks you want the firefighters in training to perform. In your lesson, be sure to mention these tasks during the drill.
While you watch the drill, ask yourself whether the firefighter performed all the tasks. For example, Did the firefighter do tasks 1, 2, and 5 but skip 3 and 4? When you ask these questions, you are not micromanaging but ensuring they heard the lesson. I open all my training with the following line: “There are many ways to do this; I am trying to show you one way.”
Sometimes you’ll perform a drill to simply see if the firefighters are following the order you gave. Now, if a 15-year firefighter would rather put his gloves on before donning his face piece but the drill requires donning gloves after, he is not performing that task correctly.
You must know your audience when you speak or show a drill. This will show you that the firefighter understands the task at hand. Keep in mind that part of your goal is to avoid overwhelming firefighters with too much information at once or too many tasks at a time.
As the trainer, you know what you want to see and what needs to happen for that outcome. You may be surprised by who you can learn from. Sometimes it’s the rookie and sometimes it’s the more experienced firefighter.
Making It Stick
When you follow these steps, you’ll ensure that a new drill will stick with your crew members. You’ll also offer them a clear understanding of your vision.
- Explain it to them.
- Demonstrate it for them.
- Perform it with them.
- Let the crew perform the drill by themselves. This will help them see your vision clearly.
Important Lessons
As I was getting started in the fire service, my first captain and mentor told me one of the rules of firefighting is to never tell another firefighter a firefighting story. He said it in jest, but it taught me something: If I’m going to tell a story, it needs to include a real lesson. Experience is such a great teacher because we’ve all seen, felt, and tasted it. We’ve used our senses to know what was required to perform that task.
We know what our own mistakes have been—and how we’ve learned from them. We share these experiences for the benefit of the members of our company who haven’t had these experiences yet. Sometimes our learning comes from tragic fires from before our time or in other areas.
Focus on the Basics
As you get started with training, you’ll want to keep a few key points in mind. Here’s an overview.
- Start with personal protective equipment (PPE) and what to take with you when you get off the apparatus.
- Take the department’s SOPs for riding assignments and PPE requirements.
- If you don’t have SOPs in your department, create them. As an instructor, you cannot write a lesson plan without an SOP. [My department calls these standard operating guidelines (SOGs).] In my department, SOG 706 gives riding assignments for engine and truck companies. In SOG 710, there is a page in a spreadsheet format that names the type of call and what to wear.
The drills included here will help you train your company and get everyone on the same page.
Opening Drill
For the first drill, which is a Firefighter 1 skill, start by reviewing SOPs. Then follow these steps with your company:
- Have the company go over donning and doffing PPE, using one-minute and two-minute drills.
- Go over the self-contained breathing apparatus (SCBA) pack and bottle: How does it work? What are the parts?
- Get everyone familiar with the equipment. You can make this fun by turning it into a game.
- Who is the quickest?
- Who can identify the most parts correctly by name?
Incorporating friendly competition into training will help keep everyone engaged. Announce that the last person to answer a question or complete a drill must take the trash out or wash the dishes. You’ll see everyone’s competitive side, and they’ll be more likely to remember what they’ve learned.
Skill Building
Once you know which skills are new (or unknown) to your crew members, you can teach them. Here are a few pointers:
- If any members of your crew are new to using a chain saw, demonstrate for them using a sheet of plywood and some 2 x 4s.
- If they’ve never used a K12 saw, bolt some metal pieces together and have your crew members cut through it.
- If you’re doing a vehicle extrication drill, use the windshield cutter and use a pedal cutter. Try different ways to stabilize the vehicle.
- Use your apparatus as a teaching tool: It’s a giant toolbox! Show your crew members how to use all the tools with real, hands-on demonstrations.
Take every opportunity to train or educate on the equipment.
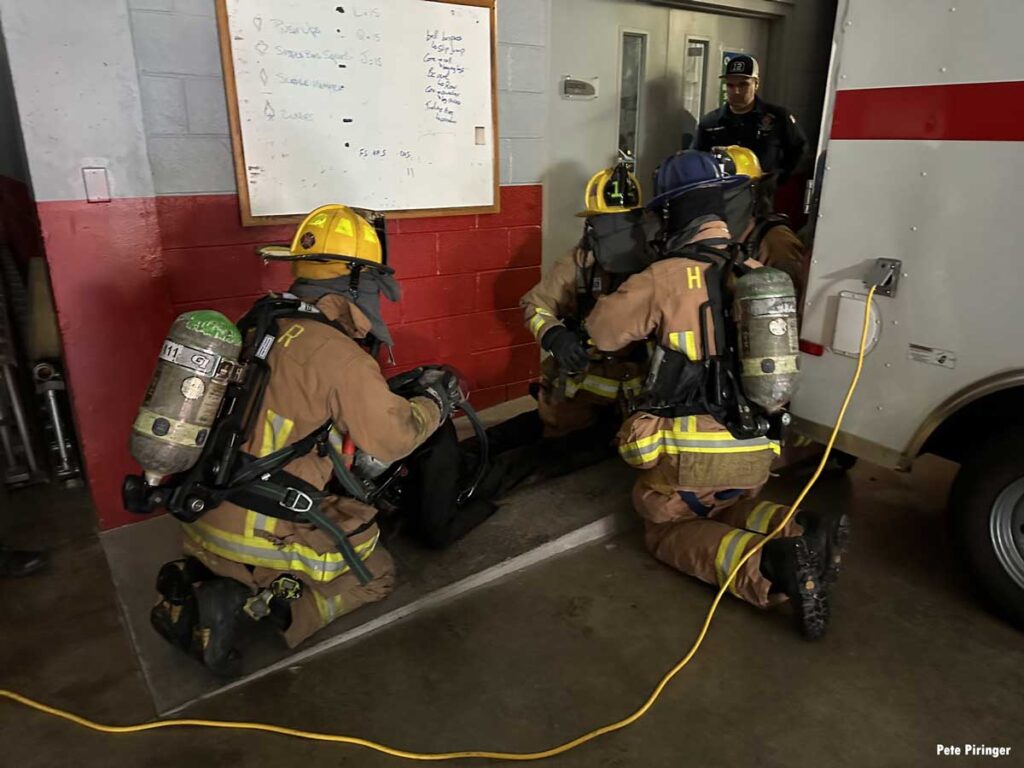
Riding Positions
When you need a drill that focuses on riding positions, follow these steps:
- Provide the company with a scenario.
- Direct them to grab the tools and equipment they’ll need for that specific task.
- Have them exit the apparatus.
Hoseline Deployments
The next drill is hoseline deployments. Once again, you, as the training officer, can touch on multiple SOPs and skills. Use these steps as a guide:
- Have the crew start on the apparatus as if they are responding to a house fire.
- Have the operator perform proper apparatus placement.
- Assess the following:
- Did the operator pull past the dwelling, leaving room for the ladder?
- Did the crew get off the apparatus with the proper equipment?
- Did they deploy the correct line to the door? (And did they do it accurately?)
- Did they bring the couplings up so that the hose stayed in line with door? (This would depend on length of the hose or size of the dwelling.)
- Did they don their PPE efficiently and properly?
- Did they call the operator for water?
- Did they bleed the air out of the line, check their pattern, and check the reach or distance of their water before entering the dwelling?
- Have them advance the hoseline to a designated area acting as the fire room.
- Assess the following: Did the crew position themselves on the hose to maneuver it around corners and obstacles?
- Direct them to perform a search of the room.
- Perform fire extinguishment.
- Give a condition, actions, needs (CAN) report to the incident commander.
- At the end of the drill, when everything is back on the apparatus, go to a hydrant and fill up the tank.
These skills and tasks touch on SOPs and skill sets. In this drill alone, the crew has performed multiple proficiencies. And you can break it down by individual skill, depending on individual skill sets. (Open with individual skill lessons as needed.) Once you’re finished, you’ll see that you’ve covered the following topics:
- PPE.
- SCBA familiarization.
- Donning SCBA.
- Radio communication.
- Pump operations.
- Search operations.
- Performing a CAN report.
- Hoseline advancement.
- Hydrant operations.
The “Bring It to Me” Drill
When your team is up for apparatus familiarization and some more friendly competition, introduce them to the “Bring It to Me” drill. Crews will compete for the best time. Here’s how it goes:
- Start by reviewing SOPs.
- Provide your crew with a scenario of a call.
- Before starting the drill, give the crew two minutes of discussion time.
- Have the firefighters enter the apparatus.
- When the air brake sounds, the timer starts.
- Direct the crew to bring all the equipment needed to perform the task to a cone or other predetermined location. (The task could be bringing a fan to the door, a person trapped in a car, or roof operations.)
- Make sure they have all their equipment on their person or stage at the cone.
Teachable Moments
It’s important to remember that when your crew is learning and practicing a drill, it’s possible that some of the equipment will be new to some people. I had an experience once during a roof operations drill at the academy where the firefighter with the saw had never used a saw to cut wood before. Now, here we were on a roof simulator with a firefighter who had never learned how to use a saw. This was an opportunity, not a problem.
Some experienced firefighters may have developed problematic, hard-to-break habits. As the training officer, you have the opportunity (and responsibility) to teach someone with no experience how to use a saw the right way.
Making It Stick
Possibilities for drills are limitless. No matter what the drill is about, always perform an after-drill conversation. Here are some after-drill conversation topics that may help you improve your trainings for next time:
- Listen to what your crew liked.
- Find out what they disliked.
- Think about what you can change based on what you’ve seen in a drill.
It’s easy to watch a video that teaches you how to complete a particular task, but performing that task really shows its difficulty. As you repeat drills, you’ll develop muscle memory. Instead of thinking about your gear or where the equipment is, you’ll be able to shift your focus to the fire or that rescue. Drills will also help you know what your crew is doing, how they’re doing it, and how long it should take them to perform these tasks.
WILLIAM OFF entered the fire service in the Hammonton (NJ) Fire Department (2006-2013), holding positions of firefighter, lieutenant, and EMT. He then joined the Winslow Township (NJ) Fire District (2012-2023), where he held the positions of firefighter, lieutenant, captain, instructor, and EMT. Off was also an EMT in Atlantic City, NJ (2011-2017). He obtained his New Jersey Practical Nursing License in 2017 and currently works as an agency nurse. He joined the Winslow Office of Emergency Management in December 2022. Off currently holds certifications including Firefighter 1 and 2, Fire Instructor 1, Fire Officer 1, and Incident Management Level 3 as well as various others in fire, EMS, and OEM.

