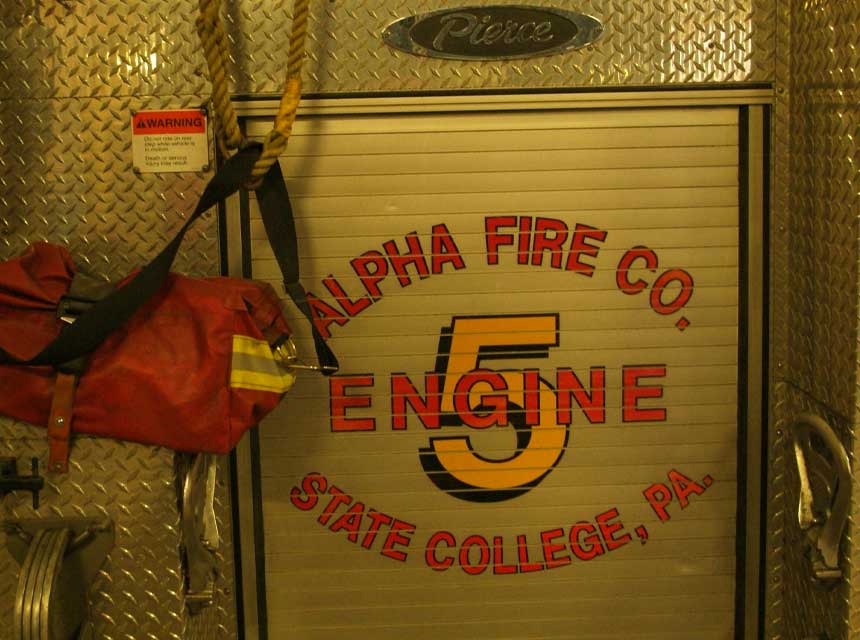
Securing our water source requires some vital pieces of equipment, especially when securing a hydrant. Most of our fire apparatus that carry large volume supply hose will have a hydrant kit of some kind nearby. As you can see in the two photos below, there are different ways of preparing the hydrant kit so that it is ready to go with the hose when it is pulled off the rig.
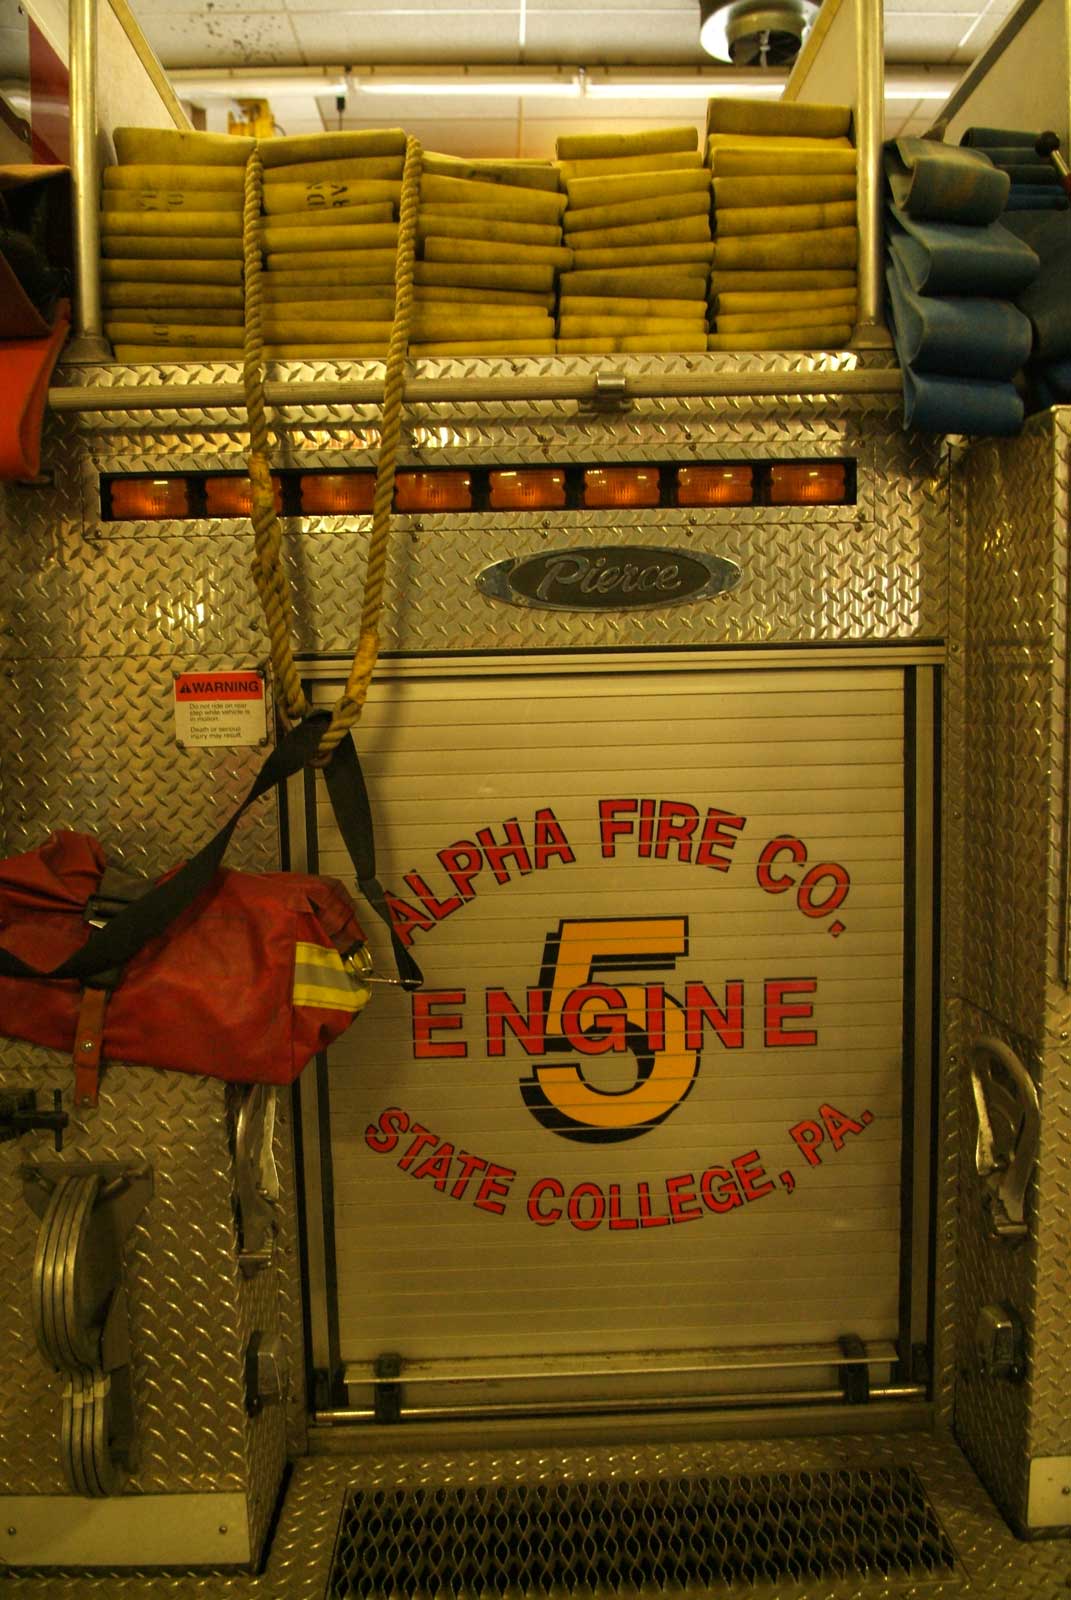
No matter which way is chosen by your department, it needs to be easily accessible and easily carried by one person when tasked with that job. Weighing down the kit with unnecessary equipment will only add to the frustration level.
What needs to be inside the hydrant kit? The kit should contain some basic equipment such as a flashlight, gate vales for both 2 ½- and 5-inch (if applicable), a 45° elbow, a hydrant wrench, a spanner wrench, thread to Storz adapter, and a mallet. Other pieces may include different thread adaptors for various fire department threads, such as the Pittsburgh 6 thread, which is unique to one certain location only. When running mutual aid calls, these adapters are important to ensure continuity. Whatever the local needs and issues are, your hydrant kit needs to address it with the proper and required equipment.
RELATED FIREFIGHTER TRAINING
Are You Using the Hydrant Kit to Maximum Advantage?
HOW RELIABLE ARE PRIVATE FIRE HYDRANTS?
Andy Fredericks: STANDPIPE SYSTEM OPERATIONS: THE STANDPIPE KIT
When you have been assigned the task of securing the hydrant, there is a great responsibility placed on you to complete the task. You will need to bring your tools with you to help in setting up the hydrant for water delivery.
A common place for our tools to be staged seems to be the ground around the hydrant. This area will be a bad choice to place your tools or appliances. The ground area around hydrants can be a black hole sometimes with tall grass, wetlands around it, mud, snow, ditches, and even darkness at night. With all these common features present at most hydrants, losing your tools can be extremely easy. It does not take long for a gate valve or a hydrant wrench to go missing when thrown aside in a hurried operation.

The best place for your tools will be either on top of the hydrant or right at the base of it. As you can see in photo 3, the hydrant wrench is always placed on top of the stem and kept there along with the other appliances needed at the base. When taking off the caps, place them also at the base of the hydrant. The base of the hydrant is a good landmark for your tools and appliances, ensuring that they will not get lost.
A simple training drill is to review the contents of the hydrant kit, review/practice its deployment, and practice equipment placement.
Equipment needed: hydrant bag, fire apparatus, dry barrel hydrant
Goal: Being assigned the hydrant man, practice securing a hydrant for a water source.
Drill:
- Review the contents of the hydrant kit to ensure that what’s in there is relevant and current for department operations.
- Place the hydrant kit back on the truck. Park the truck by a hydrant and have each member take turns securing the hydrant.
- Leave the rear jumpseat when safe to do so, grabbing the prescribed equipment needed to secure the hydrant.
- Stage a section of high-volume hose along with the hydrant kit; wrap it around the hydrant with a hand signal telling the driver to drive to the fire.
- Take the hydrant wrench out of the hydrant kit bag and place it on top of the hydrant.
- Secure the hydrant as per your department’s standard procedures using the equipment from the hydrant kit.
- Place the caps of the hydrant valves at the base of the hydrant.
- Secure the high-volume hose to the hydrant and wait for the command to send water.
Key points:
- Make sure the hydrant kit has the relevant tools/equipment needed inside
- Make sure the hydrant kit is not too heavy.
- Place the hydrant kit somewhere on the fire truck that is easily accessible.
- Always place the hydrant wrench on top of the hydrant.

Mark van der Feyst has been in the fire service since 1999 and is a full-time firefighter in Ontario, Canada. He is an international instructor teaching in Canada, the United States, and India, and at FDIC. Van der Feyst is a local level suppression instructor for the Pennsylvania State Fire Academy. He is also the lead author of Residential Fire Rescue (Fire Engineering Books & Video).
MORE MARK VAN DER FEYST
Firefighter Basics: Flat Roof Ventilation, Part 2
Firefighting Basics: Positioning Fire Apparatus, Part 1
Firefighter Basics: Flat Roof Ventilation, Part 1

