Fundamentals of foam concentrate systems for engine company operations
All photos by author
Recently I was asked to lead a class on using foam for a new recruit firefighter class, which gave me the chance to review the topic myself. Foam is not as popular a topic to instruct on compared to hose work or ladder work, but it is important nonetheless.
Foam has been an integral part of the fire service and has a variety of applications. Notably it is known to be used for vehicle fires and Class B liquid fires, but now has capabilities to be used for Class A and wildland fires as well. In this article, let’s review foam concentrate systems as opposed to compressed air foam.
Most fire trucks today are equipped with foam systems where automatic mixture and discharge of a foam product is produced. Even though most fire trucks will have this type of system, what about the trucks that don’t have one or when the onboard foam system itself stops working…how do we produce foam?
We must go back to the beginning days of foam production, where firefighters used a foam eductor combined with or without a nozzle attachment. By using these devices, we can produce a finished foam.
RELATED FIREFIGHTER TRAINING
The nozzle attachment is designed to produce a thicker finished foam by grabbing more air into the water stream to help aerate the mixture. The thicker the foam required, the more aeration is needed along with concentrate of foam product. The choice to use a nozzle attachment is up to the fire department based on the operations undertaken. Every nozzle used in the fire service will produce a finished foam product, even a smooth bore nozzle.

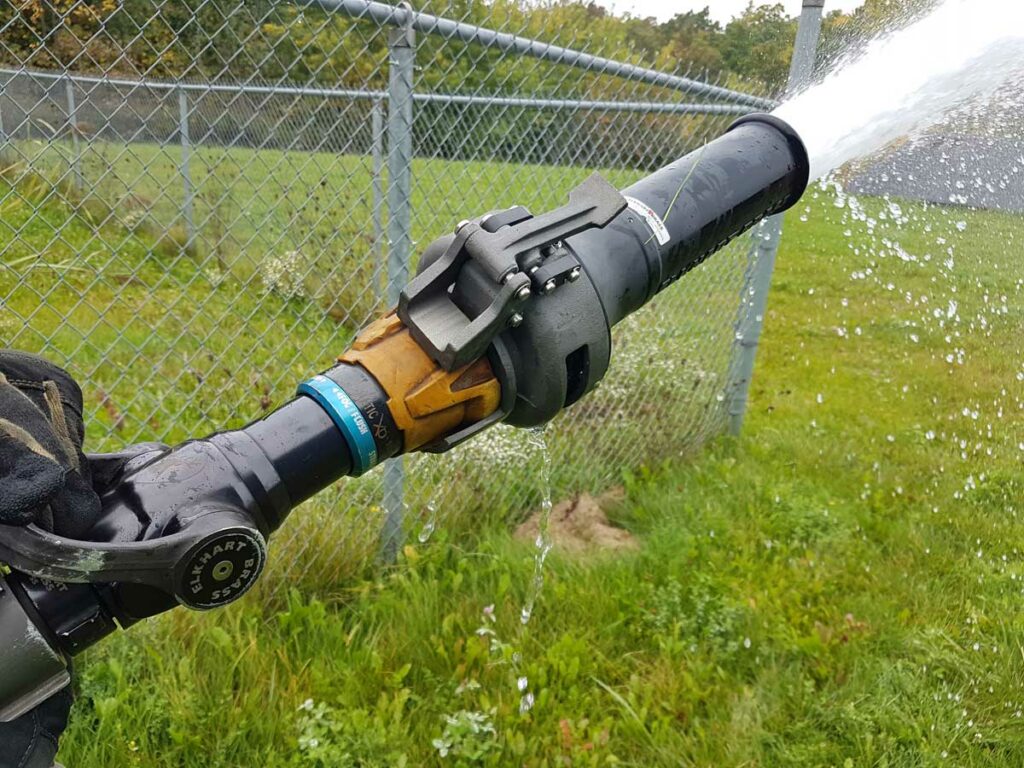
In photo number 1 we can see a smooth bore nozzle flowing water producing a solid stream. With this solid stream, we can produce a finished foam by either deflecting the stream onto the ground or banking it off an object or by pointing the stream up to the sky to create a rain down effect of the stream. By using one of these three methods, we can produce a finished foam for both Class A and B fires.
In photo 2 you can see a narrow fog pattern being used. With this type of pattern or nozzle, finished foam will be produced in the same fashion as mentioned above, with the added benefit of more aeration being produced. Add to the combination nozzle a foam tube as seen in photo number 2 and firefighters can produce a much thicker finished foam. This will be achieved by drawing in more air from the sides to mix with the water and foam concentrate.
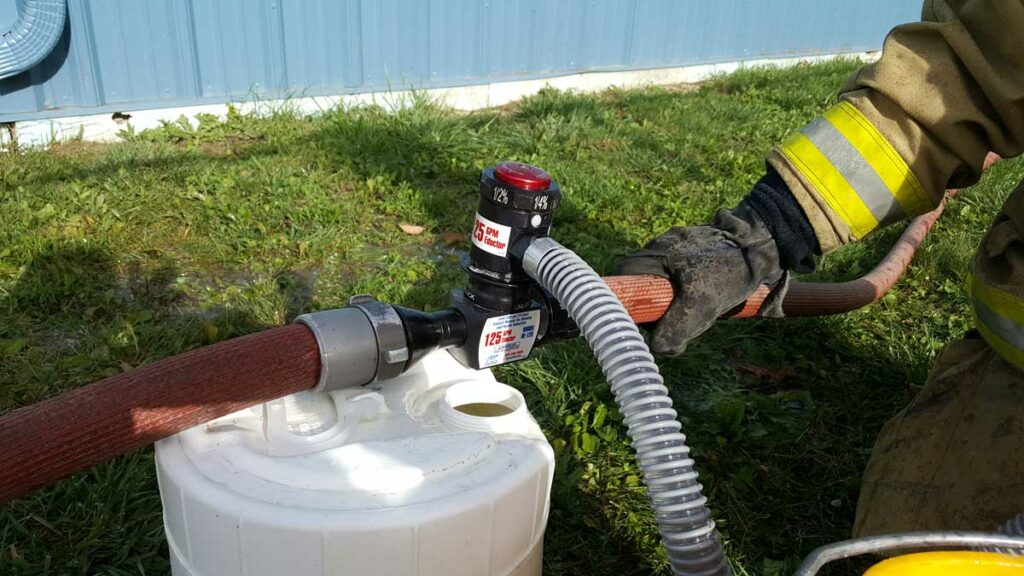
The eductor is the key piece of equipment needed to make foam. It is used to mix both the foam concentrate along with the water so that it can then be aerated at the nozzle. In photo 3 you will see an example of such an eductor.
The eductor will sit on top of the foam pail or can be attached to the pump discharge directly with the wand inserted into the foam pail. The position of the eductor in the hoseline is also important, as it must be within a certain distance from the nozzle (the general rule is within 100 feet of the nozzle). Depending upon how much hose has been pulled and is being used, the eductor will be positioned no more than 100 feet back from the nozzle.
Why? This is because of the higher pump pressure that must be used to make the eductor work properly. The pump discharge will be higher than normal automatically, not accounting for friction loss of the hose lengths added from the pump panel out. The higher pressure is needed to push the water through the hose towards the eductor, where it will decrease down in size to a ½-inch diameter size hole and then back to the normal 1 ½-inch (38mm) diameter size opening. This decrease in the diameter of the eductor creates a Venturi effect, which produces a vacuum drawing up the foam concentrate into the hose line.
The foam eductor needs to be set to the proper percentage for foam solution added. At the top of the eductor is a dial which allows the user to select the proper percentage – just turn to the desired amount and start flowing water. Once flowing, the foam solution will be used up. Depending on the percentage being used, it can go quickly, so keep a watchful eye on the level of the foam and be ready to switch out the wand of the eductor into a new foam pail. You will want to have multiple foam pails in one area right by the foam eductor set up so that quick changeover can be conducted without interrupting the operation.
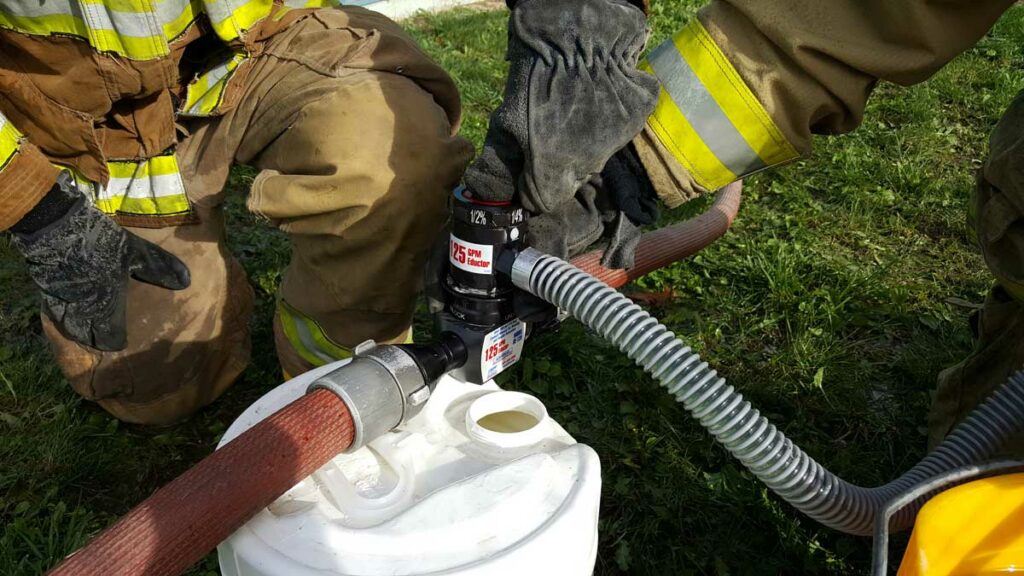
Once the foam operation has been concluded, you must flush the system. This can be accomplished in one of two ways: using a pail of clean water or the flush button on the eductor. In photo 4 you will see the flush function of the eductor being used. Simply push the red button down and keep flowing water through. If using a pail of clean water, put the wand into the water pail and keep flowing water until there is no more foam being produced.

Mark van der Feyst has been in the fire service since 1999 and is a firefighter with the Fort Gratiot (MI) Fire Department. He is an international instructor teaching in Canada, the United States, and India, and at FDIC. He is also the lead author of Residential Fire Rescue (Fire Engineering Books & Video). He can be contacted at Mark@FireStarTraining.com.

