The fire service can and must do a better job of teaching firefighters how to search. Most fire academies use textbooks that don’t accurately represent what we do. They preach to always touch your partner, crawl along walls, and search using a hoseline or tool. Those of you who have been on the job for any length of time quickly realize this isn’t how we search on the fireground. As if what’s being taught isn’t bad enough, the way it’s being taught is bad, too. Telling the students how to do it and then sending them into an empty building with blacked-out masks sets them up for failure. Let’s look at some ways we can do a better job of teaching search to everyone from new recruits to members on the floor.
When teaching search, first define what winning looks like. Wins equal going inside, occupying space, and making a rescue in a timely manner. Willingness to go inside comes with being confident in your skills. When we are looking for a civilian trapped inside a structure, we are looking for a human being—five to six feet tall and 100 to 300 pounds. We aren’t looking for a hidden Easter egg. So rather than being self-conscious about how good we are at searching, we need firefighters to be confident and simply go inside and occupy space. Occupying interior space at a fire equals the opportunity for grabs. Getting to this mindset comes through training. Here’s what modern instruction should look like for residential primary search.
Classroom
Traditional teaching methods have centered around objective-based learning, in which the instructor presents information and the student retains that information. The military has begun to adopt a style of education called “outcome-based learning,” in which the focus is on the student’s knowledge rather than the instructor’s information. The goal is to present information and skills that build on each other, with the end goal of allowing the student to make decisions in a complex and dynamic environment rather than memorizing information. The information the instructor presents sets the stage or provides background as to why and when certain decisions are made rather than independent pieces of information. The search classroom session should focus on the “whys” of search and the big picture. Addressing these items from the start helps to show how all the skills and techniques work together on the fire scene to accomplish the goal of rescue and incident stabilization.
Following are topics for discussion:
- Issues that derail us from our mission of search, including the following:
- Complacency: I won’t ever get a chance to make a grab. (Tell students: More than 10 grabs are made every day; your time is coming.)
- Lack of confidence: How we build confidence and train better.
- Lack of understanding how everything works together to accomplish the goal.
- Lack of standard operating procedures (SOPs) or a system that supports search. (Give examples of good, simple SOPs that support the mission.)
- Understanding how time plays into the success of the incident. Most successful rescues happen within the first six to 10 minutes of the incident.
- Understanding the plays we may call based on the location of the incident and resources that we have coming.
- Hasty/dirty search (engine search).
- Oriented/split search.
- Vent-enter-search.
- Addressing large-area search and commercial search and addressing the latter in a different training session.
The Training Location
Training locations are tough for many fire departments. The department may not have a place to train. In this case, the training happens in the station or in the bay. This is tough because the training location does not resemble the buildings that we are going into to search. Or, the department does have a training center, but it isn’t well laid out.
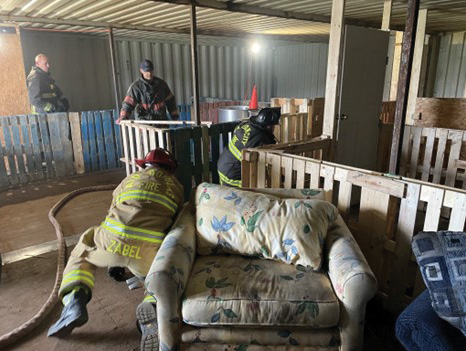
In either case, we must spend some time to find a location—find an acquired structure or build out a training space using pallets or framing out 4 × 8 panels. When we build out a location, we try to have it mirror a small house or apartment, with a front door that opens to a common area, a kitchen, several bedrooms, and a bathroom. If you are doing this, be sure to build common features found in your area. Pay attention to size and layout of rooms, door location and swing, floor coverings, and furniture. Place props strategically so you can search with bunk beds, large beds, cribs, bathrooms, closets, and more. If you are training a larger group of students, build props in different locations and rotate students. You can be as simple or as elaborate as time, space, and your budget allow. Even if you have a good area in which to teach search, it might be worth your time to build out a teaching area that students haven’t seen before.
Skill Stations
Think of these stations like those at your kids’ sports or gymnastics practice. Students rotate through different stations, and they are the subsets of what you will put together later. The main skill stations we include when teaching search are as follows:
- Communication. We need to understand what needs to be said in a fire and what doesn’t. Some fire schools and instructors teach to call out everything. They want to see you can create a visual map; while this is beneficial, we don’t want to teach people to call everything out. It just creates additional and unnecessary confusion between rescuers. When you can’t see and you add dense smoke, understanding what is said takes brainpower. We need to save that brainpower. We do, however, want to establish what is important to communicate.
- Calling out for a victim. Once you call out, you need to be still and silent to listen for a response or a cough. That response is a fast pass to the victim.
- Having the officer lead the search. This allows for one-way communication from the officer to the firefighter. What is said inside should be short, concise, and confirming what we should already be predicting. Go left, go right, search this bedroom. When firefighters lead, especially junior members, they need to read the situation and conditions, then communicate them to the officer. The officer needs to receive and process that information and then give the firefighter direction. This is too much communication; leaves too much room for error; and, at the very least, takes precious seconds that belong to the victim.
- Calling out a victim found. We know what “Mayday, Mayday, Mayday” means. When it comes to finding a victim, we should be so clear. “I’ve got a kid” sounds a lot like “I’ve got a crib.” “I’m on wall one” sounds a lot like “I’ve got one.” The examples are endless. “Victim, victim, victim” has become the gold standard for search. Use it!
- Progress. If the officer asks the firefighter, “How are you doing?” or “Where are you at?” what does this tell us? Specifically, the answer can be good or worthless. Consider “good” as an answer. What does this tell you? Nothing. What if instead you answer, “Wall 1.” This tells me you’ve just started the search of that room. “Wall 3 or 4” tells me you are just about done. “Over here” as an answer is just as bad. If I could see you, I wouldn’t ask. If I am visualizing the room and you answer “2-3 corner,” I can visualize exactly where you should be.
- Moving. Tripod, coordinating moving with a tool, and where to leave the tool.
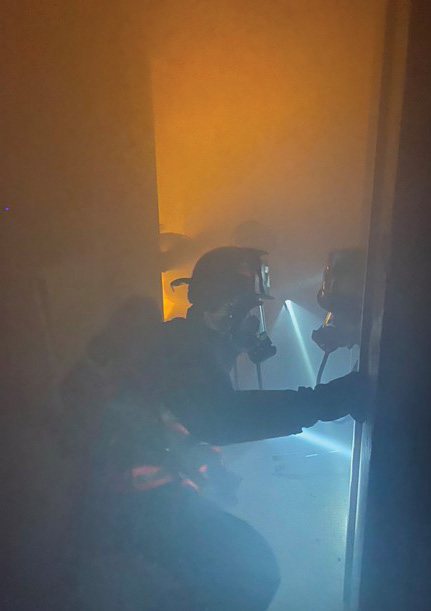
- How we move and what tools we take are important. We like to teach to take one tool with you. We need to let folks know that if they can see the floor, they can move in a walking, low fashion, staying under the smoke. If you can’t see the floor, then you can’t see a victim on the floor. You need to have them practice staying low and moving. For this, we teach the tripod crawl. It keeps your head up; it’s easy to turn and look behind you; and, when you keep your front foot out, it helps prevent going headfirst into a hole or stairs. Like with all skills, we like to show it and then let students do it. They need to practice the tripod as a singular skill so you can make any corrections to form before you add stimuli. I like to have students do this and try switching legs. Don’t move on until this skill looks comfortable for your students. Be mindful during the scenarios, especially when students get tired, they will likely default back to the baby crawl. Point this out in the skill station and then again if you see it happening in the scenario (once the scenario is over). Show them options for when they need to crawl over things or when the path through the house is narrow.
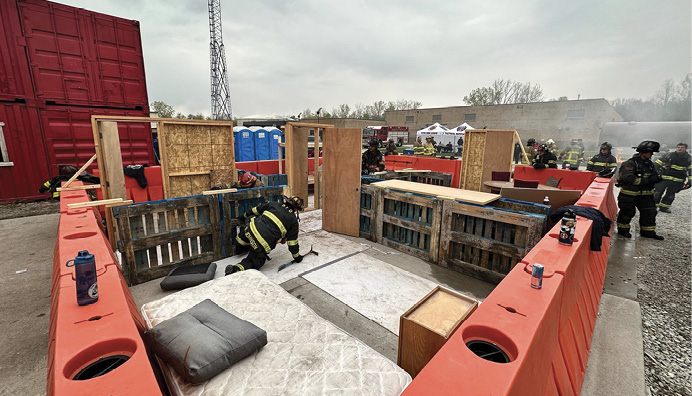
1. Build out a teaching area using Jersey barriers, pallets, doors, and furniture. (Photos by author.)
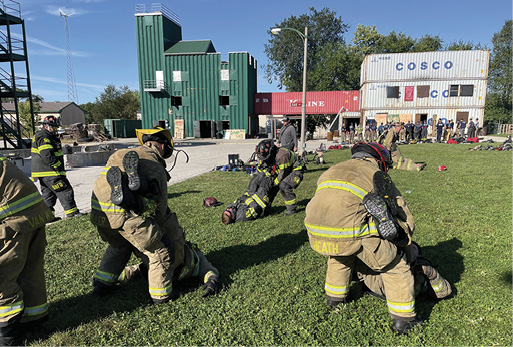
2. Drags skill station.
3. Window lift skill station.
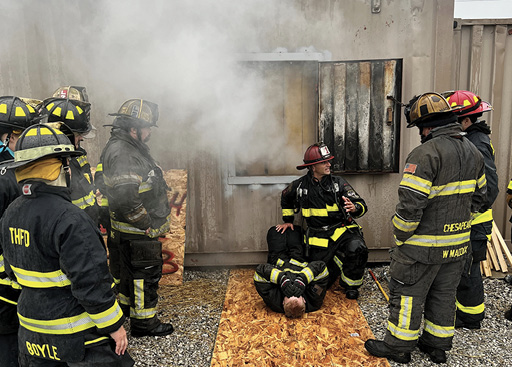
4. An interactive demo and explanation.
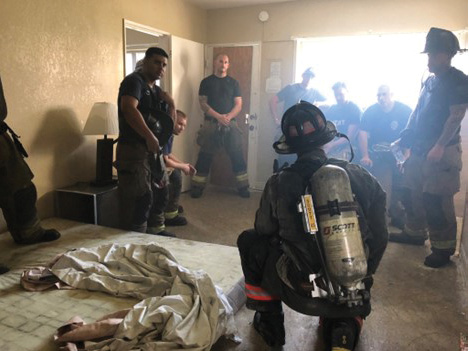
5. A student walk-through.
6. Make scenarios look realistic from the outside.
A big portion of the walk-through centers around speed and coordination of the rescuers. Think of it as the choreography to a dance. We need to know what we’re each going to do so we aren’t getting in each other’s way. I find it funny that every time I bump into someone in a fire, we tend to ask who it is and what they are doing. It has no bearing on our task and just slows us down. Again, this steals time from the victim and we need to finds ways to avoid it.
The next part of the walk-through phase covers victim rescue. I like to borrow the time/distance/shielding concept from hazmat. If we can limit a victim’s time in the fire; create and keep distance between the victim and the fire; and shield, when necessary, we are doing good. A major concept of victim rescue is to do no harm. To illustrate, this we ask: If we find a victim in a back room and crawl through nasty, hot, smoky conditions to get to her, should we take her out the way we came in or come up with another plan? Options include window removal, protect in place, and go out the way we came in. With all options, we need to weigh the conditions where we came from, conditions where we found the victim, and the time exposed to heat and fire.
We also talk about looking for a second victim where we found the first one. People don’t want to die alone. There is a high chance that on a multiple-victim fire, they will be close to one another.
The other point we try to highlight is how to communicate where you left off in a search if you have to remove a victim. The consensus at this point is that if we can pass a victim off to another crew or the attack team (once the fire is knocked down), we can finish our search. We know where we have been and where we need to go. This speeds up the “all clear” benchmark, and time is the name of the game.
The second part of the demo walk-through is to allow the students to pair up and mimic what they just saw. We allow them to do this in minimal PPE. If they can’t do it or understand it in helmets, pants, and gloves, then they surely will not get it in full gear or with added stimulus. We ask the students to go through as they would for real. This usually takes no more than three to five minutes per team, and it often leads to questions and highlights things we didn’t cover adequately. This is the time when they take the individual skills that they practiced and the interactive demo and put it all together. They visualize what is supposed to happen and we take an approach, “If this, then ….”
Depending on the time frame and goals for the class, a separate demo session can be done for each of the following search skills: hasty/dirty search, oriented/split search, and vent-enter-search.
7. Painting a light orange can mimic what a fire looks like to the students.
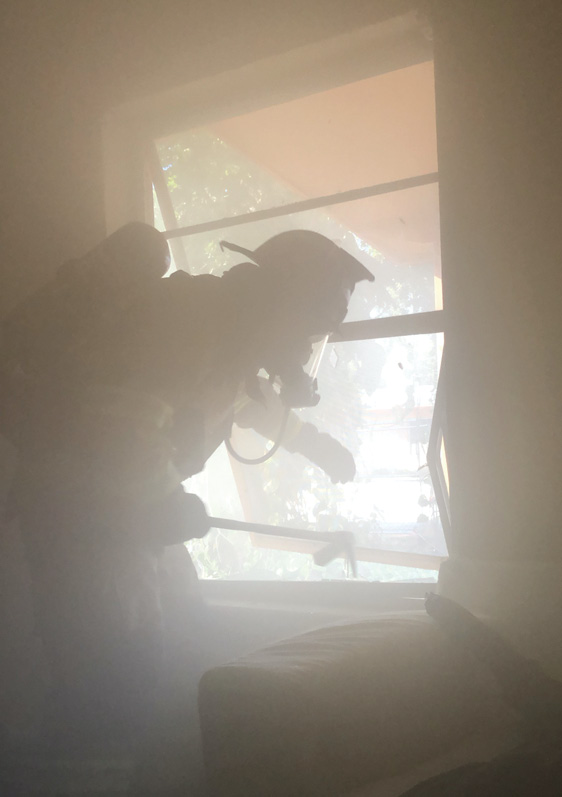
8. Does the crew take a victim out the window or back through the house?
Scenarios
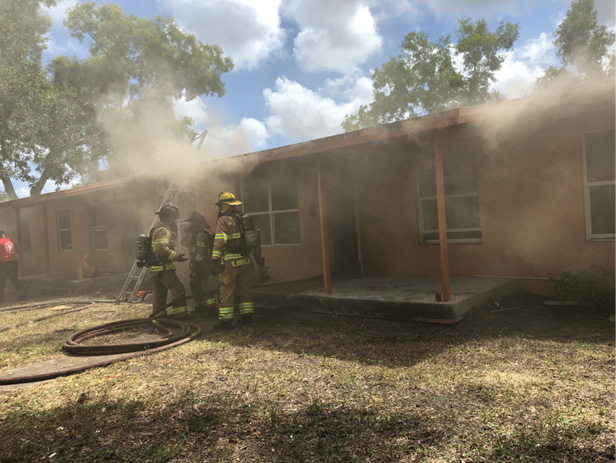
This is where we bring it all together and give the students a chance to get high-speed reps similar to those on the fireground. Plan the scenarios strategically to test the students not only physically but mentally—see what they retain from the earlier portions of training. For instance, if you gave the students a tough scenario with 10 victims, you only test their stamina and physical readiness. Scenarios should be short in duration. Most successful rescues happen in the first six to 10 minutes on the fireground. Keep each evolution to this timeframe. Make each scenario realistic, using smoke, an orange glow, or a fire simulator to mimic the fire. Furnish the search areas like a house, with furniture and clutter. If other companies are involved in the search, make sure to have role players.
Make the scenarios scripted. This keeps the instructors and role players to task. It also keeps everyone on the same page so that scenarios don’t change midway through because of instructor boredom. The script should include the conditions, number of victims, locations of victims, and measurable objectives. Those objectives should match what the students learned in earlier portions of the class. Including them in the scenario reinforces what was taught but also shows if the students retained the information and can apply it in the specific situation where it should be done. Some examples include the following:
- Scenario 1: Fire in a back room. Use a live victim who answers or coughs if the firefighters call out and gets to the front door at the same time as the attack crew.
- Scenario 2: Kitchen fire. The engine beats the search team in and has water on the fire. Three victims are in two separate bedrooms, with one small victim under a large victim. (Does the crew find mom laying on a kid? Which victim comes out first? Do they pass off any victims?)
- Scenario 3: Bedroom fire. One victim is in a separate bedroom with no smoke in that bedroom but with smoke in all other areas of the house. How does the crew choose to bring the victim out based on the conditions? Do they let the attack team know where the fire is and do they close the door to the fire room?
- Scenario 4: Two-story house. The engine is in first and blocking the stairs. Does the search team assist getting the hose in place? Do they search the fire room on the first floor? How does the search team work to get up the stairs? Once they find a victim, are they able to pass the victim off and continue the search?
Having good scenarios with integrated decision making and goals in mind reinforces what was taught. It also allows for a better discussion after the scenario to discuss the thought behind the decisions made and actions taken.
The fire service is doing a great job of pushing the search message. We must be sure we do our best to share that message in the most effective teaching model possible. This crawl-walk-run model using realistic objectives and scenarios should reinforce what we are trying to accomplish and, in the end, give the students the confidence they need to go inside and occupy space.
Grant Schwalbe is the division chief of operations and training at Estero (FL) Fire Rescue. He spent the majority of his career as a lieutenant on Engine 43. He began his fire service career in 1994 in Ohio.

