By Nick Peppard
The driver/engineer (D/E) position is arguably one of the most, if not the most, important positions on the fireground. This position requires a firm grasp of mechanical aptitude; maturity; trustworthiness; technical skills; and a good understanding of strategies, tactics, and incident command priorities to be successful. D/Es must anticipate the needs of the firefighting operation and facilitate the completion of these tasks. Furthermore, when it comes to tactical priorities, D/Es must ensure lines, ladders, and logistics are taken care of at every fire; everything else is just peripheral duties.
Pump Operation: Training for Success
It’s time the fire service prioritize developing this all-important position and give it the attention, value, and respect it deserves. D/Es may be the unsung heroes on the fireground but, make no mistake, they are the glue that keeps the operation together. If they fail, the entire incident action plan will fail as well.
Troubleshooting Mechanical/Pump Issues
Following are some common pump and mechanical issues a D/E may encounter and what to do to combat them.
The pump does not engage. Sometimes, in our hurry to engage the pump and go to work, something goes wrong, and we don’t get the “green light” (literally) indicating we are in pump mode. This can be because of a computer glitch and not processing the changeover; the teeth on the drive shaft gear didn’t quite line up, not allowing the pump’s drive shaft to engage; or the bulb for the green light is simply burned out. The easiest way to know is to listen; you should be able to hear the distinct sound of the pump engaging. Additionally, you should see the revolutions per minute on the tachometer go up.
Another diagnosis would be to open the tank-to-pump valve, crack the tank fill/recirculation valve, and throttle up to verify the ability to register positive pressure on the master discharge gauge. If none of these things occur and you don’t have the green light engaged, you are not in “Pump” mode.
The best thing to do at this point is to place the apparatus in neutral, throw the power take-off transfer handle/button back to “Road,” and start the process over. This time, take a few seconds in between steps to ensure the computer keeps up and the pump drive shaft has time to successfully switch from road mode to pump mode. Most of the time, this will be all you need to do to fix the problem. However, if the problem persists, the D/E may need to use the manual pump override handle—usually located at the pump panel—to manually force the pump to engage. If the apparatus is not equipped with an external override handle, the D/E may still be able to climb underneath the apparatus, find the transfer valve, and tap it with a rubber mallet and wrench. Follow your manufacturer’s recommendations for manual pump override operations.
The pump is not primed/loses prime. If a D/E suddenly begins having the telltale “revving” sound and gauge fluctuations of losing prime or air getting into the pump, the first instinct should be to pull the primer. Then check the tank fill/recirculation valve. Remember, the tank fill/recirculator is a discharge from your pump manifold going back into your onboard tank. Thus, once you start flowing water from your booster tank, you can cavitate the pump because of overworking the limited capacity tank-to-pump piping or by causing turbulence in the booster tank as the water level drops around the place the tank fill piping enters the tank.
By ensuring the tank fill/recirculation valve is closed and hitting the primer button, the D/E can often fix the “priming” issue fairly quickly. Again, once a constant water supply is established (pressurized or static), the D/E should crack the tank fill/recirculation valve if sufficient water is available to top off his booster tank. However, the priority is the needed attack lines, and this should be done only when it doesn’t compromise fireground operations.
Cavitation. Besides inadvertent cavitation/priming issues caused by small amounts of air getting into the pump through insufficiently bled supply lines or open tank fill valves, cavitation also comes from discharging more water than is available to the pump. Simply put, it comes down to water in/water out. You can’t give more water than you have available. If you do, you will cavitate the pump, which is obviously bad in the short term for fireground operations. However, cavitation, if not corrected, can cause damage to the pump both acutely and in the long term.
So, how do you overcome this? The short answer is to either decrease the output or increase the input. Thus, you can shut down nonessential lines, shave a little from each line (i.e., drop all lines by 10 psi to see if that corrects the issue), or get additional water from the source (auxiliary lines from the side ports of a three-port hydrant) or find another source (a secondary hydrant, water tender, and so on).
Years ago, I was the D/E on a structure fire where there was an approximately 800-foot lay from the structure to the hydrant. We were the third-due apparatus and were tasked with relay pumping the supply line. The second-due company’s probationary firefighter had been dropped at the hydrant to catch the plug, and that company had laid their supply line with a forward lay to the first-due engine that had initiated fire attack. I dropped my crew and backed into position between the hydrant and the attack pumper. I disconnected the large-diameter hose (LDH) supply hose and connected the attack side into my LDH discharge and the supply side into my officer-side LDH intake.
I called for water from the firefighter at the hydrant. Within seconds, I bled the air and had a rock-hard supply line coming into my intake. I then began discharging water to the fire attack pumper. However, about 30 seconds later, I noted that the LDH supply line going to the fireground was soft and that my intake pressure had dropped sharply. I immediately asked the hydrant firefighter if the hydrant was turned on all the way; he replied that it was. Thinking that we may have had an issue with the water main or with the water valve being partially closed, I walked to the hydrant to try to assess the situation. The water valve as well as the hydrant were fully opened. I radioed command of our situation and that we were going to have to shut down the hydrant.
I shut the hydrant off and disconnected the hose from the hydrant. I reopened the hydrant and noted that the water was still dirty but the water pressure and volume seemed adequate. I reconnected the LDH supply hose and ran additional three-inch hoses from the side ports to my engine, where I connected them to my two auxiliary intakes to get more water into my pump. Although my intake pressure still wasn’t what I would have liked, it was sufficient to supply the needed water back to the fire attack pumper. The fire was quickly extinguished.
When we were picking up after the fire, I removed the LDH supply hose coming from the hydrant into my intake and found something quite surprising. There, stuck in the intake strainer, was a large wooden plug that had occluded more than 60% of my LDH intake! The new firefighter on the second-due company, in his excitement to hook up the hydrant, had forgotten to flush the hydrant. This had resulted in this large plug being flushed into my intake, causing a massive loss of available water. Thankfully, the side port connections were sufficient to overcome this issue on this fire, but this incident really emphasized the need for flushing the hydrant prior to hooking hoses to it. It also provides yet another example of problems that can occur on the supply side of fire pump operations.
Overheating. This isn’t usually an issue on small, short-lived operations. However, overheating can become a major problem on extended, campaign-style fires where the pump is engaged for hours at a time. As long as adequate water is moving through the pump, the heat can usually dissipate. However, if only small amounts of water are flowing or water is not flowing for long periods of time (i.e., overhaul), the water in the pump may begin to heat up. If left unchecked, the water can reach damaging temperatures, resulting in compromising the pump and its components.
The D/E can usually diagnose this problem by simply putting the back of his hand on the pump panel near the intake valve. If the panel is hot, it’s time to address the issue immediately. You can overcome this by cracking the tank fill/recirculator; opening the pump and engine cooler valves (these are usually insufficient to keep the temperatures under control on extended scenes); and running a small-diameter hoseline from a discharge on the apparatus to a remote location (i.e., a tree, some bushes, and so on), placing a nozzle on it, tying it off to something to secure it, cracking the nozzle’s bail, and opening the discharge to gently flow water away from the engine. This movement of water is usually the best way of achieving long-term cooling goals, as it doesn’t reintroduce the hot water back into the booster tank as would happen with the tank fill/recirculation valve or pumping a line back into the apparatus through an intake or a fill chamber.
Pump failure. This is the worst possible scenario for the D/E. You cannot fix a catastrophic pump failure on scene, and this means the apparatus is no longer useful for pumping attack lines on the fireground. If this happens, a couple of options exist. Depending on when the pump fails, the D/E could simply move the apparatus out of the way or just shut it down where it stands and allow another apparatus to assume pump operation responsibilities for the incident. Another option is a dual pump as long as you establish a pressurized water supply to the first-due engine. By simply letting the water pass through the eye of the failed pumper’s impeller and out the LDH intake on the other side of the apparatus, it essentially makes the failed engine a giant manifold. The supply line is run from the second LDH intake on the first engine to the intake on another engine, allowing the water that was going to the first engine to simply pass on to the other engine to resume operations.
Failed primer. National Fire Protection Association (NFPA) 1911, Standard for the Inspection, Maintenance, Testing, and Retirement of In-Service Emergency Vehicles, requires all pumping apparatus with capacities up to 1,250 gallons per minute (gpm) to achieve a prime within 30 seconds and those rated at 1,500 gpm to achieve a prime in a maximum of 45 seconds. Although there are several types of priming devices available for fire service pumpers, the concept is still the same: the successful removal of air from a centrifugal fire pump to create a lower pressure inside the fire pump, which allows the higher atmospheric pressure to force water up the suction hose and into the pump during drafting operations. Remember, centrifugal pumps are not self-priming, so apparatus manufacturers equip them with external priming devices to make static water supply operations feasible.
However, what happens when the primer fails? Although this is not an article on static water supply operations, following are a few options for overcoming this issue on the fireground:
- Burp drafting. This means using the centrifugal pump at a higher pressure and slowly cracking open the intake valve to create a pressure differential, allowing the air to slowly be “burped” off by an open recirculation valve.
- Turbo drafting (photo 1). This means using a soft-sleeve LDH supply line and soft-sleeve three-inch hose. This method works great, especially when the water source is farther away than the amount of hard suction carried on the pumper and when the “lift” is greater than a traditional drafting operation would normally allow.
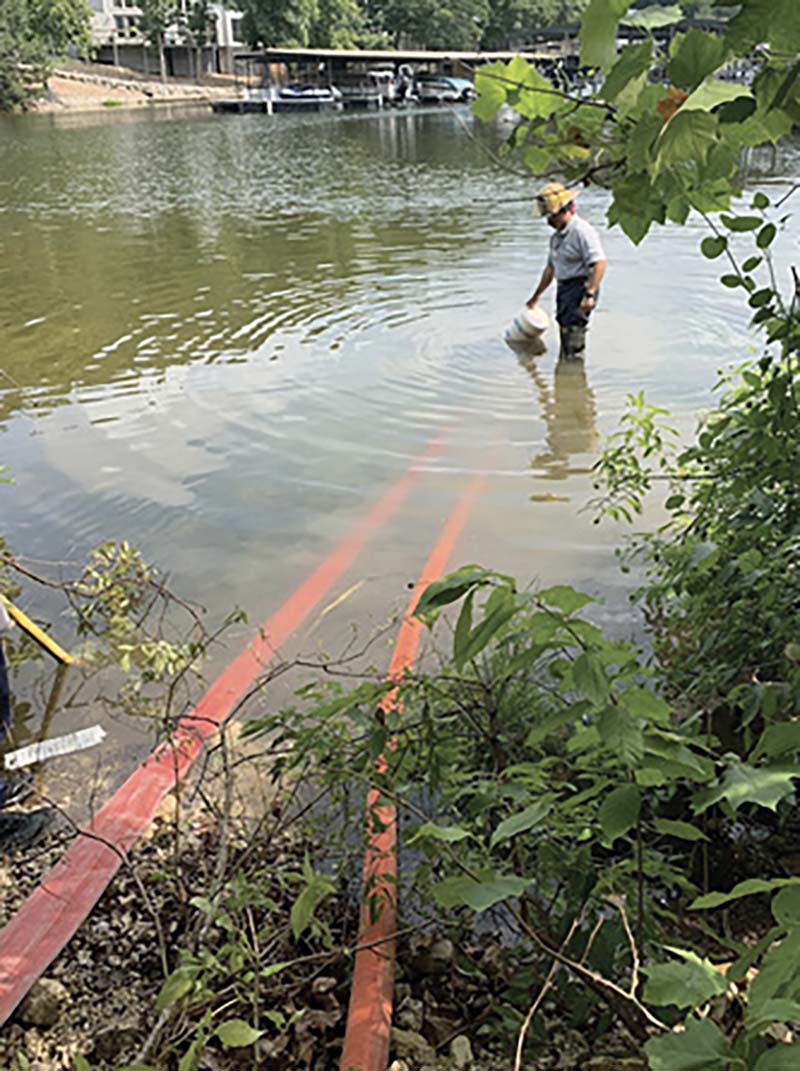
(1) Photos by author.
- Jet-assisted strainers (photo 2). This means using a smaller, higher-pressure hose to create a pressure difference, drawing water up the hard suction hose to the apparatus.

All three methods are “primerless” drafting options to overcome a failed primer when conducting static water supply operations. Like any fireground skill or tool, you must thoroughly train on these methods to implement them successfully in the streets.
Discharge Side Issues
Discharge side issues are not the result of a lack of water supply or pump issues but rather are caused by something interfering with the delivery of the water between the apparatus and the nozzle. Following are several potential problems and common issues you may encounter on the fireground with the discharge side of the pump.
Burst/burned-through line. The environment in which firefighters fight fires is harsh, unforgiving, and often hostile. It is not uncommon for a hoseline to burst secondary to thermal insult. Simply contacting burning embers or debris can cause the hose jackets to burn through. Additionally, hose is often dragged across sharp objects and glass while engaged in the firefight. Any of these occurrences may result in hoseline failure.
If the opening is small, the “Hail Mary” use of a hose jacket may be an option. However, if the leak is significant or unable to be quickly controlled, you must shut down the hoseline and replace the burst section; this may require two sections of hose to replace the one burst section. With smaller-diameter attack lines, it may be possible to pull the burst section back a few feet, forming an “S” shape in the hose. This will enable you to remove the burst section and replace it with just one section of new hose.
Kinks. When operating attack hoses in tight; confined; and, at times, cluttered spaces, such as those encountered in typical residential structure fires, there are numerous and often inevitable points where the hose may kink. From getting caught on/under furniture to catching on corners or perhaps being caught under open doors, the possibilities for kinks exist, from the rig to the seat of the fire. All personnel must be vigilant to minimize kinks and manage areas where kinks may develop.
The best way to prevent kinks is to set up the hose correctly before charging it, pump it at the correct pressure, and ensure that enough hose is readily available at the entrance to ensure a smooth payout into the building as the crew advances the line. D/Es must ensure that they chase kinks from the rig to the structure as part of their on-scene duties.
Clogged line/nozzle. Improperly flushed hydrants, drafting from a “dirty” static source, failing to flush a standpipe prior to connecting the attack hose, and sediment/debris becoming dislodged during use are just a few examples of foreign objects getting into the hoseline or nozzle. A nozzle with a filter screen placed before the shutoff valve may catch debris (as intended), but it also may partially or completely occlude water flow, causing a compromised or absent fire stream. Unfortunately, the only way to fix a blocked filter screen is to shut down, bleed the handline, and clean the screen or replace the nozzle altogether.
If there is no filter screen and the nozzle is a fog, the debris may lodge in the internal nozzle components distal to the bail. Whether it is an automatic or a fixed or selectable gallonage fog nozzle, the debris can cause varying degrees of blockages. Sometimes, simply shutting the bail and replacing the fog tip may correct the issue (in nozzles with breakaway features) so long as the debris is only caught in the fog tip. Additionally, some fog nozzles come with a “flush” feature on the nozzle, which allows the nozzle firefighter to clear small debris from it and block large objects from passing though. D/Es may need to implement other means to rectify this situation.
Note that you will usually be able to detect a loss of flow pressure in fixed gallonage and selectable gallonage fog nozzles. This is not the case for automatic nozzles, which may experience significant decreases in flow volume and still produce a usable fire stream. Thus, barring a major blockage, the user in a smoke-filled environment may not initially detect the loss of flow from his nozzle, giving him a false sense of security and putting the nozzle crew in the dangerous position of attempting to extinguish a fire because of this reduction in flow.
Smooth-bore nozzles are the simplest in design and generally pass small debris with ease. However, larger objects can become stuck in the waterway, reducing the flow and distorting the fire stream. When this happens, the simplest solution is to shut the bail, remove the nozzle tip, and either remove the clog (if it can be removed easily) or replace the nozzle tip.
A heads-up D/E can diagnose all three of these discharge side problems at the pump panel (yes, you read that correctly). Each of these scenarios are usually manifested by radio traffic from the officer to the D/E stating that they’ve lost water pressure or need more. If this occurs, the D/E will usually start by simply bumping up the pressure at the pump. However, this may not correct the problem. The D/E needs to look at the compound gauge for the respective handline.
If the gauge shows a sudden drop in pressure with all other factors remaining the same (the master discharge gauge is still set at the required pump discharge pressure, the intake pressure is still registering where it previously was, and so on), then water is escaping somewhere between the apparatus and the nozzle. One of two things can cause this. First, the hoseline has failed. Second, it is possible that, if the handline is attached to a wye or water thief, one or more of the additional valves may have inadvertently been open, thus allowing water to discharge unintentionally onto the ground. The latter can simply be tracked down and the valve closed; the former will require replacing the failed section.
Another possibility in standpipe operations is that the standpipe itself has failed somewhere or there are one or more open outlets somewhere else in the building. This will require someone to walk the stairwells to ascertain if this is indeed the case.
If, however, the D/E receives radio traffic stating the crew has had a loss of pressure and the compound gauge has remained constant (no drop in pressure), one of two things has occurred. Either there is a major kink or multiple kinks in the hoseline or the nozzle/hoseline is clogged. If the line is kinked, the D/E and the attack line crew must retrace the line to determine if kinks exist. If there are no kinks in the line or removing them doesn’t correct the issue, the D/E must let the nozzle firefighter and officer know to check their nozzle for debris.
The nozzle firefighter must try flushing the nozzle or removing and replacing the tip. If this doesn’t fix the problem, the crew will have to abandon that hoseline and use another or exit with that hoseline and allow another crew to use the backup line to extinguish the fire. By simply looking at the compound gauges and using a little deductive reasoning, the D/E can quickly identify the source of the problem and offer solutions to the crew.
Discharge valve failure. Several years ago, I responded on the first-due engine company to a fire in the rear of a three-story commercial motel. The fire had started on the second floor, and several units were on fire on our arrival. Additionally, the fire had autoextended and involved a couple of units on the third floor on the C side of the building. We did a courtyard stretch and called for water.
As we waited, my company officer could immediately tell something wasn’t right. The driver—who was new at the time—radioed that the pump had failed and that our second-arriving engine would be used for fire attack. We quickly transitioned to the second engine’s pump and went to work. After the fire was out, we did a further inspection of the pump situation on our rig. To our surprise, the pump worked flawlessly.
After doing some troubleshooting, we found that the handle for the rear 2½-inch hoseline we had stretched to the rear of the building had come unpinned from the valve actuator. Thus, the hand was not moving anything and was free-floating in the panel. Had the new driver simply opened the pump panel door, he could have used a rubber mallet and a screwdriver to tap open the valve, or he could have returned the cotter pin that had slipped partially out back into the eye hole on the discharge handle and reattached it to the actuating device on the valve, correcting the situation. This experience drove home the need for thorough apparatus inspections as well as being a great teaching moment.
Tactics from the Left Seat
The D/E is the busiest person on the fireground during the response’s first 10 minutes. Although tactics are usually thought of primarily from the role of company and chief-level officers and firefighters, the fact is that the D/E has his own tactical considerations that must be evaluated on the emergency scene. Here are some considerations from the D/E’s perspective:
Positioning. The D/E must position the apparatus in a way that gives the company the best possible tactical advantage while still providing for the safety of the crew, the apparatus, and interoperability with other companies arriving on scene. What is the best location for an effective hose stretch while still leaving room for the truck? Is radiant heat a concern? What about collapse? Are there overhead power lines? If it’s a motor vehicle accident, is the “plus-one” lane blocking the most appropriate for the situation? If you’re responding to a hazmat incident, which way is the wind blowing? What is the topography like in the area? Are there evacuation concerns?
Pump, lights, and tool staging. The D/E must quickly engage the pump for water delivery while getting the needed and anticipated tools staged in close vicinity to where they will most benefit the incident. For instance, the D/E may place an attic ladder, a few hooks, and a positive pressure ventilation fan near the entrance when operating on an attic fire in a single-story residential structure. Scene lighting may also be needed if the incident occurs in the nighttime hours.
Accountability. In many fire departments, the first-due apparatus may serve as the initial accountability point at multiple resource incidents until a chief officer can arrive; collect the accountability tags, passports, and so on; and assume the duties of the accountability officer.
Additional hoselines. D/Es are often tasked with deploying the backup line, exposure lines, and secondary attack lines. In my organization, the D/E is expected to deploy the second and third preconnected attack lines on working structure fires. The backup line is often stretched nearly simultaneously with or immediately after the first line is deployed. Furthermore, the D/E may be required to operate an exposure line for a few moments while the attack line is put in place or until later-arriving companies arrive and can take over this important job.
Ladders. Whether you’re the D/E on the engine or truck company, ladders should come off the rig on nearly every fire. Aerial apparatus D/Es must set the outriggers and get the aerial device out of the bed on every fire call. This serves two purposes: First, if the aerial device is needed for rescue, it is already out of the bed and ready to swing over and effect the rescue. Second, even if the aerial isn’t needed, it provides valuable experience and practice for the D/E. Additionally, ground ladders should be placed for access, emergency egress, rescue, and roof operations.
Rehab. D/Es must anticipate operational rotation periods of crews on the fireground. That said, they must ensure that drinking water, extra self-contained breathing apparatus cylinders, medical equipment, and towels are available in the designated rehab area. D/Es must also ensure the rehab area is set up out of the immediately dangerous to life or health area and away from apparatus exhaust and find a suitable spot out of the elements, to the extent possible. For example, the D/E may set up a rehab tarp under a shade tree in the heat of the summer or have members take shelter in apparatus cabs in bitterly cold weather.
Water supply. Many variables and factors influence the water supply tactics chosen for a specific fire such as the type, location, distance, and sufficiency of the nearest water source. Ask yourself the following questions:
- Is the area well covered with hydrants, or is there a natural body of water available from which to draft?
- What is the flow capability of the water source?
- What resources are on scene?
- What resources are en route?
- What are the departmental standard operating guidelines (SOGs)?
- Is booster backup the tactic of choice?
- Does the first engine need to lay their own supply or have a second- or later-arriving company secure the hydrant connection?
- Is the lay going to be forward, reverse, or split?
- Is dual pumping an option?
- Is it a high-rise operation requiring tandem pumping?
- Will relay pumping or water shuttle operations be required?
- Is the hydrant two-port? If so, one method for maximizing water supply would be to use two short three-inch pony sections of hose into a nongated Siamese, where the LDH supply line can then be connected (photo 3). This method reduces unnecessary adapters while providing maximum water to the apparatus. Whole books have been written on this topic, and there are many opinions as to what works “best.” The fact is, D/Es must be knowledgeable and skilled on the typical (and even nontypical) water supply tactics that their organizations use in various circumstances.

Decontamination. The cancer epidemic sweeping the fire service over the past two decades has prompted some changes in the way we do business. Gross on-scene decontamination is one of several changes aimed at reducing our exposure to the deadly carcinogenic materials encountered in the modern fire environment.
Several years ago, the state of Florida did the “green bucket” initiative. Fire departments across the state were provided green buckets with items such as a small green hoseline, scrub brushes, a decon cone, soap, and so on to use for gross decontamination of firefighters exiting the fire building. D/Es are usually the ones responsible for setting up the decon area on the fire scene and should know their organization’s expectations regarding firefighter decontamination.
The Tactical Mindset
Broadly speaking, we can summarize the D/E’s tactical mindset in three words: lines, ladders, and logistics.
Lines. There is an old fire service adage that says, “As the first line goes, so goes the fire.” I couldn’t agree more with this statement! D/Es must ensure that the first line is placed into service rapidly, smoothly, and with effectiveness in mind. However, the word “lines” also includes the discussion of backup, exposure, and supply lines. The delivery of water to the seat of the fire is of paramount importance on the fireground. From the water source to the pump to the nozzle, D/Es must ensure the right amount of water is delivered at the right time at the right location. Putting the fire out makes things better for the civilians and our firefighters.
Ladders. Ladders are arguably the most important tool on the fireground. They support access to the structure for search and rescue, provide emergency egress to those operating on upper floors of an incident (should the need arise), and provide access to the roof for investigation and ventilation operations. D/Es should be proactive and purposeful in throwing ground ladders to places where they are needed. Furthermore, those assigned to truck companies should also deploy the aerial device early and often. Many lives have been saved by these essential fireground tools. D/Es are often the ones who are tasked with “softening” the building for those operating on the inside. Ladders must be high on the tactical priority list for all D/Es.
Logistics. Finally, once the lines and ladders have been taken care of, logistics must be the next tactical priority for D/Es. From tool staging to additional lighting, rehab, decon, and so on, the D/Es must anticipate what equipment will be needed as well as what must be accomplished and then execute said tasks. D/Es must be the fireground’s facilitators.
Training
For any of these tips, tactics, and considerations to be useful, fire departments must conduct training regularly to ensure members’ mental aptitude and physical skills are developed and maintained. Although there are numerous training drills that can be useful in developing the D/E position, the drills should be planned, purposeful, and practical in nature. Following are some drills that I have found to be useful in developing D/Es:
- Street, tool, and SOG morning drills. Each morning, our crew reviews a different street in our first-, second-, or third-due area. This keeps us familiar with our district and surrounding jurisdictions. We also choose a different piece of equipment from our apparatus and review its use, applications, and operations in depth. Finally, we read an SOG, policy, collective bargaining agreement article, or memo, which keeps our members aware of our rules of engagement and allows us to cover all of them throughout the course of the year.
- Map/blank street exercise. This is one of the best drills for new drivers to learn their first-due area. Print a blank street map of one or more map grids and have them fill in the street names, hydrant locations, and so on.
- Compartment drills. Ask specifics as to what is in a chosen compartment. What is on each shelf? How does it work? What is in that toolbox?
- False alarm drills. Use activated fire alarms, good intent calls, and other lower-acuity calls (once the problem has been mitigated) as opportunities to practice positioning, aerial/ground ladder placement, hose stretches, and building system identification and use elevator controls, fire department connections, standpipe hookups, and so on.
- Deck gun cone drill. Set up cones at various depths and distances and have your D/Es connect to a water source and practice hitting their targets with either the deck gun or aerial master stream device.
- NFPA 1410 timed drills. There are 13 drills related to NFPA 1410, Standard on Training for Initial Emergency Scene Operations. All are designed to measure a crew’s overall performance in establishing a water supply and deploying and operating various attack packages for offensive and defensive fireground operations. The recommended time constraints provide a benchmark to measure a fire company’s performance against a national standard.
- Aerial depth perception drills. Numerous drills can be done using cones or by contacting local businesses and apartment complexes to see if they’re okay with practicing positioning on their buildings (photo 4). Many people are more than understanding when the fire department wants to practice for what could be their emergency.

(4)
- Creative alternatives. If you don’t have a dump tank for drafting, build one (photo 5)! If you don’t have money to keep buying foam to use in training, no problem. A mop bucket and some liquid dish soap will suffice. If you can’t commit a ton of hose and resources because of coverage issues but still want to get in a good pump drill, a ball valve and an LDH hose clamp with a few nozzles are all you need to practice various pumping scenarios (photos 6, 7). There are endless possibilities to constructive training if you’re willing to put in a little effort and creativity.

(5)

(6)

(7)
References
National Fire Protection Association (2017). NFPA 1002, Standard for Fire Apparatus Driver/Operator Professional Qualifications. Retrieved from www.nfpa.org: https://www.nfpa.org/codes-and-standards/all-codes-and-standards/list-of-codes-and-standards/detail?code=1002.
National Fire Protection Association (2017). NFPA 1901, Standard for Automotive Fire Apparatus. Retrieved from www.nfpa.org: https://www.nfpa.org/codes-and-standards/all-codes-and-standards/list-of-codes-and-standards/detail?code=1901.
National Fire Protection Association (2017). NFPA 1911, Standard for the Inspection, Maitenance, Testing, and Retirement of In-Service Emergency Vehicles. Retrieved from www.nfpa.org: https://www.nfpa.org/codes-and-standards/all-codes-and-standards/list-of codes-and-standards/detail?code=1911.
NICK PEPPARD is a firefighter/paramedic for the Oshkosh (WI) Fire Department with 17 years of service. He has an A.S. in fire science, an A.S. in EMS technology, and an A.A. in general studies and is now obtaining a B.A.S. in fire administration.

