TRAINING NOTEBOOK ❘ By MIKE WALTERS
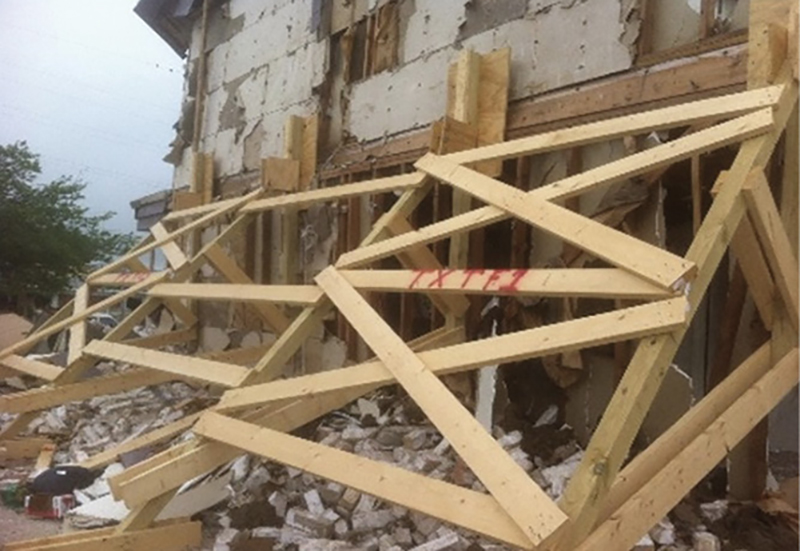
On April 17, 2013, an ammonium nitrate explosion occurred at the West Fertilizer Company storage and distribution facility in West, Texas, 18 miles north of Waco. While local emergency services personnel were responding to a fire at the facility, the unimaginable happened: a massive explosion, not witnessed in the state of Texas since the Texas City explosion of 1947.
- Simple Technique for Constructing Shores for Sloped Floors
- COLLAPSE SEARCH AND RESCUE OPERATION: TACTICS AND PROCEDURES PART 14: HORIZONTAL SHORING
- Training the Technical Rescuer
Immediately after the explosion, Texas A&M Task Force 2 was rostered and deployed, soon to be followed by Texas A&M Task Force 1. On arrival, they saw as unimaginable a sight as ever seen in a small Texas town. By the end of the deployment, 15 people had perished, more than 160 were injured, and more than 150 buildings were damaged or destroyed.
Although, the devastation was intimidating, the mission was clear: search, evaluate, and mitigate any hazards and then, hopefully, recover any victims remaining in the rubble. Right away, one thing was certain: This incident was going to require emergency building shoring—and a lot of it (photos 1, 2).
Wood Wedges
When a team is deployed to an incident that will require the installation of emergency building shoring systems, the team that gets the shoring assignment knows right away that they will be needing certain critical components such as an adequate cut station, gusset plates, and wedges. One characteristic of a complete shoring system is adjustability; this is where a set of wedges comes into play. Wedges used in shoring operations are two inclined planes, simultaneously driven together under a post until the shore is under compression and resisting the weight of the structure above. The shore is then properly displacing that portion of the load to the ground or, at a minimum, transmitting it to a portion of the building that can support the additional load.
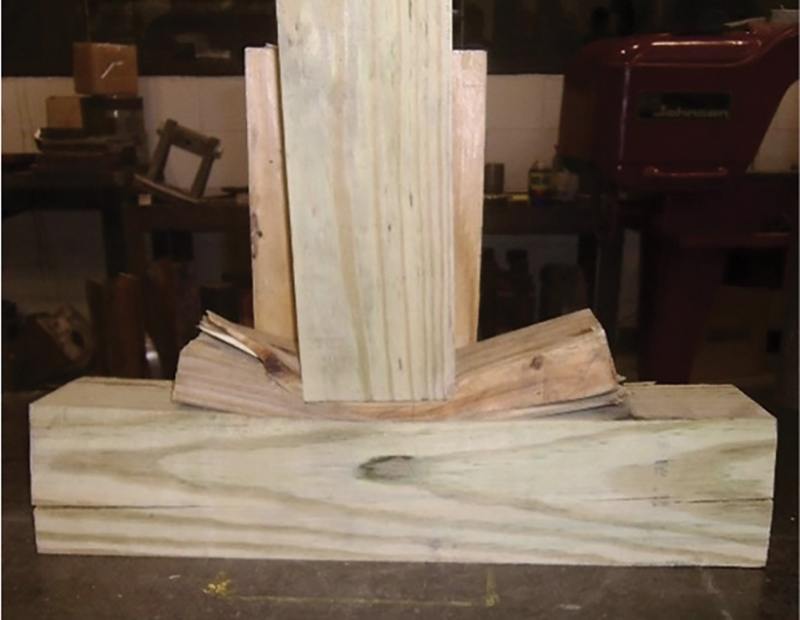
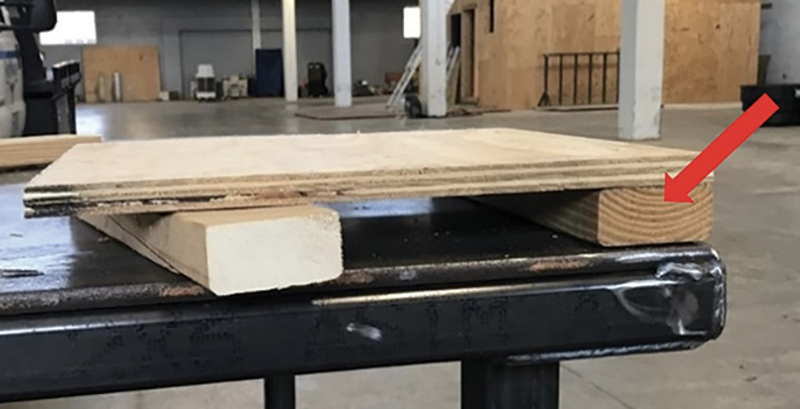
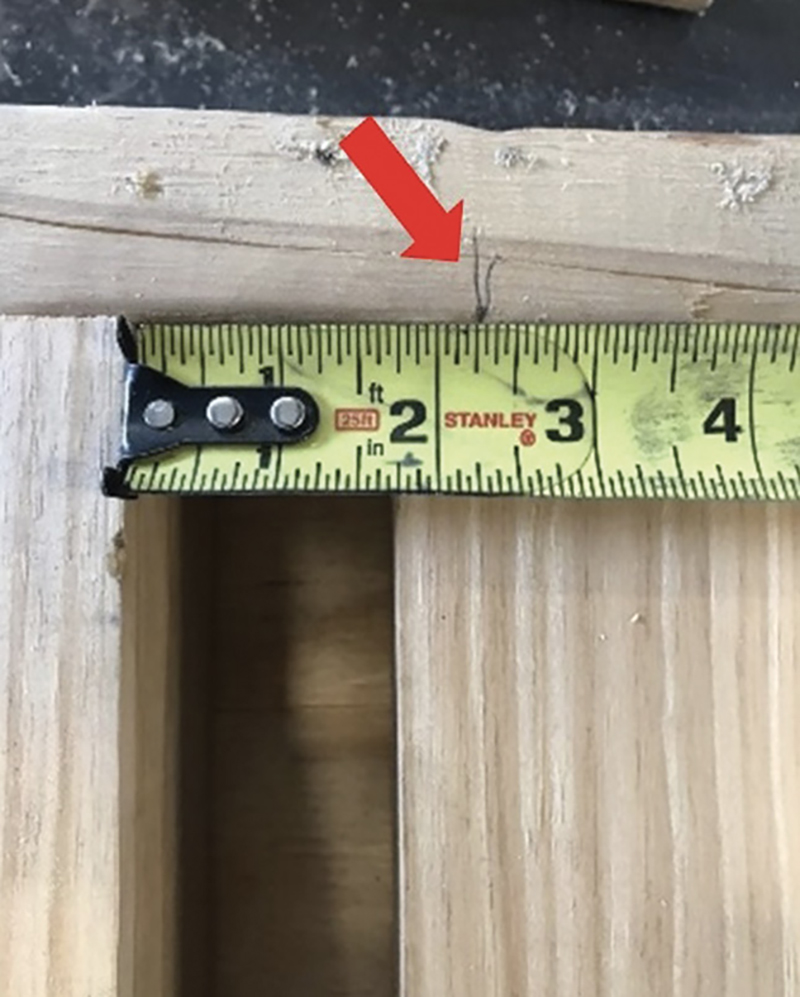
Used in pairs, wood wedges not only allow for vertical and lateral adjustment but also provide an ideal “structural fuse” since they will crush and deform when the posts are overloaded, usually about 1½ to two times the allowable bearing load of the species of wood being used. This is commonly referred to as “cupping,” which occurs when the ends of the wedge move upward (photo 3) as the post crushes into the wedges and soleplate. This indicates that the system, as designed, has been overloaded and a reevaluation of this area is necessary.
Always use caution to ensure that the wedges are not overcharged, which applies more pressure than is necessary to the system, possibly moving the load. Remember, a shoring system is intended only to support the structure in its current, at-rest position, not to reposition it back to its original configuration. That will be accomplished by contractors if the decision is made to salvage the building.
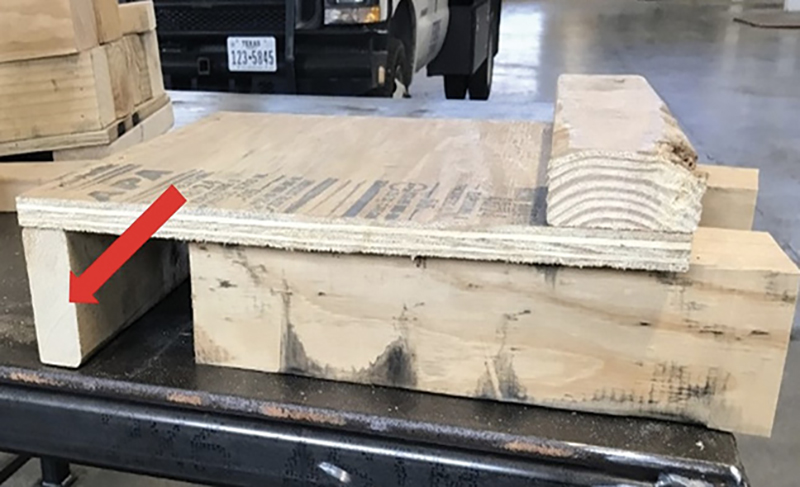
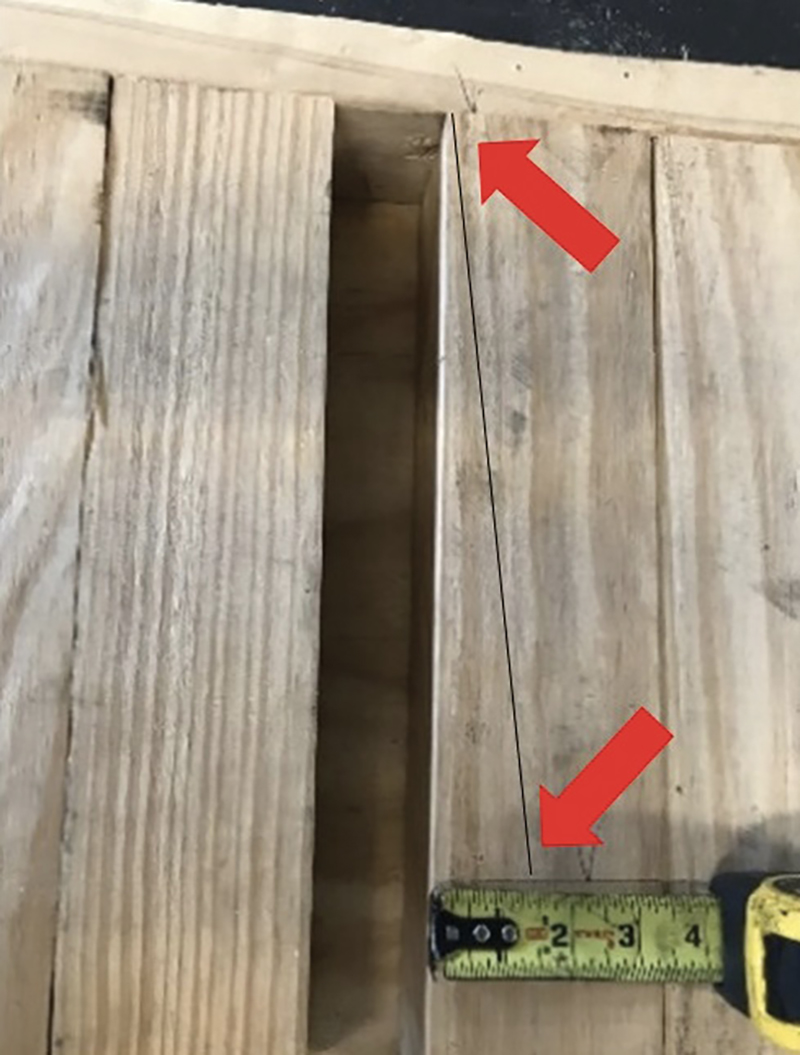
We can also use wedges individually to take up space between the shore and the building. With this type of application, they are typically referred to as “shims” (photo 4). Their purpose is not to apply compression to the shore but to take up space around the shore so that pressure can be applied equally from the structure to the shore.

(1) Photos 1, 2, and 4 by Richard Wier. All other photos by author.
(2)
(3)

(4)
Building the Shoring System
When being used to charge a shoring system, 2×4 wedges are more stable and generally preferred over 4×4 wedges because the 2×4 wedges tend to crush evenly. The 4×4 wedges, as they crush, tend to roll off the side of the wedges and the soleplate when the system is excessively overloaded. There are several ways to cut wedges, but the team will normally be well served to construct a simple wedge jig for use with a 10¼-inch rotary saw. Although there are many ways to construct a wedge jig, the following instructions are easy to follow to construct a simple 2×4 and 4×4 wedge jig; all that needs to be changed is the materials list.
For a 2×4 wedge jig (Figures 1, 2), you will need the following:
- One 18- × 16-inch plywood.
- Four 4×4- × 16-inch pieces.
- Two 2×4- × 16-inch stop blocks.
- One 2×4- × 20-inch piece to be used as a fence.
For a 4×4 wedge jig (Figures 3, 4), you will need the following:
- One 24- × 18-inch piece of plywood.
- Four 4×4- × 22-inch pieces.
- Two 2×4- × 18-inch stop blocks.
- One 2×4- × 24-inch piece to be used as a fence.
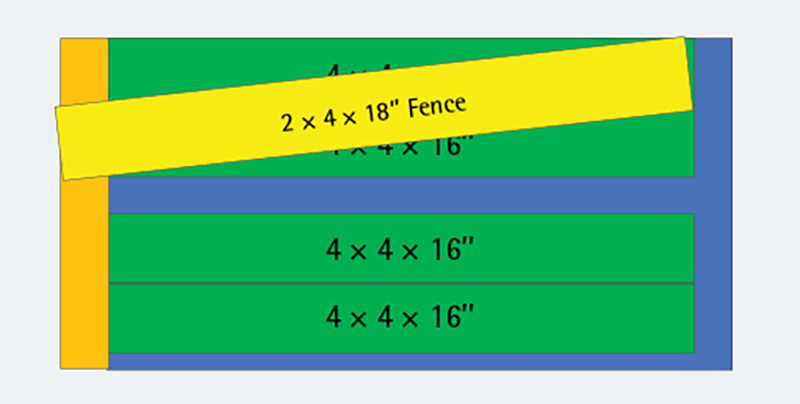
Figure 1. 4 × 4 Wedge Jig: Side View
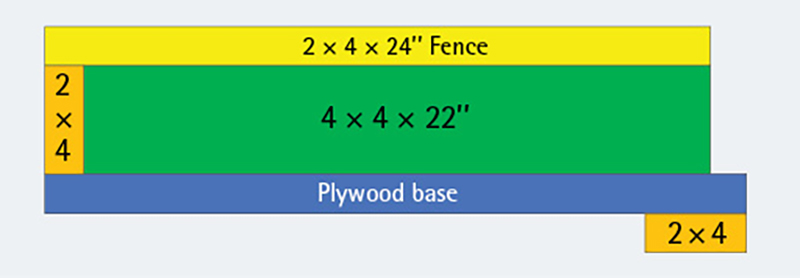
Figure 2. 4 × 4 Wedge Jig: Top View
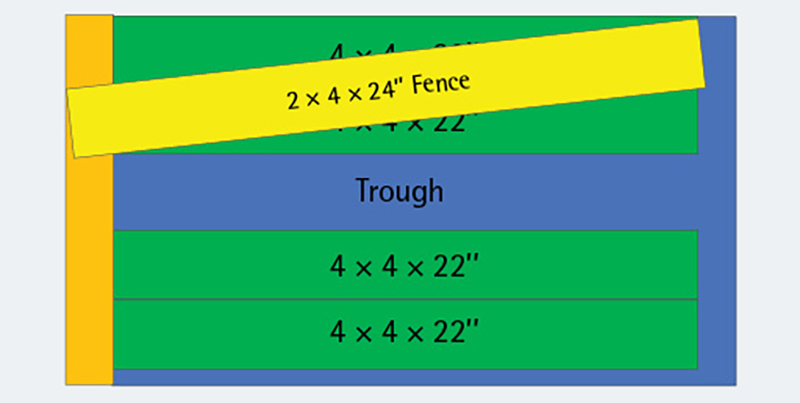
Figure 3. 2 × 4 Wedge Jig: Side View
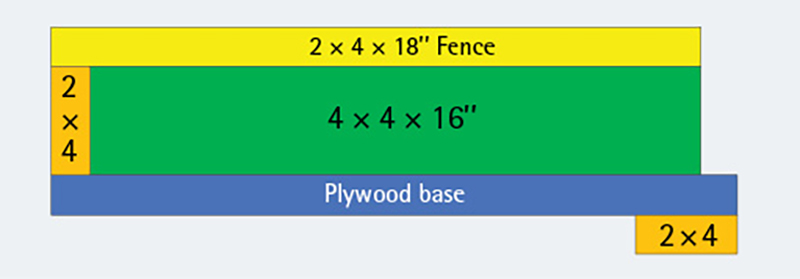
Figure 4. 2 × 4 Wedge Jig: Top View
(5)
(6)
(7)
(8)
(9)
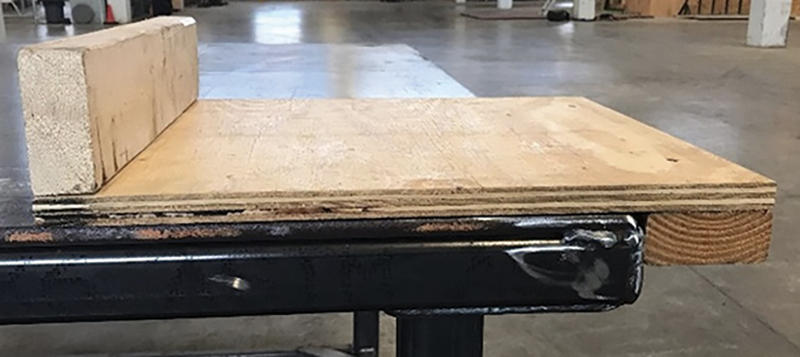
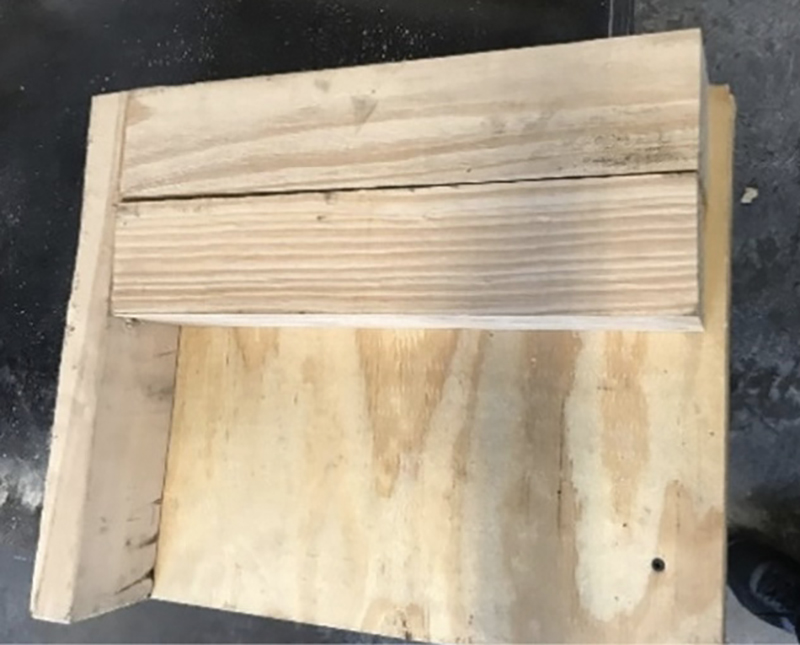
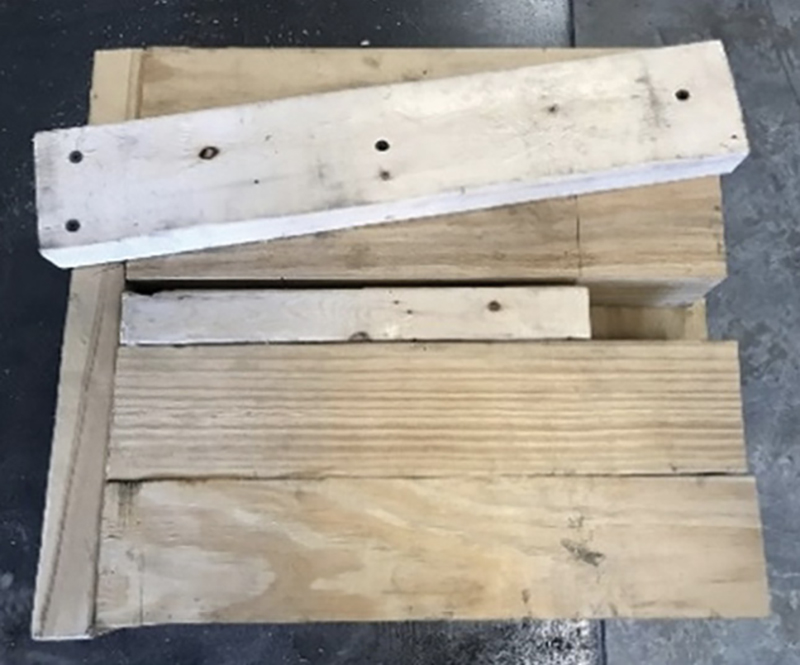
Begin by laying one of the 2×4 stop blocks flat and flush across the end of the plywood, the other one just propping up the other end (photo 5). Drive three or four 8d nails through the plywood into the 1½-inch side of the 2×4; this will serve as a stop block for the bottom of the jig. Turn over the plywood and place it on top of the 4×4s (photo 6). Then, stand the other 2×4 stop block on its end and nail it flush with the opposite end (photo 7); this will serve as a stop for the wedge blocks that will be cut.
Butt the end of one of the 4×4s flush along one edge of plywood and nail it securely through the 2×4 wedge stop block and also to the bottom of the plywood (photo 8). Place another 4×4 next to it and secure it to the wedge stop block and plywood.
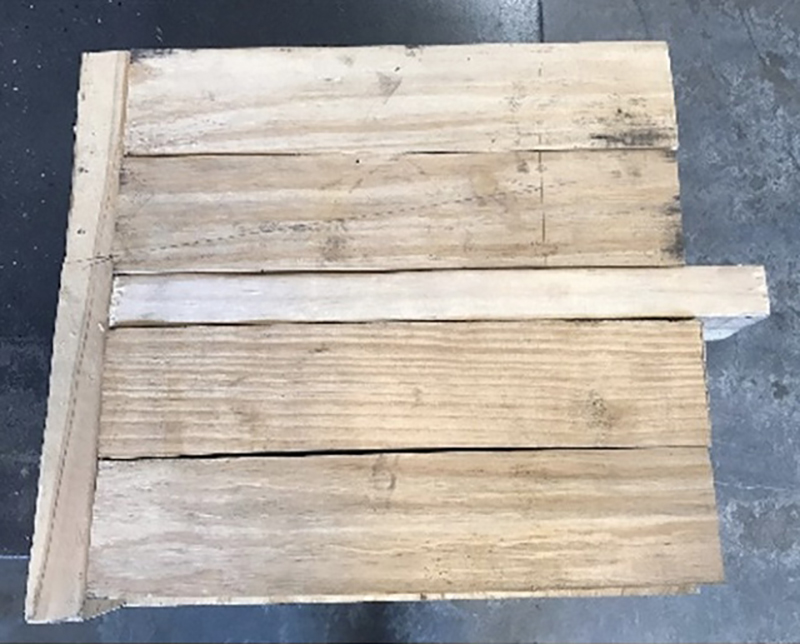
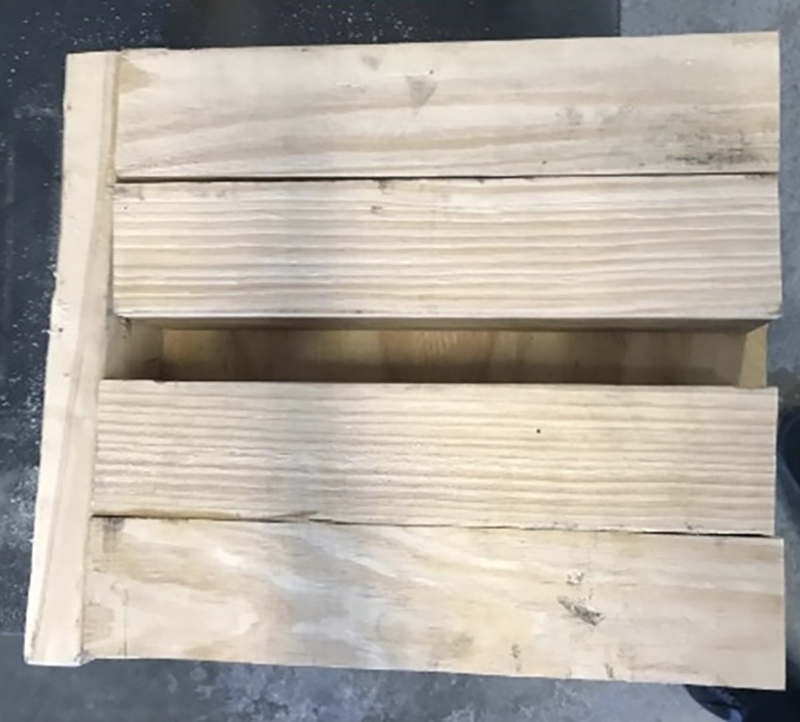
For a 2×4 wedge jig, stand the 2×4 fence up against the secured 4×4s and lay the remaining 4×4s down next to it. Use two 16d nails as spacers and place them between the nailed-down 4×4s and the 2×4 fence (photo 9).
Snug the other 4×4s up against the 2×4 fence, “toenail” their open end down to the plywood, and nail the other end of the 4×4s through the stop block with 16d nails. This will leave you with a trough in the middle of the jig to place the uncut wedge blocks in (photo 10). They should fit loosely. If they are snug in the trough, there is a strong probability that the kerf will begin to pinch the back of the blade while you are cutting the wedge block.
With your saw unplugged, measure the distance from the narrow edge of the shoe on the saw to the saw blade (photo 11). Then, mark that distance at the end of the trough (from the left edge of the trough). Measure down and scribe a line—12 inches for a 2×4 wedge jig or 18 inches for a 4×4 wedge jig (photo 12). Mark that same distance on the line at the right side of the trough. Line the fence up the 2×4 fence on those marks and tack it down with a 16d nail on each end. Drop a 2×4 or 4×4 wedge block into the trough and make a trial run with the saw. Adjust the fence until the cut runs properly, from one corner of the wedge block to the other corner.
(10)
(11)
(12)
(13)
Once the fence is adjusted properly, secure it to the jig with 16d nails. Make sure to put at least one nail through the 2×4 wedge stop block to keep it from being pushed out by sawdust during the cutting of the wedge block (photo 13). When excessive sawdust accumulates in the end of the trough, clean it out by picking up the jig and dropping the end of it on the table to clean out the sawdust. The 4×4 blocks on the jig are four inches longer than the wedge blocks so as to help keep the saw’s shoe on a flat plane and in line with the fence while cutting through the blocks.
When cutting wedges, you are basically making a rip cut, in line with the grain of the wood, as opposed to a crosscut, which is a cut across the grain. Rip cut blades require fewer teeth and provide larger gullets (the space between the teeth) for more efficient removal of the cuttings. Although making a rip cut should be easier than making a crosscut, a rip cut can be more difficult for several reasons, including the following:
- There is generally more surface contact between the blade and the wood with a rip cut, creating additional friction.
- If the wood you are cutting is treated or freshly cut, it may cause the kerf to swell behind the cut, pinching the blade.
- If the blade is manufactured for a crosscut, the set of the saw teeth is not wide enough, so the kerf created by the blade will not be wide enough to allow the blade room to pass without undue friction.
- If the cut is not straight, it will bind up the blade.
- The blade is dull. Dull blades are much more likely to scorch and burn wood because the teeth are not cutting the wood fibers effectively.
- As wood pitch builds up on the surface of the blade, it will be more likely to bind up, causing additional friction and heating up the saw. So, keep your saw blades clean to ensure smooth cutting.
- Do not force the blade through the wood. This creates an additional amperage load on the motor and can cause the motor of the saw to overheat and burn up. If the saw begins to bog down, simply back up the saw while the motor is still running and run the blade through the kerf again. This will cut additional wood fibers out of the kerf that may be causing the saw to bog down.
Rescuers know that wedges are valuable assets to many of our emergency operations. By following this process, you can easily assemble wedge jigs for use in training or at an incident. Although wedge jigs can be reused many times, assembling them is something that should be included in our structural collapse training so that we can easily assemble them on the scene if the ones we have been using come up missing for some reason.
MIKE WALTERS is a lieutenant with the Fort Worth (TX) Fire Department, where he has worked since 1988. He has also been a rescue specialist for Texas A&M Task Force 1 since April 1999 and a Federal Emergency Management Agency (FEMA) structural collapse instructor since 2000. Walters is also an instructor for Texas A&M Engineering Extension Service, the Alabama Fire College, Spec Rescue, and Safety Solutions. He also served as a member of the FEMA Rescue Sub-Group from 2017-2020.

