BY Chris LORENZ
Extrication involves using many skills and tools, some in a form or for a function for which they were not originally intended. As a problem-solving profession, we apply our lessons and experiences to situations for which we have no ready answer.
 |
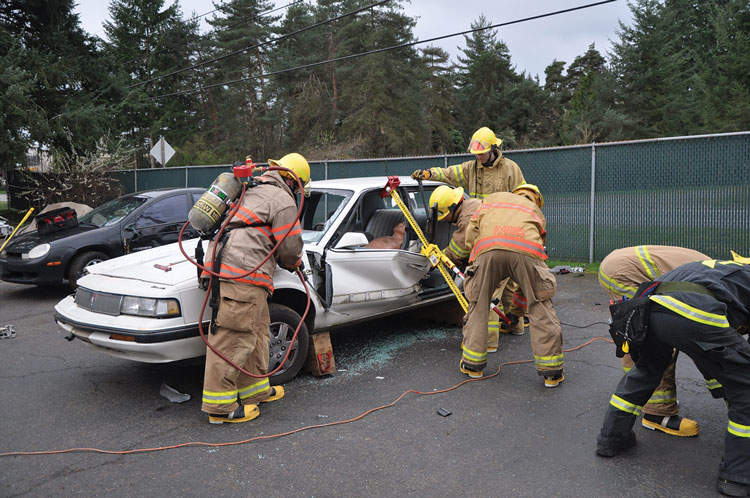
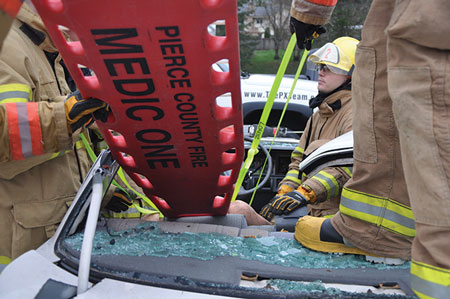
| (1) Photos by author. |
Making access to the patient is half the battle. Once we have established access and removal pathways, we must now extricate our patient without causing any further harm and with minimal movement. Many times, our patients may be much larger than average. Even an average-size adult can be difficult to extract, given the confines of the space and the angles in which we are forced to work. We must find methods that allow us to better use our resources and our body mechanics while providing support to the patient.

The ideal removal pathway for a patient with potential spinal injury is always in-line – i.e., nose/navel/toes. Even with growing medical research and an anecdotal review of spinal injury, we will continue using the current C-spine precautions – the cervical collar and the long board – but less frequently. This supports what most first responders have known: We overuse the C-collar and backboard with patients. It’s more for our legal protection than for patient injury prevention. The growing trend across the country is moving away from the traditional C-spine/backboarding of most patients. However, it is common sense, good practice, and more comfortable for our patients when we try to maintain (to the best of our ability and according to the given situation) a neutral spinal alignment. The long board will continue to be a good tool for patients’ removal regardless of whether they remain on it for continuing treatment.
Extrication Options
Traditional options for patient removal from a vehicle include clothing drags, which are frequently the method of choice. Using a hose strap as a girth hitch around the patient’s chest is not ideal since the strap is often too short to provide adequate mechanical advantage and constricts the patient’s chest, even if only momentarily. Extremity pulls are a last resort for patients who must be quickly removed. In the rare instances, we may deploy the Kendrick extrication device, which provides excellent support and adequate handles, albeit sometimes hard to reach. An excellent option is using the hose strap to extend the Kendrick’s handles so that rescuers can maximize lift and leverage.
Understanding this, we need to add tools to our toolbox that enable us to move a patient, many times from a place of limited access. Even a small patient can strain a strong rescuer’s back, given the confines within which the rescuer must twist to access the patient. The ability to quickly deploy a tool that allows additional rescuers to assist with patient extrication while at the same time provides support and limits discomfort to our patient makes our job more efficient, therefore quicker and safer for our patient.
The Hasty Harness
We have used the Hasty Harness with the webbing loop as a tool to move down firefighters, officers, and civilians. The webbing loop is part of the inventory of our Massive hemorrhage, Airway, Respirations, Circulation, Hypothermia (MARCH) bag inventory, which we carry for active shooter incidents. Although we have used this harness for many years, only last year did I realize that it could be used for a seated patient in a vehicle rescue.
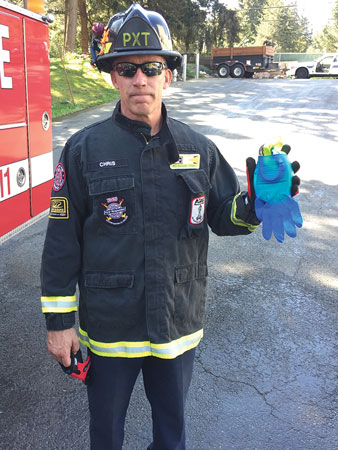
Although we can use the hose strap that many of us carry to rapidly establish a victim harness for patient support, lift points, and mechanical advantage, the strap is not always long enough. For the Hasty Harness described below, use a 25-foot-long piece of one-inch tubular webbing, preferably of a bright neon color. The contrasting color makes placement much simpler and efficient. Tie the webbing in a loop with a water knot. You can conveniently carry the strap rolled up with the knot on the outside, stuffed in an XXL nitrile or latex glove with the knot end hanging out. If the webbing loops get wet, take them out and dry them to prevent rot and a funky smell (photo 1).

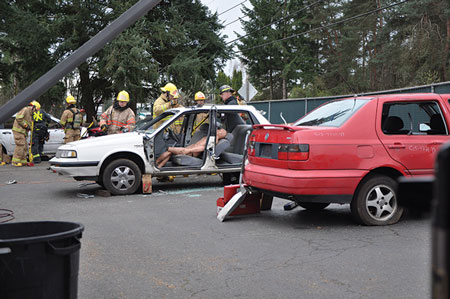
Once we have completed our scene size-up of the inner and the outer circle and have established that our patient needs mechanical extrication, we develop our plans (Rapid, A, B, and so on). In this instance, we have determined that our rapid plan will be out the back window opening. Our Plan A is a complete roof removal. Plan B is a driver’s side maxi-door removal, which, together with Plan A, will also give us greater patient access and allow us to address entrapment from the dash, the floorpan, and so forth (photos 2-3).
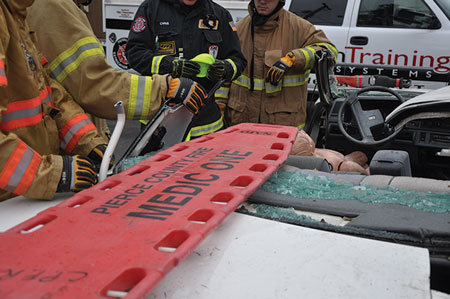
Even in situations where the backboard may not be warranted for injury concerns, it still protects against the many sharp edges created during extrication and the accident itself. It also provides a mechanical advantage by reducing friction as we pull the patient out (photo 4).
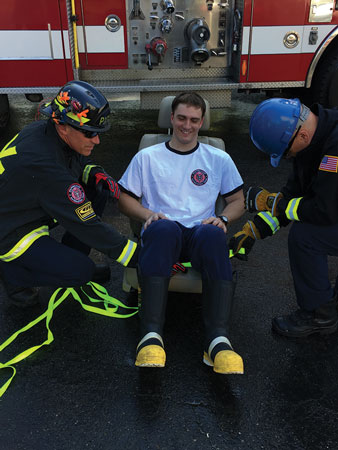
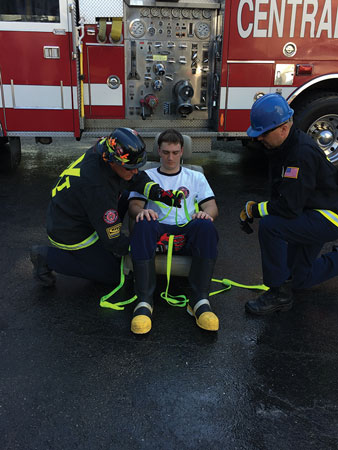
In photos 5-16, the rescuer with the blue helmet is the interior rescuer and the one with the black helmet is the exterior rescuer. In deploying the webbing loop harness, the exterior rescuer hands the interior rescuer (if available) one end of the webbing under the patient’s legs (photo 5).
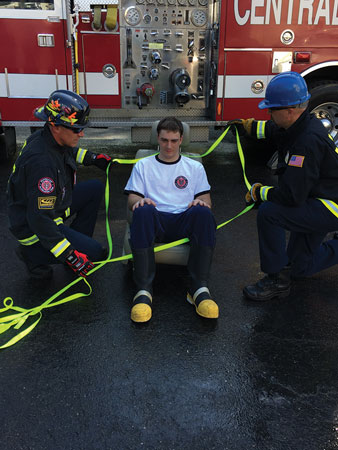
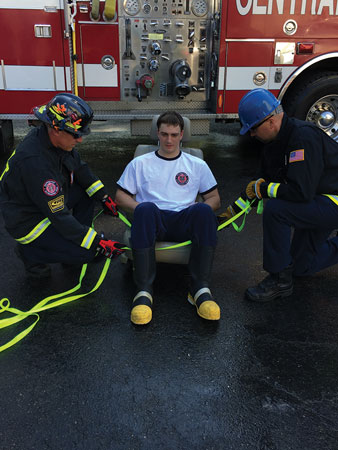
The rescuers determine together which side will be considered the top run of webbing (in this example, the webbing held in the left hand of the exterior rescuer and in the right hand of the interior rescuer). The rescuers pull the top webbing up under the patient’s hips while both rescuers maintain the other end, the bottom webbing, at the knees. The rescuers now move the top webbing back and forth, “sawing” it past the patient’s hips and up the back. All the while, the rescuers maintain the bottom webbing’s position at the groin (photos 6-8).
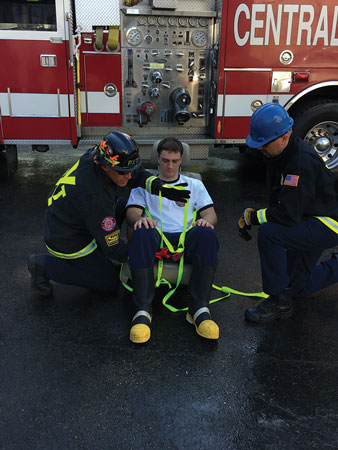
Once the rescuers have worked the top webbing up to the back of the patient’s neck, each rescuer takes the top webbing (held in the left hand of the exterior rescuer, in the right hand of the interior rescuer) and passes it between the patient’s torso and arm toward the sternum (photo 9).
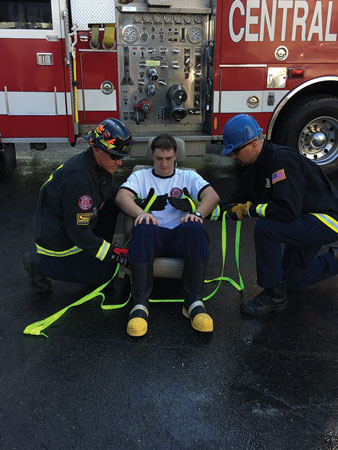
The exterior rescuer takes these two loops with his left hand. Keeping the bottom webbing over his right wrist, he brings his right hand up between the patient’s legs (photo 10). Using his left hand, he passes the webbing to his right hand while maintaining the bottom webbing over his wrist.
The exterior rescuer uses his left hand to lift the loop that is over his right wrist. With his right hand, he grasps both sides of the top webbing, pulling them under and through the bottom loop on his wrist (photo 11).

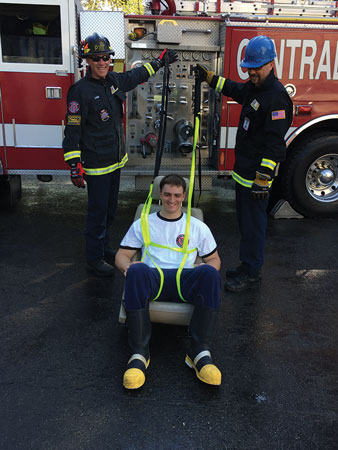
He continues to pull up the webbing until the slack is taken up and the leg wraps are seated in the inguinal crease. The patient can be safely moved with the harness at this point (photos 12-14).

The 25-foot piece of webbing provides an ample length to secure and extricate a patient from a more ergonomically advantageous position. However, if the situation requires more rescuers on the lift, a longer reach, and so forth, additional webbing loops can be girth hitched around the existing harness handles (photo 15).
Once this is accomplished, the loops/webbing on either side provide a rock solid lifting harness to extricate our patient. This allows more personnel on the lift/pull. It frees the rescuers with the patient to concentrate their efforts on guiding the patient out while others provide most of the pull/lift (photo 16).
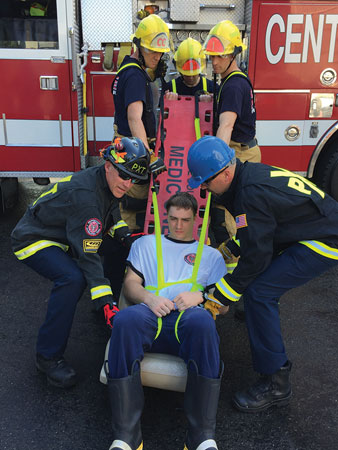
In situations where the harness is used to remove a patient from a restricted opening where the bent knees could interfere with extrication, the rescuers should give the side handles slack until the patient’s knees can be straightened. All of these techniques should be used in conjunction with a backboard, which aids in extraction, protects the patient from sharp edges, stabilizes potential injuries, and ultimately makes patient removal easier and more efficient (photo 17).
Adding these methods to your toolbox provides you with more options to make patient extraction more efficient and safe at a motor vehicle collision or any other scene where patients must be removed from their surroundings. Never let it be said that we failed to accomplish our mission because of lack of training, preparation, or physical readiness.
CHRIS LORENZ joined the fire service in 1998 and is a 17-year veteran of Central Pierce (WA) Fire & Rescue, where he is a deputy fire marshal and a firefighter/SWAT medic. He is an instructor for the Puyallup Extrication Team and specializes in auto extrication, technical heavy extrication, and active shooter rescue team training. Lorenz is a member of the Pierce County Law Enforcement/Fire Joint Training Consortium and a fusion liaison officer.
The Fundamentals of Advanced Vehicle Extrication
New Eight-Minute Extrication Cutting Program Available
Extrication: Who Makes the Call?
Fire Engineering Archives

