Photos and article by Dave Dalrymple
In the previous two columns, we have followed the path of what should be occurring on scene at a motor vehicle collision (MVC). In the first column, I wrote about the first five minutes; in the second, then next five minutes on scene. Although every MVC is different and each incident has unique concerns, we can set certain benchmarks to strive for at each and every incident. Although we cannot always hit them, we can do certain things to make them more achievable: train, educate, and practice.

Many of the issues, concerns, and hazards of today’s vehicles are not present on or in the vehicle with which we train. Use props to simulate the hazards of today’s vehicles in the older vehicles you use for training. Build training scenarios from real-world incidents and in all types of weather and various times of day. Use rescue dummies or even live patients. Make your training as realistic as possible. Evaluate your training using evaluation forms from extrication challenges from www.terc.us or www.wrescue.org. These steps will help you at every incident.
11 Minutes…
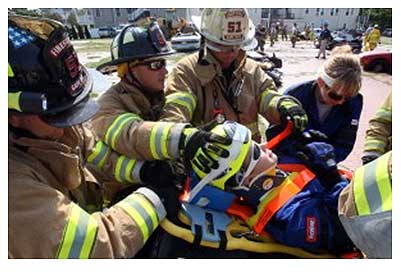
Time-critical patient: Your patient has been transferred to EMS, which is in the process of moving the patient to definitive care.
Non-time critical patient: The rescue crew is wrapping up the roof removal. The roof is moved to the dump (our vehicle debris pile) “shiny side up,” sharp edges are covered, and stabilization is rechecked. Now, how is your tactical action going? You have a big open pathway, but is it enough? Maybe you need to move the dash to create space for the patient’s legs? At least with the roof away, you have a great removal path if the patient has change in status. You also have a better vantage point to observe how the patient is positioned. The interior rescuer is keeping the rescue team updated on how the patient is doing. That information is being passed along to the rescue/operations officer and to the incident commander (IC). Further examination of the patient’s lower extremities suggests you will have to displace the dash. To do that, you must first displace the door closest to the patient, or maybe the door is open already. Always “try before you pry.”
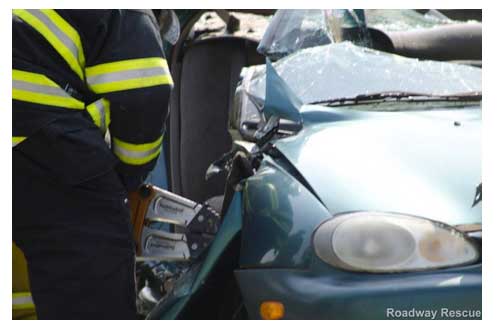
Remove the door quickly. Displace the door outer skin so you can see the door’s hinges and latches and sever them with your power hydraulic cutter. This is the fastest way and the easiest on the patient and tool operator, but remember a few things:
- Make sure you have hard protection in place between the patient and the tool work.
- Ensure you can easily see what you are severing.
- Ensure your cutter blades go completely around and past what you are cutting.
Why is this point important? First, if your cutter doesn’t go completely around what you are cutting, you run the risk of tip loading (side loading) the tool. Cutters do not like to be tip loaded. Tip loading the blades can damage the tool and possibly break the tool blades. Also, remember that since hinges are not round, the cutter usually will move and swing up and/or down as it severs the hinge, so anticipating tool reaction is important.
After you have severed the hinges and latches, sever the wiring loom with a hand cutter and remove the door to the debris pile; place it shiny side down. Then recheck stabilization.

13 Minutes…
Non-time critical patient: Now that the door is removed, you have an even better view of the patient’s extremities. To provide the right amount of space to facilitate disentangling the patient’s feet and legs, the plan calls for a dash lift. The roof is already removed, so you do not need to provide a relief cut on the A post. However, to make the dash lift more effective, you must add a vertical relief cut into the driver side front crush or crumple zone. To access this area, displace the fender away from the vehicle to expose that area. Once the fender is gone and the vertical relief cut is made, you can then make the relief cut for the dash lift. The easiest way is to use the existing hole for the wiring loom running to the vehicle’s door. Using a hand tool, push the rubber boot and wiring back through the hole in the lower A post, and then place hard protection down into the vehicle’s footwell. Insert one blade of the power hydraulic cutter into the hole and the other blade around the lower A post toward the patient and close the cutter, making a deep cut. Now, with the cutter, make another cut going in the opposite direction by inserting one blade back into the hole and the other blade forward toward the wheel well as deep as possible. This makes a deep and significant relief cut. Take the spreader and insert its tips into the space; position the tool to allow the tool arms to spread vertically. This cut, in conjunction with the size of the wiring loom hole, makes for a perfect opening for inserting the spreader tips into the space. As the spreader opens and lifts the dash, you might need to adjust the spreader in the opening space as you work. Ideally, try to make the lift as vertical as possible. The vehicle’s dash reinforcement bar, which runs through the vehicle’s dash, assists you in the dash lift. This ultra-high-strength material bar works just like a class one lever as you apply force beneath it. And since it is high-tensile material, as it is bent, it will stay bent upward and hold the dash up, even if the tool is relaxed or slips.
15 Minutes…
Non-time critical patient: With the completion of the dash lift, your disentanglement pathway is complete. Recheck the stabilization, and ensure that any sharp edges are covered as EMS finishes packaging the patient for movement. Part of the rescue team is assisting EMS with disentangling the patient from the vehicle; the other members are beginning to clear up the tools. As the patient is transferred to a transport vehicle (be it an ambulance or an aeromedical unit), the rescue team and the engine crew begin the process of incident termination. Tools are checked for damage and wear, power units are fueled, fluids are checked, and so on. Document the incident demographics for reporting purposes. Once you are cleaned up and your equipment is accounted for, mount up on the apparatus and return to the station.
Once you have returned, recheck your tools for the next assignment. Take any tools that have issues out of service or repair them, if possible. To enhance your operational tempo for the next assignment, officers and crew ought to debrief and review the incident in an objective manner. Add each incident to which you respond into a database to use as potential scenario-based training examples for future training.
Although many of the items mentioned in these three articles may seem time consuming or even tedious, they will become second nature if you consistently perform and practice them in training and during real operations. Rescuers must be aggressive these days when managing and mitigating MVCs. Today’s vehicles are more dynamic, as are the hazards we are encountering. To provide for a better patient outcome, you must change, adapt, and constantly evaluate your training and education in dealing with MVCs from the perspectives of EMS and rescue. Ensure that rescue evolutions and patient management occur simultaneously. This will go a long way in assisting you to meet both the golden hour and the platinum 10 required by your patients.
DAVID DALRYMPLE is a career EMS provider for the RWJUH Emergency Medical Services in New Brunswick, New Jersey, and a volunteer firefighter/EMT/rescue technician for Clinton (NJ) EMS/Rescue. He has been actively involved with emergency services for 27 years. He is the education chair of the Transportation Emergency Rescue Committee-US (TERC), is a certified international level extrication assessor, and serves on the Expert Technical Advisory Board of the IETRI as their road traffic accident advisor. Certified as a NJ fire service instructor, he has been teaching transportation rescue topics for more than 16 years. He is the executive educator for Roadway Rescue LLC, an educational team for transportation rescue training. He is an ICET (Netherlands) certified registered International SAVER instructor. He writes on “Extrication Tactics” for Fire Engineering and contributed to Fire Engineering’s Handbook for Firefighter I and II (2009). He received the 2007 Harvey Grant award for excellence in rescue education. He is featured in “Training Minutes” on vehicle extrication on fireengineering.com.

