BY SAMUEL HITTLE
The value of fireground experience vs. company drilling is a conundrum. Although the experience gained from an alarm of fire is invaluable, training provides firefighters with precise muscle memory that facilitates good experience. We truly optimize the coalition between experience and drilling when we embrace the ideology that reflective thinking turns a fireground operation into a valuable experience. In other words, if we take time to reflect on our operational experience and curtail firefighter training to reflect areas of growth and forward progress, we can make every experience, whether good or bad, a valuable learning opportunity. Ultimately, drilling is controlled experience with specific focus, and worthwhile experience is the culmination of specific functional fireground assignments that allow for the application of focused drilling.
REALISTIC TRAINING PROPS THAT FIT YOUR BUDGET
REALISTIC TRAINING WITH LIMITED RESOURCES
USING PROPS, SIMULATORS, AND MOCKUPS FOR MORE REALISTIC TRAINING
Remember, the greatest enemy to tomorrow’s success is today’s success. If the fireground is littered with poor tactics but the “fire went out” or “no one died,” without reflection, the experience is tarnished with the reinforcement of a bad tactic that will likely be duplicated later, possibly without the same successful outcome. A dependable and successful company must embrace that worthwhile experience by recognizing the need for realistic drilling that personifies the challenges it will encounter prior to the alarm.
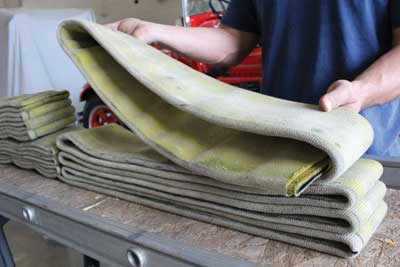
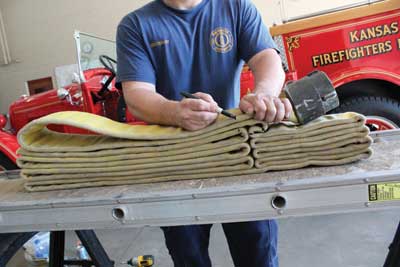
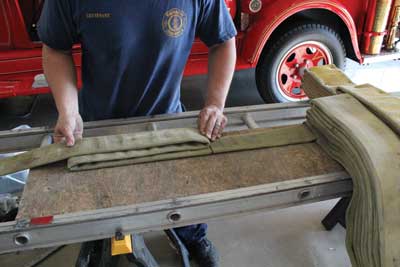
The following is one way to build a cheap hose dummy that allows your company to perform realistic drills for life safety. It weighs from 120 to 180 pounds and articulates at the joints, similar to a real victim. It can be used for training in less-than-favorable conditions like confined space, elevated situations, live fire, and extrication (photo 1).
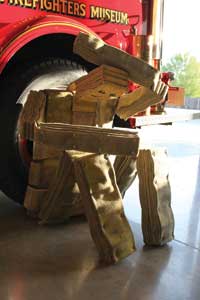 |
| Photos by Isaiah Hittle. |
Supplies and Tips
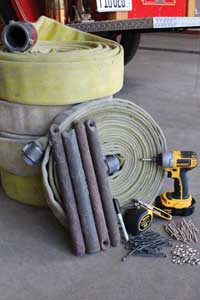
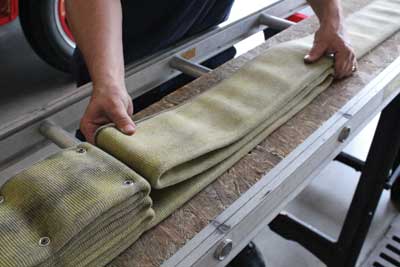
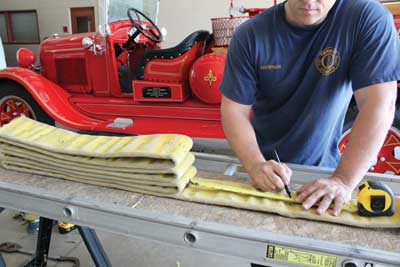
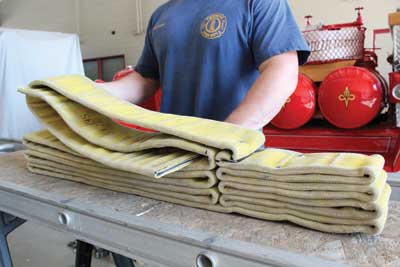
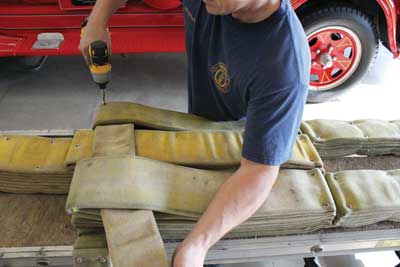
You will need the following supplies (photo 2):
- 4 50-foot lengths of three-inch hose
- 1 50-foot length of 1¾-inch hose
- 2 small boxes of three-inch square tip composite deck screws
- 1 small box of 2½-inch square tip composite deck screws
- 2 boxes of 100 washers
- cutting tool
- tape measure
- indelible marker
- drill
- window weights, steel flat stock, rebar (optional)
If working with rigid hose that makes folding layers difficult, wet it prior to starting the project. Square tip composite deck screws work best.
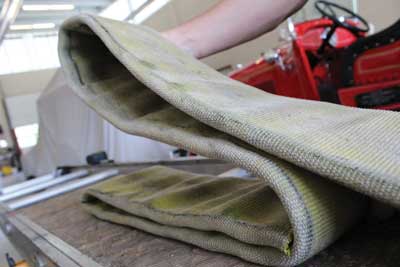
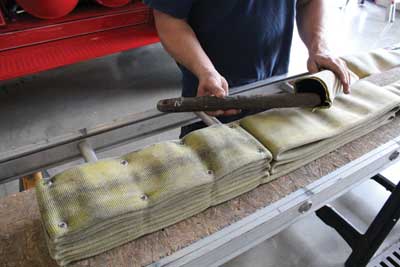
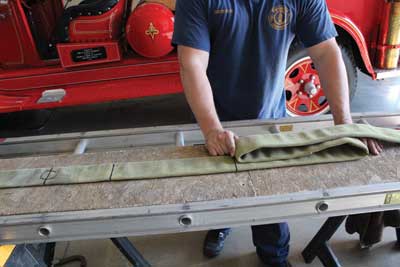
Build the following sections individually and weave them together later. Note that two leg/torso sections are required (photo 3).
hittle_2-1310fe.jpg

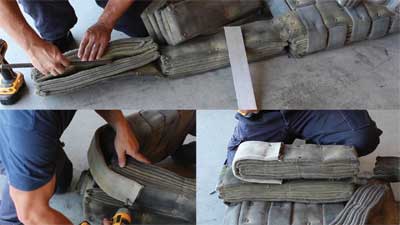
Legs/Torso
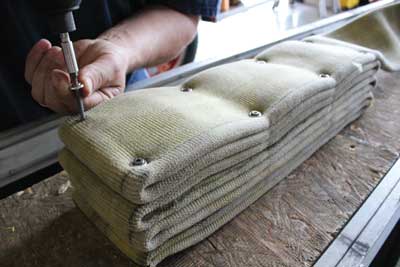
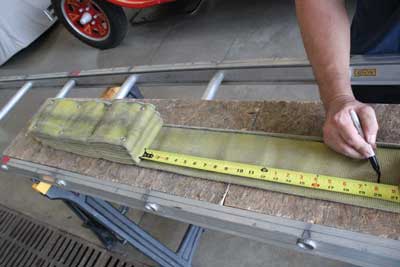
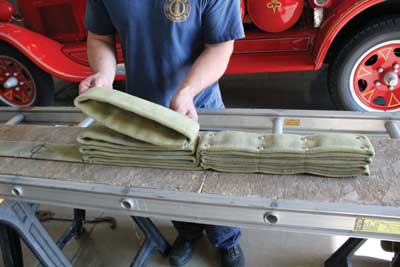
Cut the couplings off a length of three-inch hose. Mark 17 inches from the end. Fold the end back toward the working hose at the 17-inch mark. Then fold the working hose back and forth over the exposed end until eight layers are formed. Tip: Keep the folds as even as possible to ensure the joints perform optimally (photo 4).
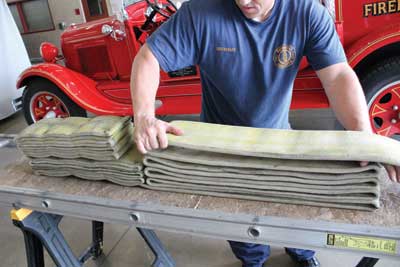
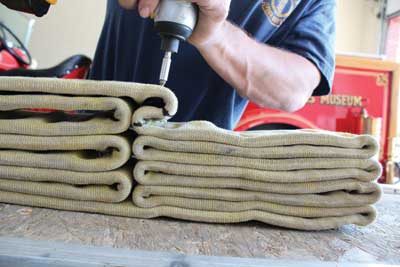
Secure the newly formed bundle with three-inch screws and washers along both edges. Flip the bundle over, and do the same again to create opposing tension (photo 5). Tip: Secure the screws as close as possible to the end of the bundles.
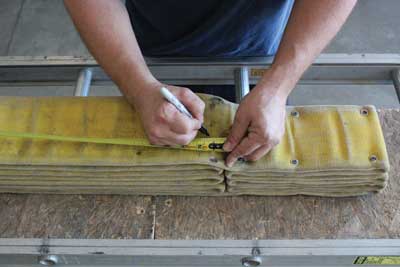
Measuring from the end of the bundle toward the working hose, mark 20 inches (photo 6). At the 20-inch mark, fold the working end of the hose back and forth toward the bundle until you have formed five layers (photo 7). Tip: To optimize directional joint performance, ensure folds are tight and square where the bundles touch.
At this point, we like to insert old window weights taken from our last burn to provide a skeletal frame and increase the overall weight (photo 8). Steel flat stock or rebar also works well to provide rigidity, which can be added now or later as demonstrated at the end of the article.
After inserting the weight into the hose, fold two more layers and secure with opposing three-inch screws and washers.
Measuring from the end of the bundles toward the working hose, mark 26 inches. At the 26-inch mark, fold the working end of the hose back and forth toward the bundles until you have formed nine layers (photo 9). Tip: After the fifth fold is another opportunity to add additional weight.
Mark the top layer at a point equal with the inside of the folds below, and cut it (photo 10). Tuck the hose underneath the layer below to conceal the exposed end. Temporarily secure this bundle where it meets the second bundle with two opposing three-inch screws and washers on each side (photo 11).

HEAD/TORSO
Cut the coupling off a length of three-inch hose and mark 26 inches from the end of the hose. Fold the working hose back and forth at the 26-inch mark until you have formed seven layers. Tip: For additional weight and structure, insert window weight in the fifth layer.
Without placing any screws, flip the bundle over. Measuring from the end of the bundle toward the working hose, mark 11 inches (photo 12). At the 11-inch mark, fold the working end of the hose back and forth toward the completed bundle until you have formed eight layers. Lay the remaining working hose over the long bundle. Secure the small bundle (head section) with three-inch screws and washers on both sides.
From where the bundles meet, measure and mark 1¼ inches toward the longer bundle (photo 13). Apply pressure where the two bundles meet, and fold the working hose toward the small bundle until you have formed two small layers at the 1¼-inch mark. Temporarily secure the short layers with a single three-inch screw and washer (photo 14).
With the working hose still lying over the long bundle, fold an additional layer back toward the small bundle. Mark this final layer at a point equal with the inside of the folds on the longer bundle below and cut it (photo 15).
Tuck the hose underneath the layer below to conceal both exposed ends. Temporarily secure the long bundle, remote from the small bundle, on each side with two opposing three-inch screws and washers (photo 16).
ARMS
Mark the center of a length of 1¾-inch hose and cut the couplings off. From the center, mark 7½ inches, 21½ inches, and 37½ inches on one side only. From the 37½- to the 21½-inch mark, fold the working hose on that half of the length back and forth until you have formed eight layers. Secure the bundle on both sides with 2½-inch screws and washers (photo 17).
With the working hose, make two 90-degree bends to start the next bundle between the 21½- and 7½-inch marks. Fold the hose back and forth until you have formed nine layers. Mark the top layer at a point equal with the inside of the folds below, cut it, tuck the hose underneath the layer below to conceal the exposed end, and secure the bundle with 2½-inch screws and washers on both sides (photo 18). Remember to keep the joints as tight as possible for optimal results.
Place the two leg sections and the torso section together, face up, making sure the leg sections bend appropriately. Then flip the arm section over and feed the working hose through all three sections, going through the topmost folds. Pull the arm section tight to the torso and leg sections, and secure the four together with three-inch screws and washers (photo 19).

Flip the assembly over. Measuring from the main body toward the working hose, mark 14 inches and 30 inches.
From the 30- to the 14-inch mark, fold the working hose back and forth until you have formed eight layers. Secure the bundle on both sides with 2½-inch screws and washers (photo 20).
With the working hose, make two 90-degree bends to start the next bundle between the 14-inch mark and the main body. Fold the hose back and forth until you have formed nine layers. Mark the top layer at a point equal with the inside of the folds below. Cut it, tuck the hose underneath the layer below to conceal the exposed end, and secure the bundle with 2½-inch screws and washers on both sides (photo 21).

FINISHING
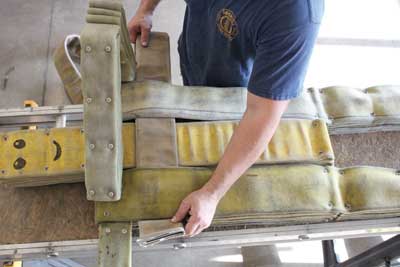
Place the dummy face down. From one of the shoulder blades, weave three-inch hose through and over the topmost folds, slightly angling toward the armpit on the opposite side. Secure this initial back strap with three-inch screws and washers (photo 22). Reposition the dummy so it is face up, and continue weaving the three-inch hose around the torso sections. Tip: Pivoting the dummy at the hips will speed up the weaving process (photo 23).
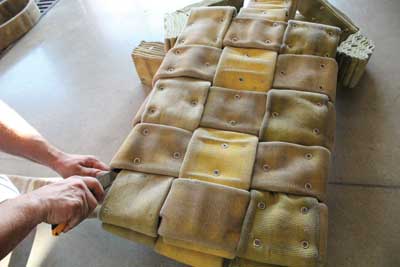
Cut the excess hose off. Look for areas that require additional fasteners to ensure the joints bend as intended (photo 24).
Additional Considerations
Some individual bundles within the dummy may not bend as desired. Correct this by adding additional opposing screws, flat stock, or rebar.
Some joints also may not bend as desired. Members of the Denver (CO) Fire Department added hamstrings to the hips to control this. This works great if you intend to outfit the dummy in personal protective equipment, eliminating the potential of its becoming snagged.
Routine maintenance may require that you use hose boots where friction erodes the bundles and replace screws (photo 25).
● SAMUEL HITTLE is a lieutenant in the Wichita (KS) Fire Department. He has an associate degree in fire science, is an FDIC and Wichita H.O.T. instructor, is an FDIC classroom instructor, and is a contributing author to Fire Engineering and Urban Firefighter.
More Fire Engineering Issue Articles
Fire Engineering Archives

