Within the discipline of forcible entry, through-the-lock techniques are frequently overshadowed by other, more conventional methods. As a result, training on through-the-lock techniques is often forgotten. Is this because these techniques are thought to be more skilled and technical methods of gaining entry into structures? Or could it be because it’s not as sexy when compared with more conventional methods? Let’s face it: We are all “creatures of our craft” and love to force a door when the opportunity pre-sents itself. But, at the same time, we need to be well-trained in all methods of forcible entry and know when it’s appropriate to implement each of the various techniques.
Through-the-lock forcible entry may be appropriate for those “investigation calls” – calls at which it is essential to enter a structure and verify there aren’t any emergencies but your knowledge and experience tell you that you could take a few extra seconds and perform a less destructive form of entry.
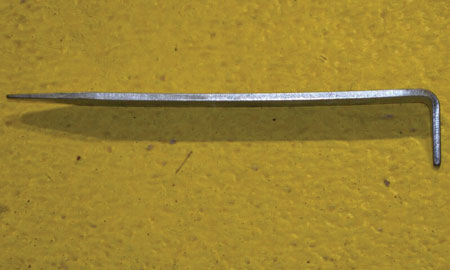 |
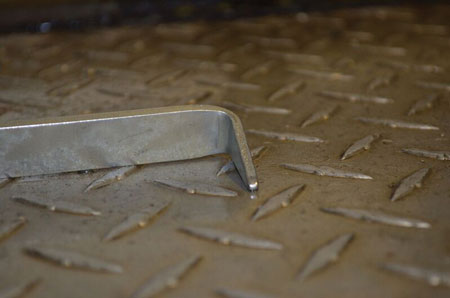
| (1) A standard key tool has two ends, the 90° bend cam end and the flat end. (Photos by author.) |
Some examples of investigation calls where through-the-lock forcible entry may be appropriate include the following:
- An alarm that’s sounding with nothing visible from the exterior.
- Dispatch is stating the alarm company called back and reported an accidental activation.
- A recurring activation of an alarm throughout your tour.
- A broken water pipe, water flowing out of a structure and no fire is apparent.
With this said, we must always fall back on our department’s standard operating procedures (SOPs) and size up the building for the least destructive way to enter it (open window on an upper floor, for example). Our department’s rules may determine when and when not to perform through-the-lock forcible entry techniques.
Size Up the Cylinder
When performing through-the-lock techniques, many times members do a fantastic job of successfully pulling the cylinder only to find they are unsure of what to do after the cylinder is removed. Without knowing which key tool to select, what end of the key tool (photo 1) to use, and how to successfully manipulate the locking mechanism after pulling the cylinder, all efforts, unfortunately, would be in vain.
 |
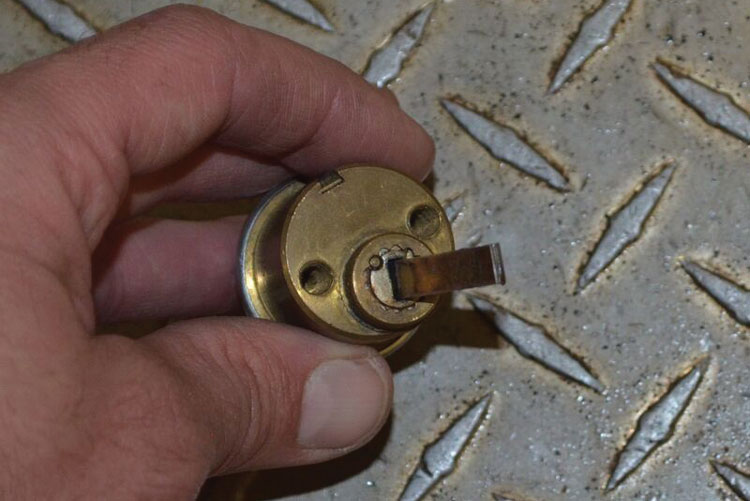
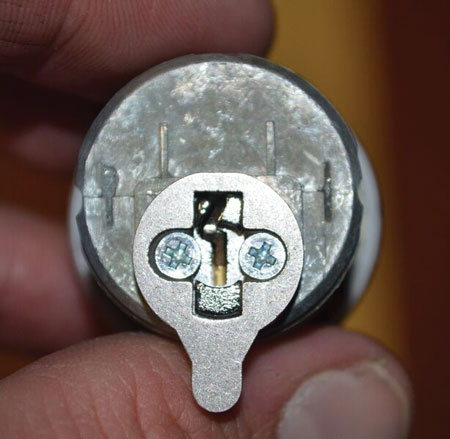
| (2) Looking at the back of the cylinder, we see that the cam is the operating mechanism. |
You can avoid this situation by “sizing up the cylinder.” Take a few extra seconds to size up the back of the cylinder to gain insight into the type of entry you are facing. This approach is not new; it has been taught as a fundamental skill within the American fire service for many years. Some members have dedicated their lives to the advancement of forcible entry and over time have developed a variety of invaluable tools and techniques.
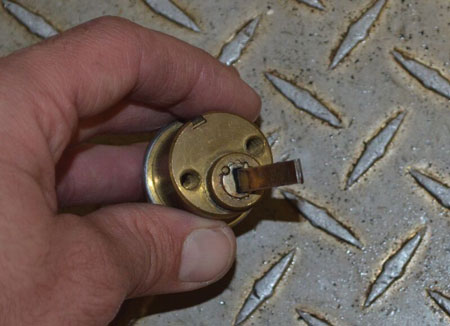
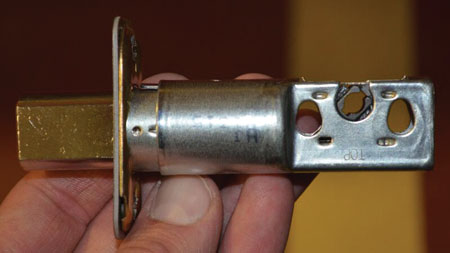
After pulling the cylinder, pick it up and look at the back. Be careful; jagged metal or burrs on the cylinder could cut you if you’re not wearing gloves. Not all manufacturers design and engineer their locks in exactly the same way, but most locks have either a cam (photo 2) or a stem (known as a tail) (photo 3) on the back of the cylinder.
Cam
If the cylinder has a cam, use the end of the key tool that has the 90° bend, also known as “the cam end.” Cylinders that use cams are commonly found on mortise locks. These locks will be encountered on every “Main Street” in all towns and cities. Your objective is to recreate the action of the cam under the lock’s normal operation.
 |
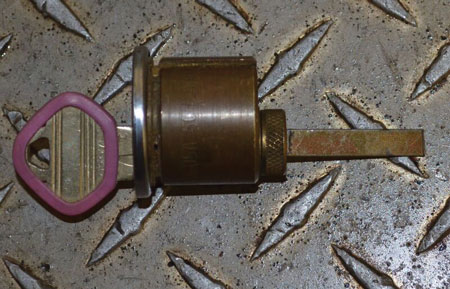
| (3) This cylinder has a stem (tailpiece). |
Every action we perform in the fire service necessitates some degree of size-up. Whether pulling up to a working structure fire or backing the apparatus into the station, size-up is a must. The same holds true with forcible entry. In addition to checking the back of the cylinder during the size-up, also check the type of door; visibility of hinges; wall type (wood, metal, concrete); type and number of locks; position of locks; location of locks; or if a security shroud/collar or carriage bolt heads are present.
Positioning of the Keyway
In addition, identify the positioning of the keyway. Usually, cylinders are installed with the keyway set at the traditional “six o’clock” position. Business owners, in an attempt to thwart burglaries or out of personal preference, may intentionally set the cylinder in different orientations. If the keyway is set in the traditional six o’clock position, place the 90° end of your key tool into the detent, which has a spring-loaded pin on the lower portion of the mechanism. Most times, you will have to move your key tool from the five o’clock position to the seven o’clock position or vice versa (seven o’clock to five o’clock) to unlock and lock the door. If the keyway is not in the six o’clock position but is set vertically or horizontally, fall back on your fundamental understanding of the distance the key tool must travel from the five o’clock to the seven o’clock positions, and adjust the key tool movements accordingly. It takes discipline to take the time during your size-up to identify the setting of the keyway before pulling the cylinder, but it will facilitate success.
Stem
If the cylinder’s back has a stem or a tail instead of a cam, use the opposite end of your key tool, the flat end. Cylinders that use stems are commonly found on rim locks. The stem, like the cam, is the part of the assembly that operates the locking mechanism. Insert the flat end of the tool through the cylinder hole, into the slot, and rotate in a clockwise/counterclockwise motion. Again, your objective is to recreate the action of the stem under the lock’s normal operation.
 |
| (4) A view of the cam when the keyway has been turned and the cam has been moved to the downward position. |
Rim locks tend to be the easiest to overcome in through-the-lock forcible entry unless, of course, a tamper-resistant device is built into the lock.
Tamper-Resistant Device
Over the years, criminals have developed their own sets of skills for getting in through the lock. In response, rim lock manufacturers began designing and installing something called a “shutter guard,” also referred to as a “steel curtain” or a “guillotine shutter.” Such a device is built into many newer style rim locks to prevent break-ins. The guard is a piece of thin metal loaded with a shutter spring. It sits parallel to the opening where the stem enters the lock. Once the cylinder is removed and the stem is pulled out, the shutter spring is released, setting the shutter guard in the closed position, cutting off access to perform through-the-lock forcible entry.
 |
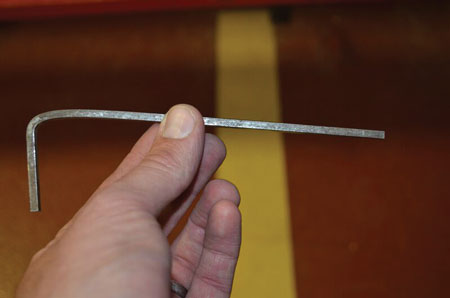
| (5) The end of the standard key tool with the 90° bend, otherwise known as the “cam end.” |
Once the shutter guard is actuated, it is possible to slide the shutter guard back into the open position. This can sometimes be accomplished by using a flathead screwdriver that has been filed down, a pick, or other longer narrower metal tools that have been fabricated for this operation.
Sliding back the shutter guard can be difficult because of the other jimmyproof mechanisms that may be engineered within the shutter guard assembly. These mechanisms are designed to prevent the guard’s movement once the shutter guard has been actuated and set in place. These mechanisms include a locking pin and a pressure switch. Both make the shutter guard more fortified and reinforce its purpose.
 |
| (6) As the keyway turns, the tailpiece rotates, enabling the locking mechanism to operate. |
If a shutter guard is present and you are unsuccessful in sliding it back, you don’t have to abandon your through-the-lock entry. Rim locks are set onto the face of the door with screws. At this point, insert the pike of your halligan or other suitable tool and drive the lock body and screws off the door. With the proper technique, there should be minimal damage to the door.
Basic K-Tool Assembly
Your basic K-tool assembly (photo 7) usually comes with a K-tool, a standard key tool, a shove knife, a leather pouch, and a second key tool whose purpose often is unknown to firefighters. The second key tool is often referred to as the “square key” or the “box key.” This key tool is a 5⁄32-inch square stock key (photo 8). During your size-up, if you find a cylinder that is flush with the door near the center of the door and pull the cylinder to find a stem that is square as opposed to flat, you may very well be dealing with a fox lock. The fox lock also falls within the family of rim locks. Most likely, a metal plate secured to the door with carriage bolts will be found covering the cylinder. You will have to remove the plate prior to pulling the cylinder. This can be done by shearing off the bold heads and removing the plate completely or by shearing three of the bolts and using the last bolt as the hinge to slide the plate off the keyway.
Fox Lock and Square Stem
The fox lock, otherwise known as the double bar lock or a horizontal double brace, has two steel bars that cross the width of the door and are set into keepers mounted into the door frame. Once you have sized up the cylinder and find a square stem, use the 5⁄32-inch square stock key tool to facilitate manipulating the lock.
 |
| (7) A look at a standard K-tool assembly: K-tool, 5⁄32-inch square box key, standard key tool, leather pouch, and shove knife. |
Working in a more suburban type environment predominantly comprised of wood-frame, single-family dwellings, I have been confronted with fox locks on only a handful of occasions. However, if you work in a more urban/inner-city environment, you may encounter these types of locks on a somewhat regular basis.
Knob Locks and Tubular Dead Bolts
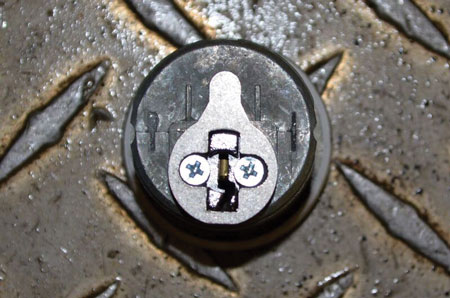
There are also knob locks and tubular dead bolts. Once you have removed the knob or the face of a key in the knob lock or the cylinder of a tubular dead bolt, visually inspect inside the cylinder hole. You will find a backset adjustment (photo 9). The slots in backset adjustments are of different sizes and shapes; they may be straight, square, or crossed, to name a few possibilities.
 |
| (8) Many members do not know how to use the 5⁄32-inch square stock key. |
To manipulate the lock, you may have to maneuver your key tool in different directions in accordance with the shape. You may have to slide your key tool left to right/back and forth or rotate it in a clockwise/counterclockwise motion. Most of the time, you will be using the flat end of your standard key tool. It may not sound as straightforward as when working on a mortise lock with a cam or the stem of a rim lock. If you don’t manipulate the lock on your first shot, don’t get frustrated. Slow down, take a deep breath, and look at the inner mechanics of the locking mechanism.
The next time a group of firefighters is standing behind you wondering if you are skilled enough to successfully perform a through-the-lock entry, take a few extra seconds and size up the cylinder. I’m confident you will gain entry into the structure in a timely, more professional manner.
 |
| (9) A view of a backset adjustment. They come in many sizes and orientations; therefore, we must learn how to manipulate the mechanism. |
Adam J. Hansen is a lieutenant assigned to Engine 7 in the Milford (CT) Fire Department, where he has worked since 2006. He began his career as a volunteer in Branford, Connecticut, in 1999. Hansen has a BS degree in fire science (fire administration) and a minor in criminal justice from the University of New Haven. He is a nationally registered paramedic and is state-certified in fire service instructor 1, fire officer 1, incident safety officer, pump operator, and aerial operator and in rescue operations: trench.
Construction Concerns: Residential Door Locks
Key in Knob Through-the-Lock
DRILLING LOCK CYLINDERS
The Vertical Deadbolt Lock
Fire Engineering Archives

